Deliver work

Artwork approvals

In ZigaflowMomentum plan

The short answer

To get artwork approved, open the job or order, click Create eForm, choose the Artwork Approval pre-build, upload your artwork, ideally as a PDF, and email it to the customer with Email Artwork Approval. The customer approves or rejects on a page that needs no login.

Steps

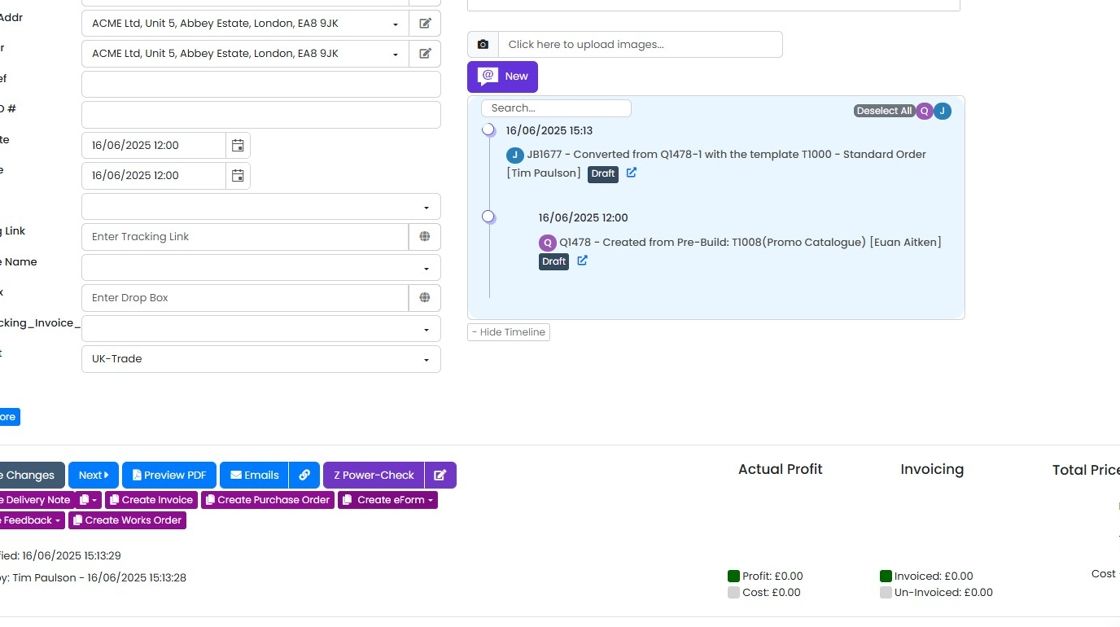
  1. Go to the Job/Order

    Job/Order screen showing address fields, activity timeline, and action buttons like Create Invoice and Create Purchase Order
  2. Click "Create eForm"

    Job details screen with the Create eForm dropdown button highlighted among the purple action buttons below Save Changes
  3. Click "Artwork Approval" - this is a pre-build that is provided in every installation
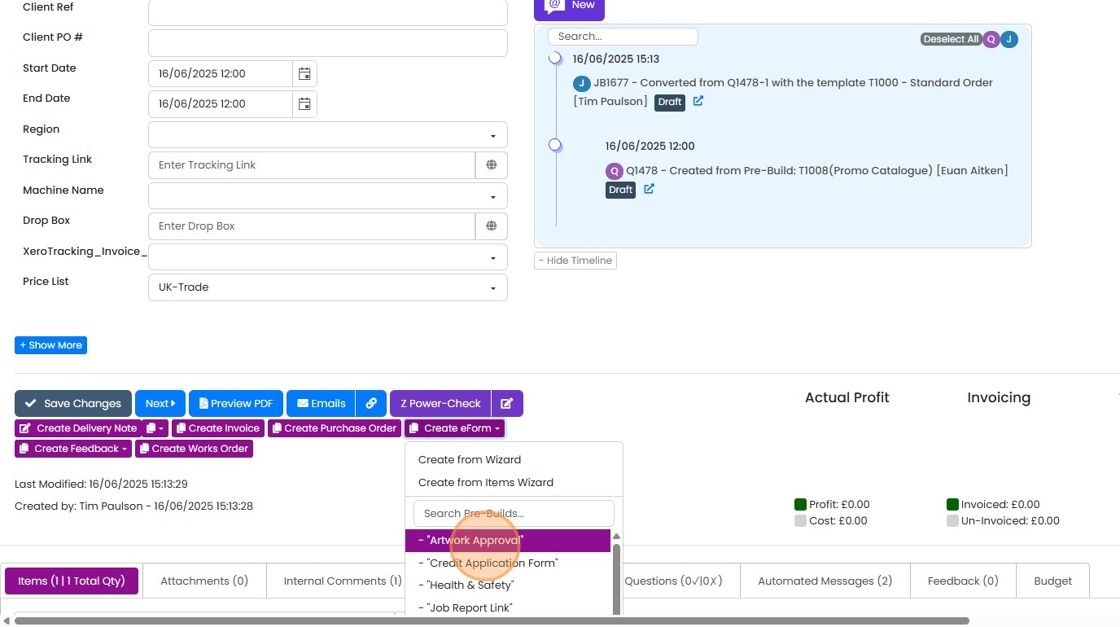
    Job screen Create eForm dropdown open, with the
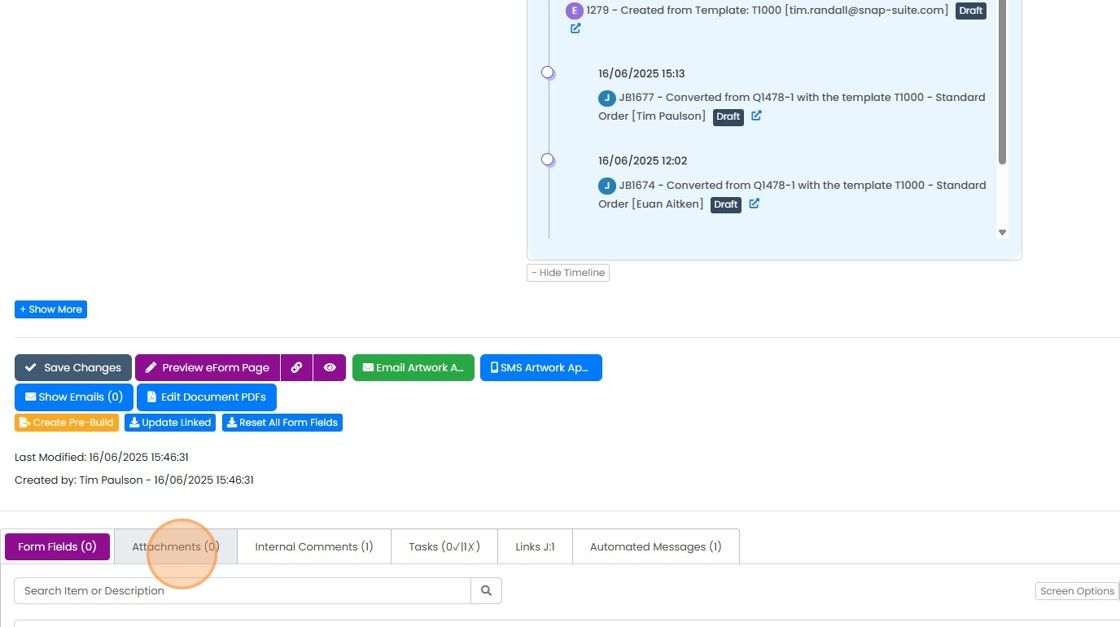
  4. Click "Attachments (0)"

    Artwork approval eForm record with the Attachments (0) tab highlighted in the tab row below the action buttons
  5. Click "Select files..." and upload your artwork, ideally in a PDF

    Email the artwork to the customer
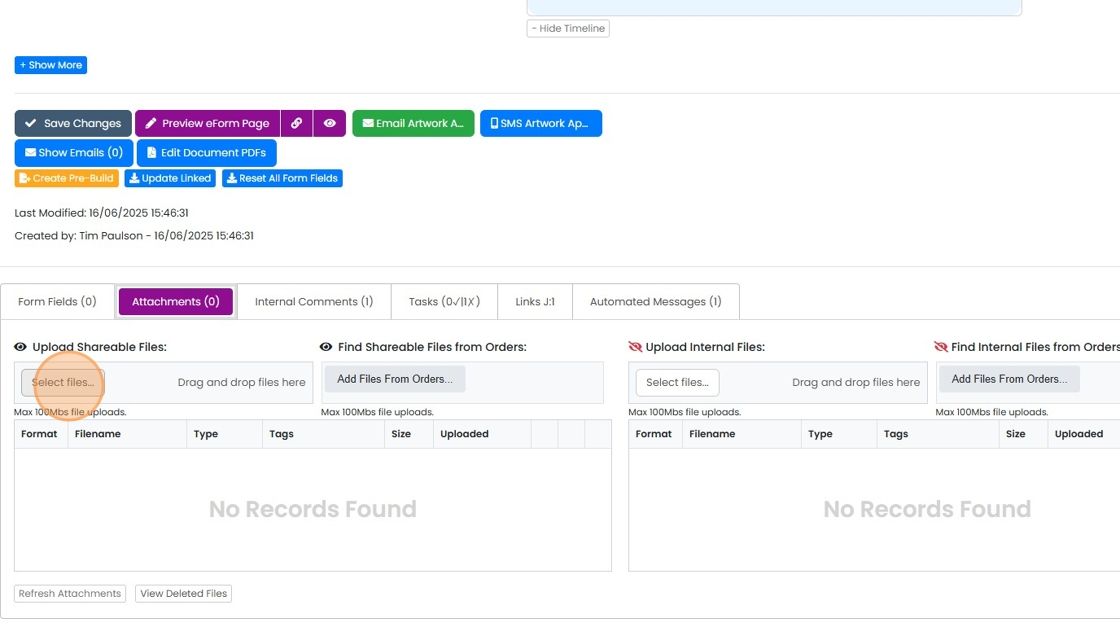
    Attachments tab with the Select files... button highlighted under Upload Shareable Files for uploading artwork
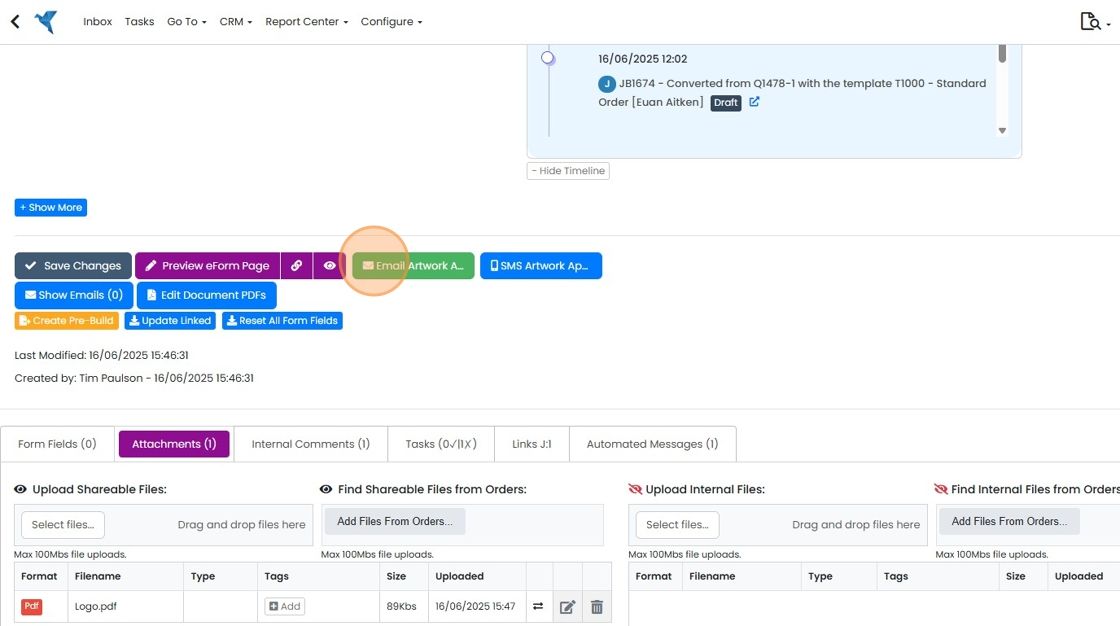
  6. Click "Email Artwork Approval"

    Job page action buttons with the green
  7. Email it to the customer. This moves the status of the eForm to 'Sent' which sets up the chaser emails

    Edit the chaser email

    Artwork approval email panel with the Attachments to Send section highlighted near Logo.pdf, above the Send Email button
  8. Click "Automated Messages (1)" to see and edit the chaser email to the customer

    Click "Automated Messages (1)" to see and edit the chaser email to the customer. If you regularly want to use a different message than this, edit the automated message in the pre-build eForms ->Artwork Approval.
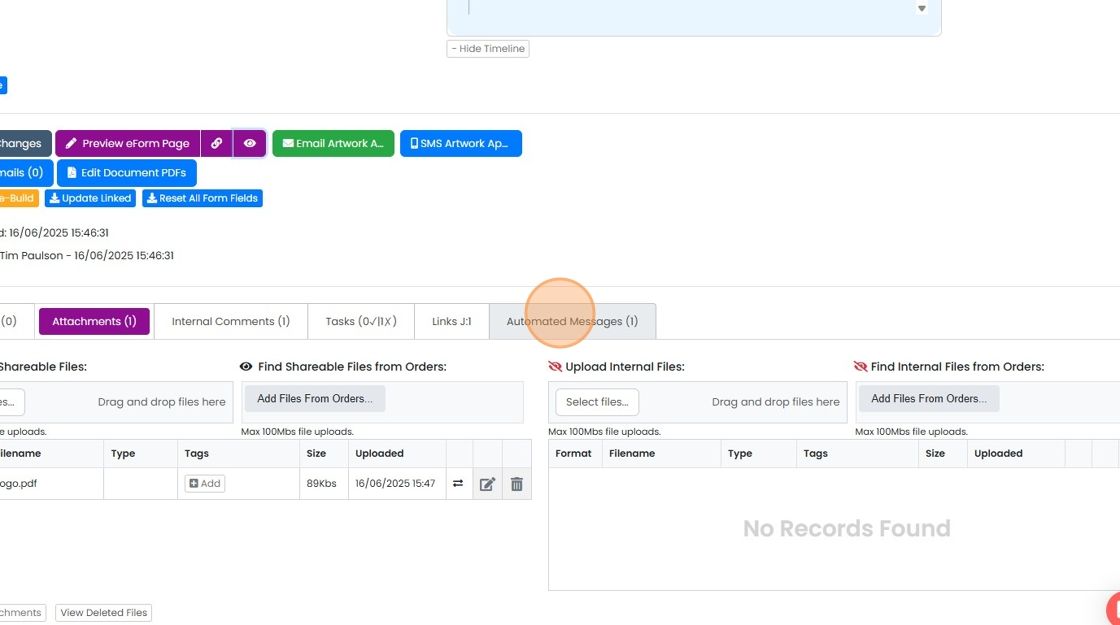
    Record tabs with the Automated Messages (1) tab highlighted, beside Attachments, Internal Comments, Tasks and Links
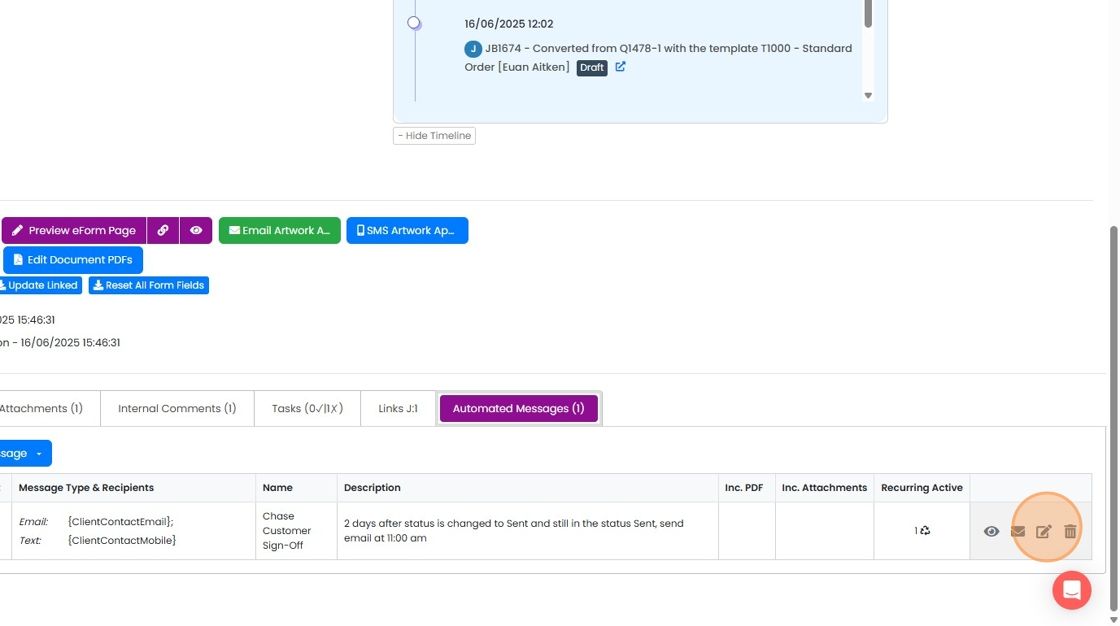
  9. Click to edit

    Automated Messages tab listing the Chase Customer Sign-Off message, with the edit icon in its row highlighted
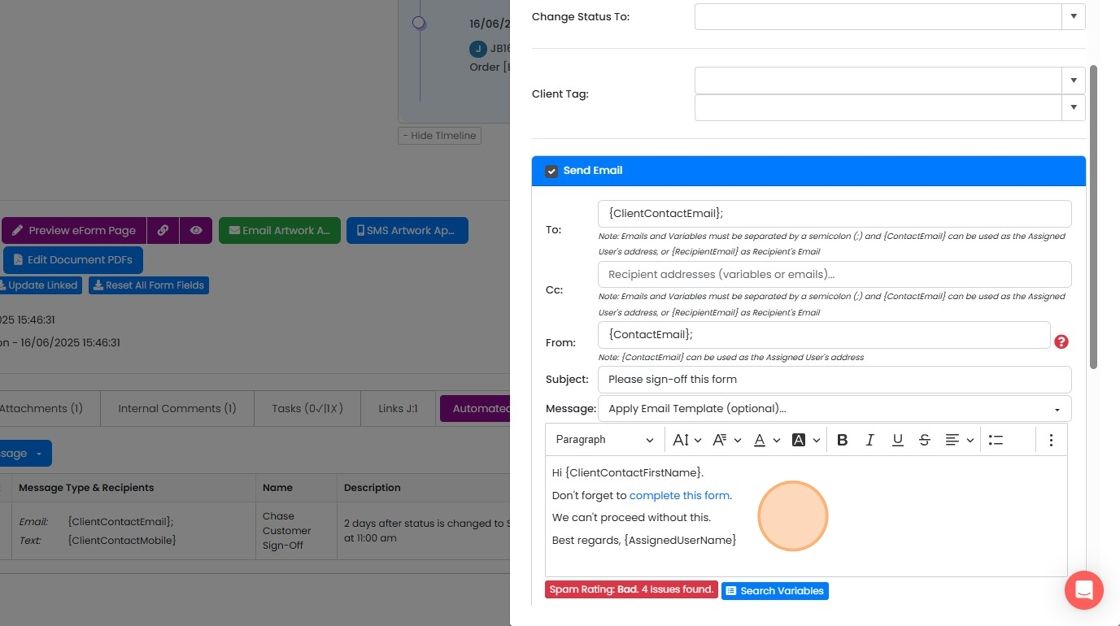
  10. Edit the text as required

    Send Email panel with the Message editor highlighted, showing body text asking the client to complete the form
  11. Click here to preview what the customer will see

    How the customer responds
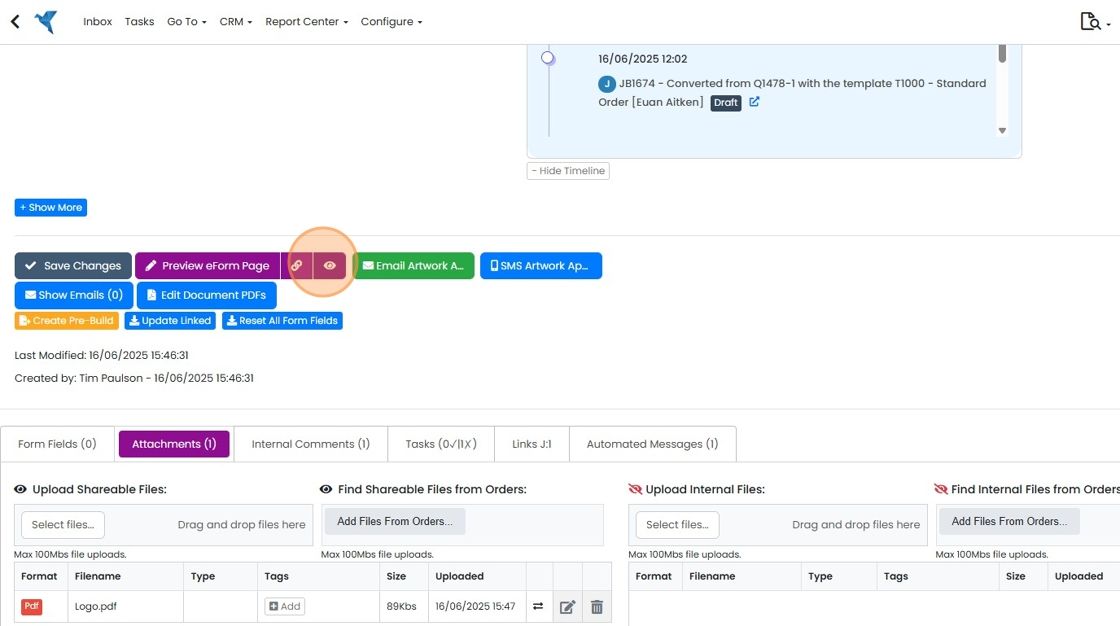
    Job record action buttons with the eye icon next to Preview eForm Page highlighted to preview the customer's artwork view
  12. The customer page can be accessed with the URL sent and does not require a login for the customer

    The customer page can be accessed with the URL sent and does not require a login for the customer. The top of the page shows the instructions on the edit form
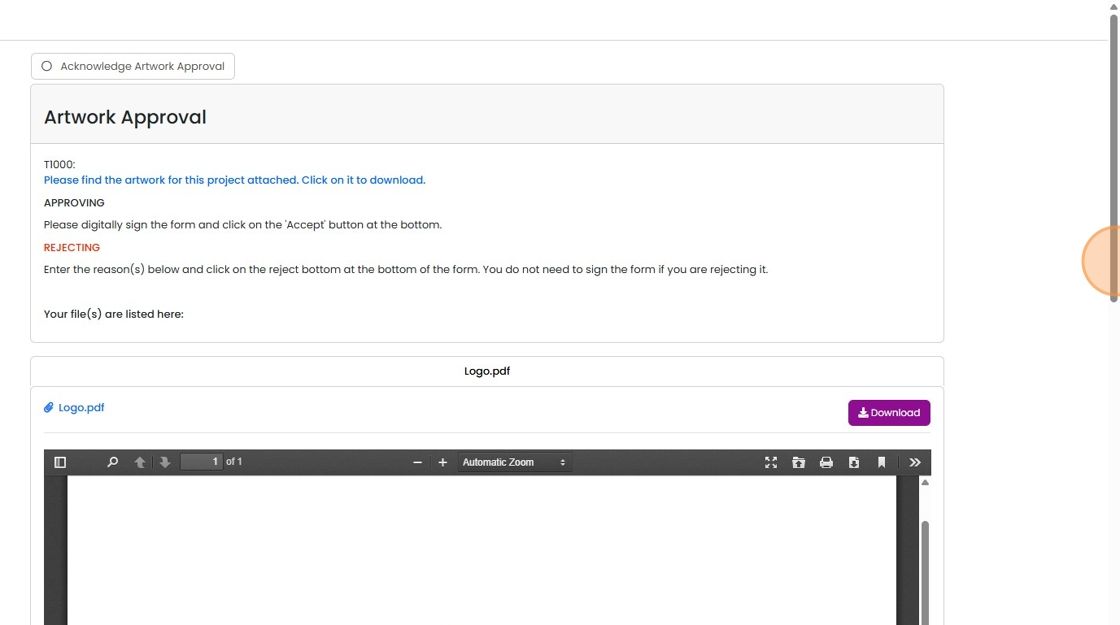
    Artwork Approval customer page showing approve and reject instructions, attached Logo.pdf preview and Download button
  13. And the artwork PDF

    Artwork PDF preview showing a pink, orange and purple lotus flower logo, with the cursor highlighted on the right petal
  14. Rejection: The customer can enter rejection reasons in the 'Details' section, enter their name, and then...

    Rejection: The customer can enter rejection reasons in the 'Details' section, enter their name, and then click the 'Reject' button. They do not need to click on the 'I approve...' tick box.

    Approval: The customer needs to put in their name

    Artwork approval form Signature section with the First Name field highlighted, above Last Name and the approval checkbox
  15. Tick on the 'I Approve...' box (not required for rejections)

    Signature section of artwork approval form with the
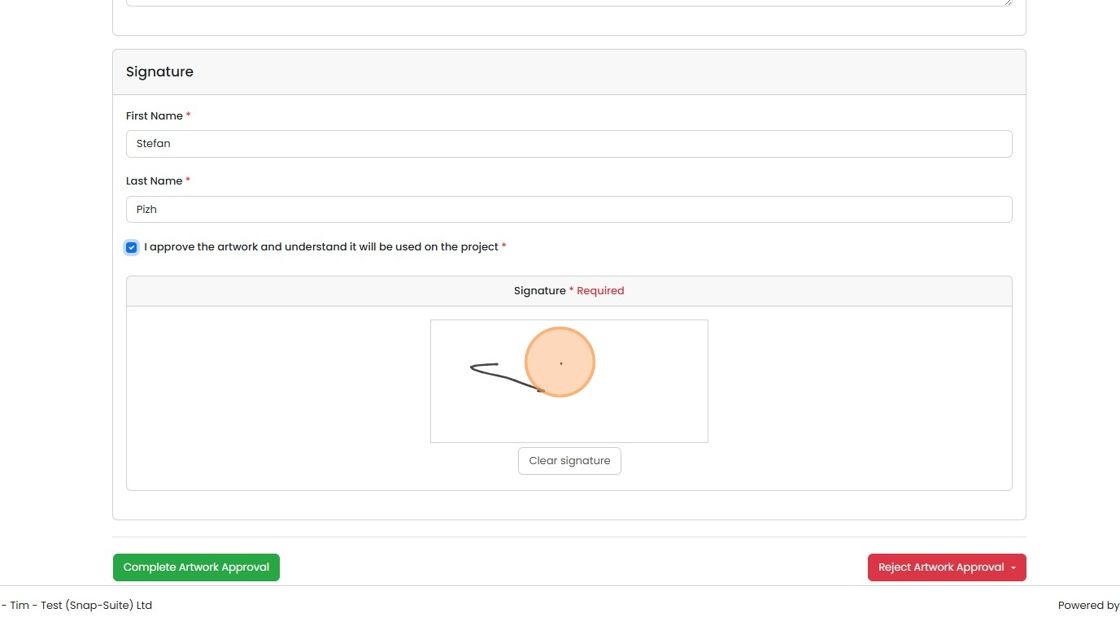
  16. Digitally sign

    Artwork approval Signature section with name fields, approval checkbox ticked and a signature being drawn in the Signature box
  17. Click "Complete Artwork Approval"

    Click "Complete Artwork Approval". This will move the eForm to 'Approved/Signed' and optionally send a mention to a team member

    Learn more: eForms in Zigaflow
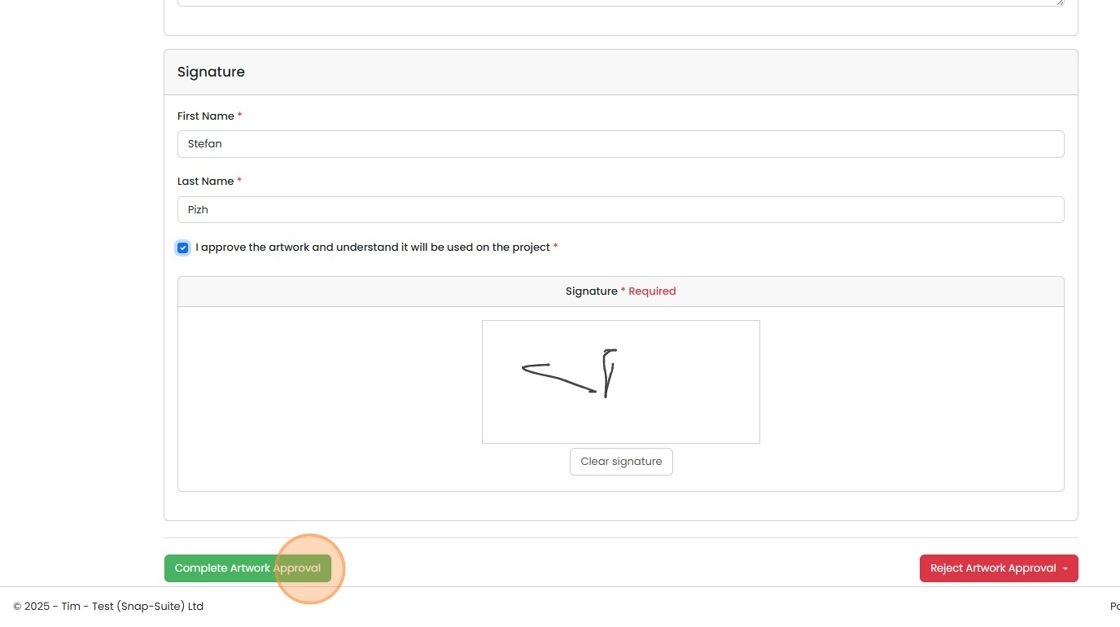
    Artwork approval Signature section with name, approval checkbox and signature filled, highlighting Complete Artwork Approval button

Create the artwork approval eForm

Frequently asked questions

Next step

Creating an automated message to chase a customer's sign-offMomentum planIn Zigaflow, go to Prebuilds, then eForms, edit a pre-build and open Automated Messages. Create a new blank message, set the days, the "Sent" trigger status and send time, and tick Recurs. Add the email and optional SMS text with {ReviewLink}. Sending stops once the eForm is approved or rejected.

Was this helpful?

See Zigaflow on your own workflow

Book a demo and we will walk through quoting, jobs and purchasing the way your team runs them.

Or see how Zigaflow would fit your business, free