Deliver work

Setting up RFQs

In ZigaflowMomentum plan

The short answer

Set up RFQs in Zigaflow by showing the "Received" and "Declined" statuses in the RFQ workflow, editing the RFQ email template so it links to the supplier's online page with {ReviewLink}, and creating an RFQ pre-build. Add an automated message to chase the supplier for a price until the RFQ status changes.

Steps

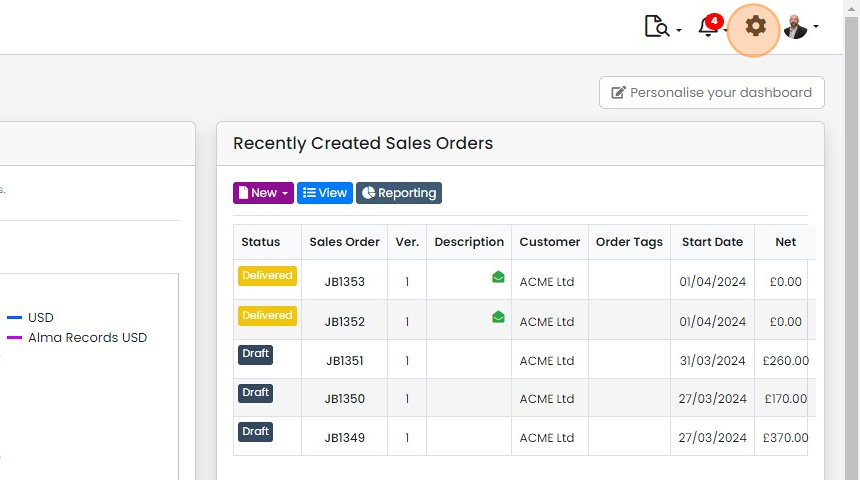
  1. Click here

    Zigaflow dashboard with the gear (Settings) icon highlighted in the top-right toolbar, next to notifications and profile icons
  2. Click "Workflows"

    Settings menu list with Workflows highlighted at the bottom, below Team Settings and Task Types
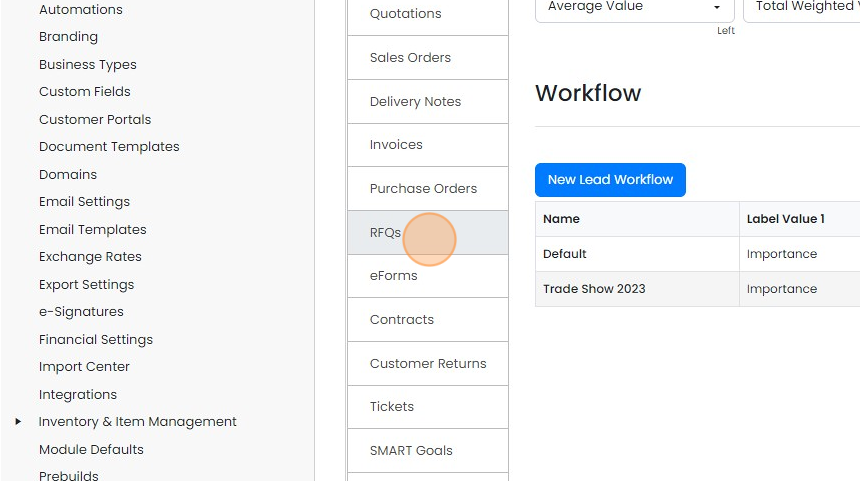
  3. Click "RFQs"

    Settings module list with the RFQs tab highlighted, beside the Workflow panel showing the New Lead Workflow button
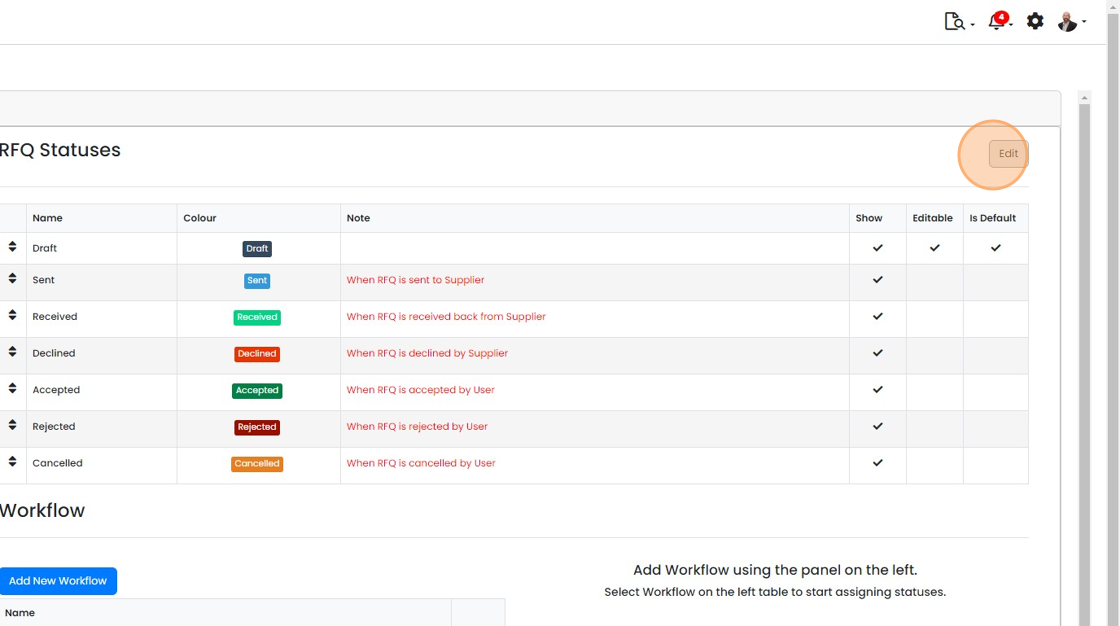
  4. Click "Edit"

    RFQ Statuses table listing Draft, Sent, Received, Declined, Accepted, Rejected and Cancelled, with the Edit button highlighted
  5. Make sure "Received" and "Declined" are shown

    RFQ Statuses page with the Received and Declined status rows and their Name fields highlighted
  6. Click "Save Changes"

    Edit the RFQ email template
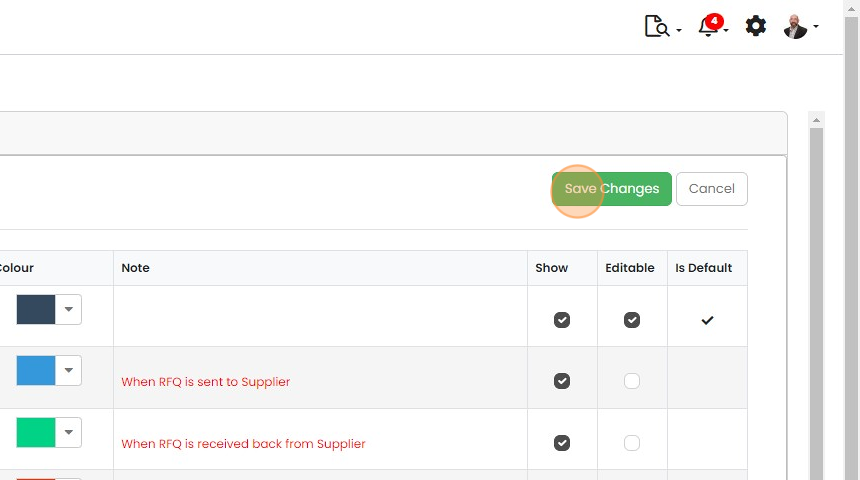
    Status settings table with Colour, Note, Show, Editable and Is Default columns, with the Save Changes button highlighted
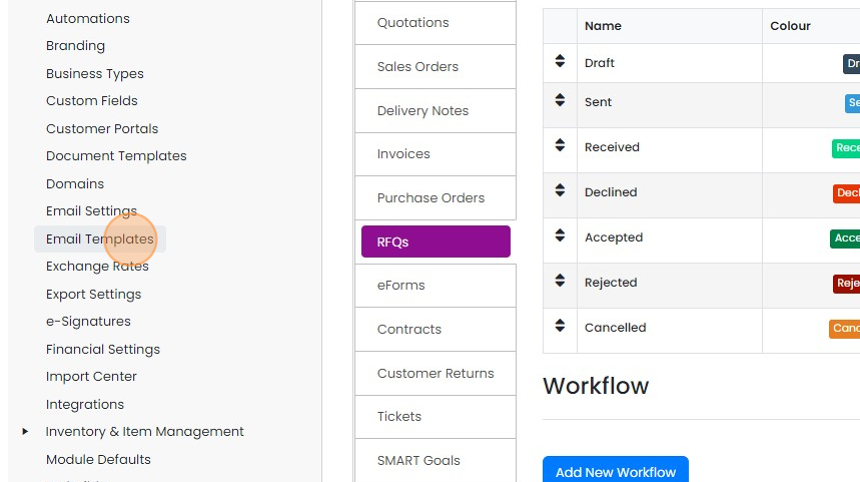
  7. Click "Email Templates"

    Settings menu with Email Templates highlighted, beside the RFQs statuses list showing Draft, Sent, Received and Cancelled
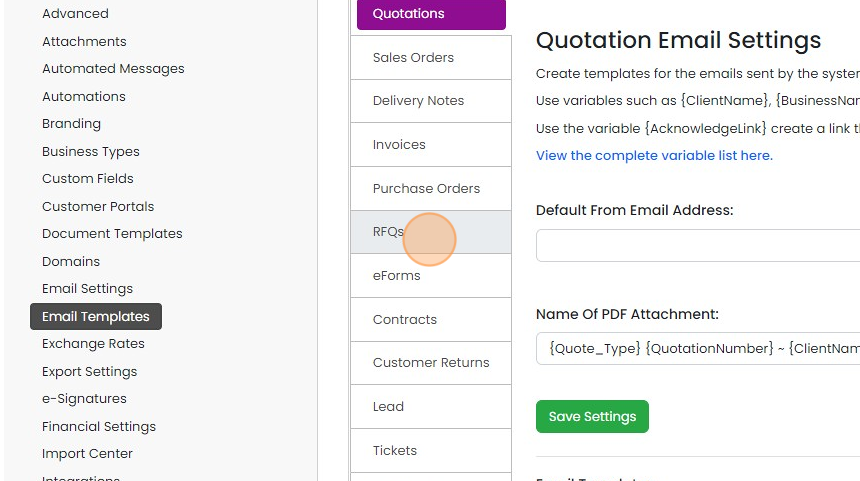
  8. Click "RFQs"

    Email Templates settings with the RFQs tab highlighted in the document type list, next to Quotation Email Settings
  9. Edit the default template or create another
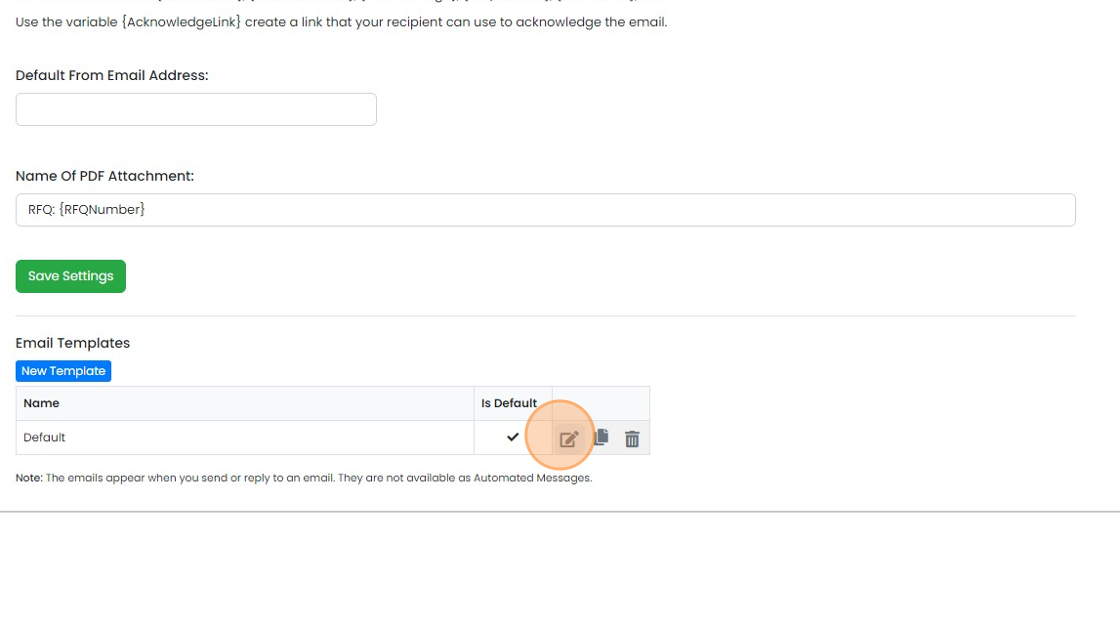
    RFQ email settings with the Email Templates table, highlighting the edit icon on the Default template row
  10. Click "-Send price and lead times, or decline."

    RFQ email template Email Body editor with the line
  11. Click "online here."

    RFQs email template editor with the
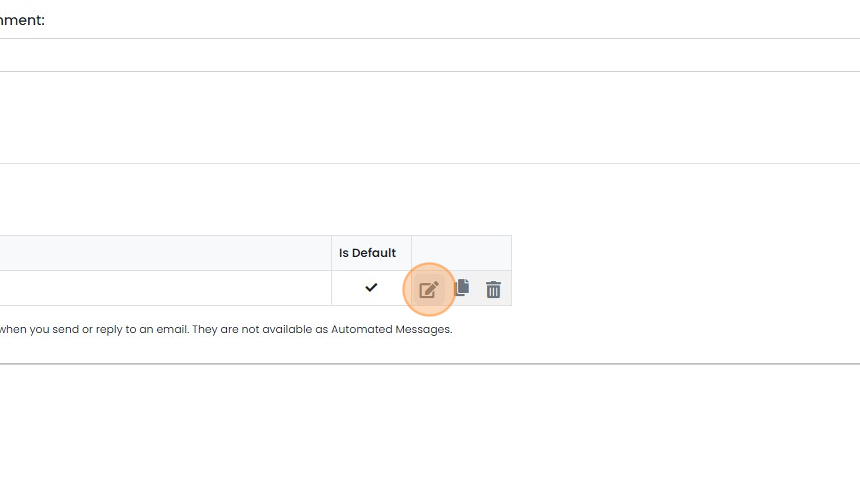
  12. Click here

    Edit icon highlighted beside the Is Default checkmark in an email template list row, next to the copy and delete icons
  13. Make sure the hyperlink to the supplier's page is present, and if not, add it

    Edit Email Template for RFQs with
  14. Type in {ReviewLink} and then click on the tick
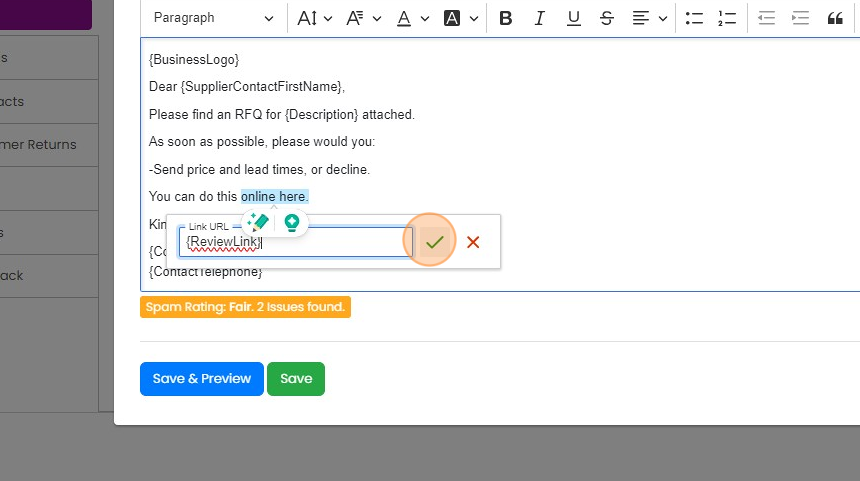
    RFQ email template editor with {ReviewLink} entered in the Link URL field and the green tick button highlighted to confirm
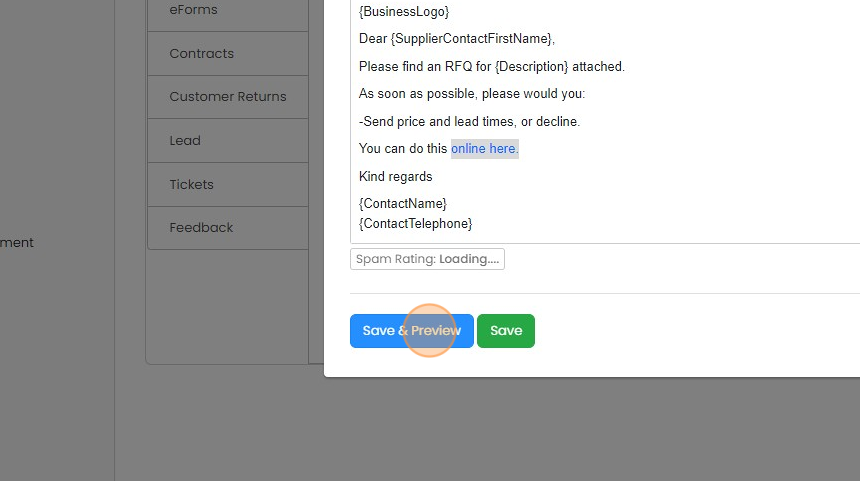
  15. Click "Save & Preview"

    RFQ email template editor with supplier merge fields, highlighting the Save & Preview button next to Save
  16. Click "Close"

    RFQ email preview showing Subject and Email Body fields, with the Close button highlighted at the bottom of the window
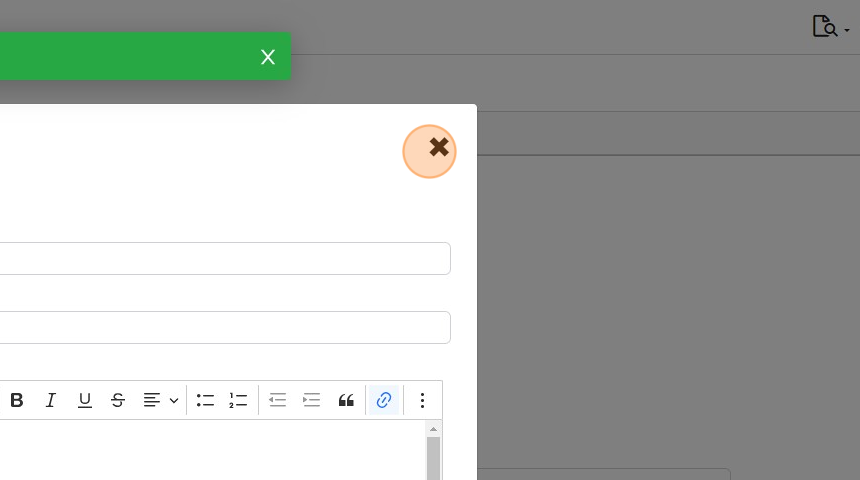
  17. Click "×"

    Create an RFQ pre-build

    Email dialog with text fields and formatting toolbar, close (×) button highlighted in top-right corner to dismiss
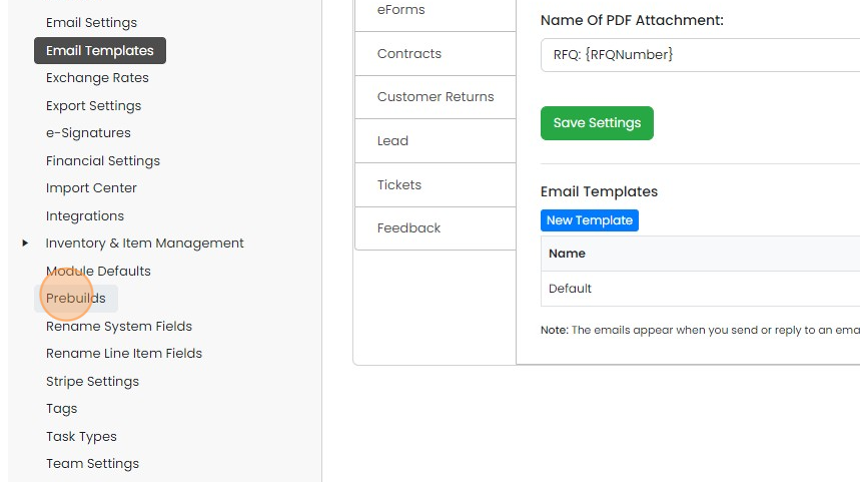
  18. Click "Prebuilds"

    Settings menu with Prebuilds highlighted in the left sidebar, below Module Defaults, while Email Templates is open
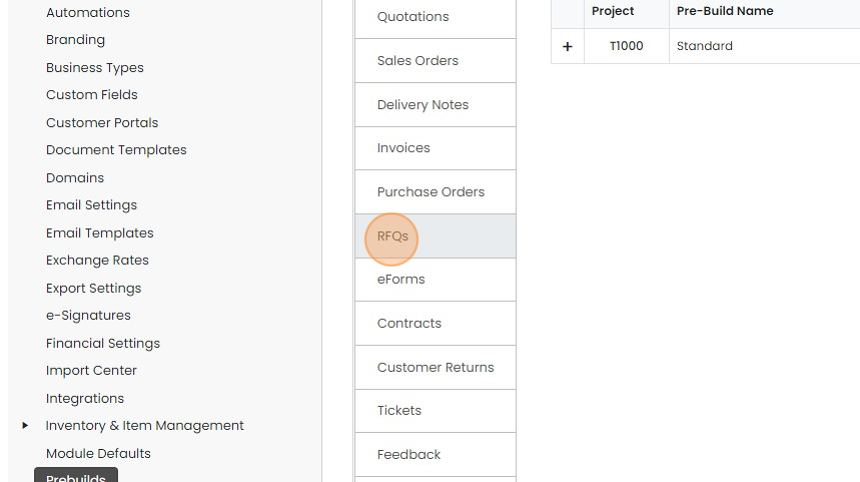
  19. Click "RFQs"

    Prebuilds settings with document type list, RFQs tab highlighted below Purchase Orders, next to Project and Pre-Build Name table
  20. Click "New Pre-Build" or edit an existing one

    Pre-Builds screen with the RFQ tab selected and the New Pre-Build button highlighted above the list of existing pre-builds
  21. Enter the name here if it is a new pre-build

    Add an automated chaser message
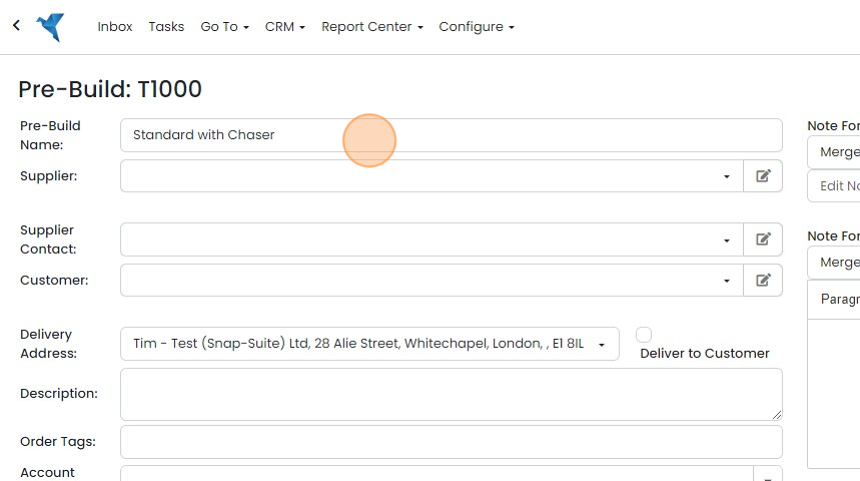
    Pre-Build T1000 form with the Pre-Build Name field highlighted, showing
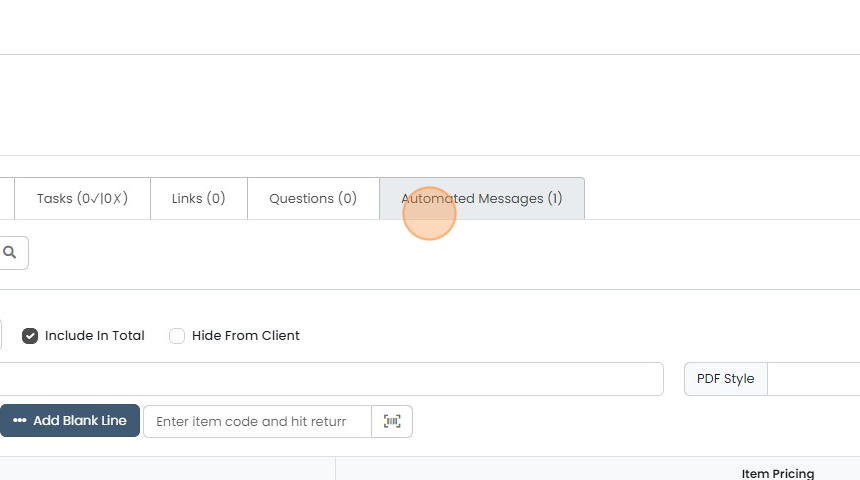
  22. Click "Automated Messages"

    Record tab bar with the Automated Messages (1) tab highlighted, beside the Tasks, Links and Questions tabs
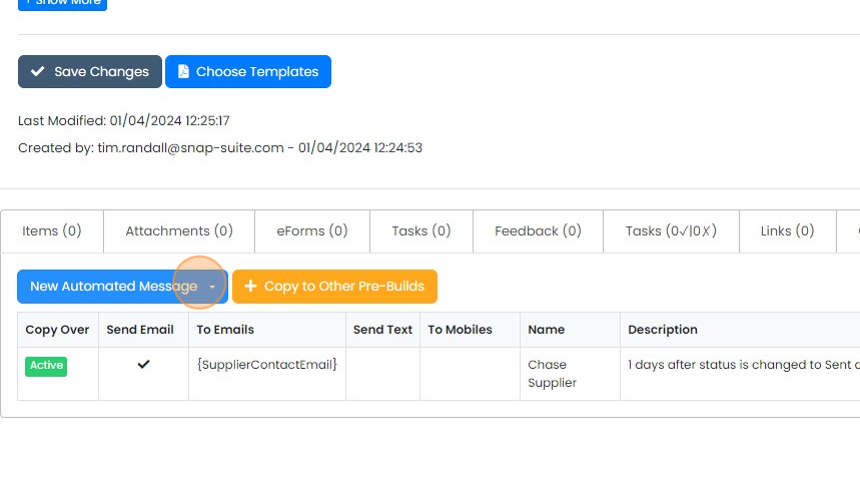
  23. Click "New Automated Message"

    Automated messages tab with the New Automated Message button highlighted above the Chase Supplier message list
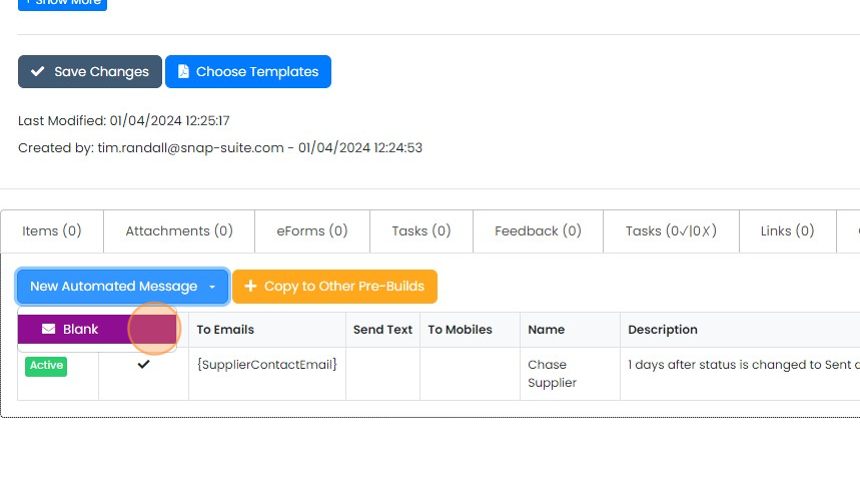
  24. Click "Blank"

    New Automated Message dropdown open below the pre-build tabs, with the Blank option highlighted
  25. Give the automated message a name - this is to the chase a price from the supplier
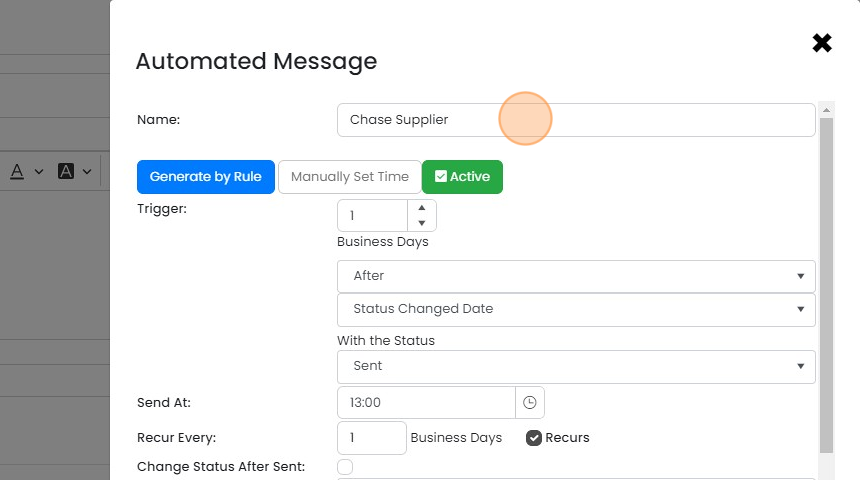
    Automated Message window with the Name field highlighted, filled in as
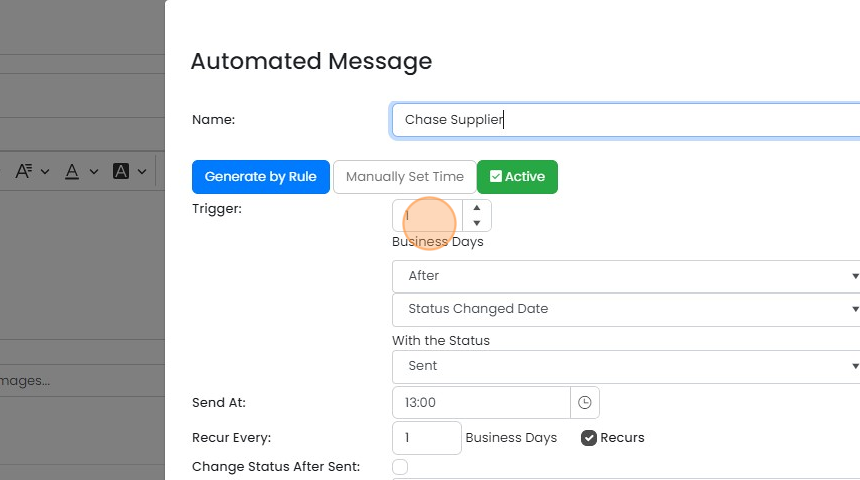
  26. Click this field

    Automated Message panel with the Trigger number field highlighted, set to 1 Business Days after Status Changed Date
  27. Set how many days after the status is changed to "Sent" this will be triggered
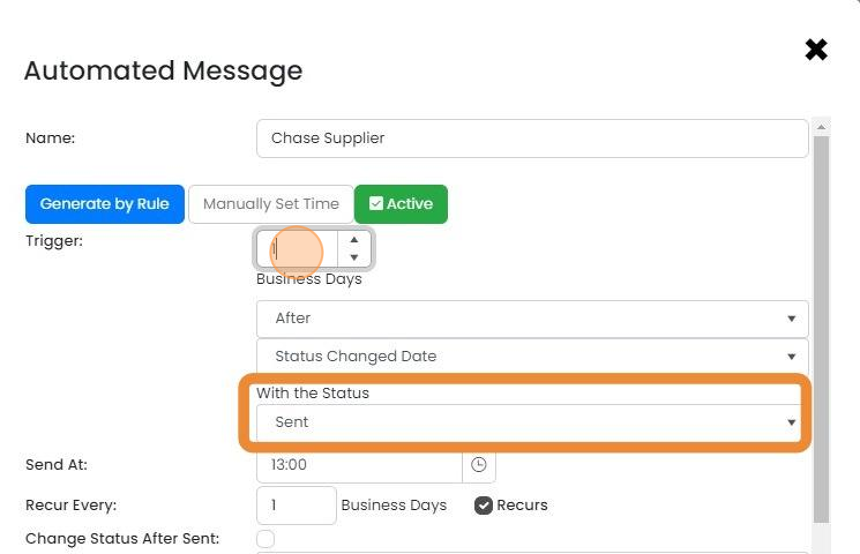
    Automated Message panel with the Trigger days field selected and the With the Status dropdown set to Sent highlighted
  28. Messages can be resent regularly until the status of the RFQ is moved off the trigger status (in this...

    Messages can be resent regularly until the status of the RFQ is moved off the trigger status (in this case, "Sent").

    Click the "Recurs" field to activate this
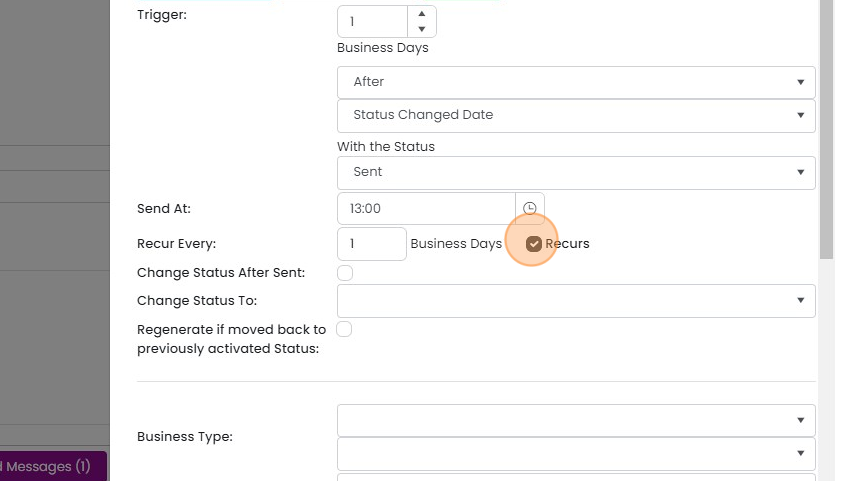
    Workflow trigger settings with the Recurs checkbox highlighted and checked next to Recur Every 1 Business Days
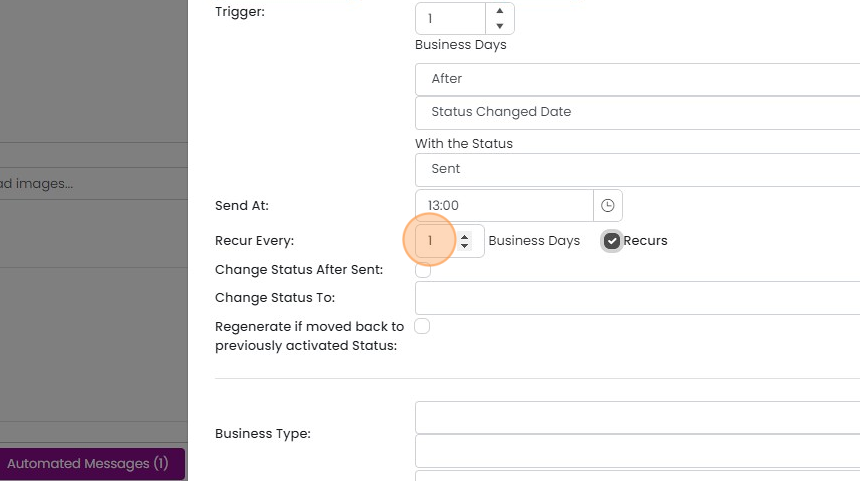
  29. Enter the time between each re-send

    Automated message settings with the Recur Every field highlighted, set to 1 Business Days and the Recurs box checked
  30. Fill in the following fields

    Send Email panel with To, From and Subject fields highlighted using supplier contact, assigned user and reminder variables
  31. Use this button to find any variables you need to add to the email
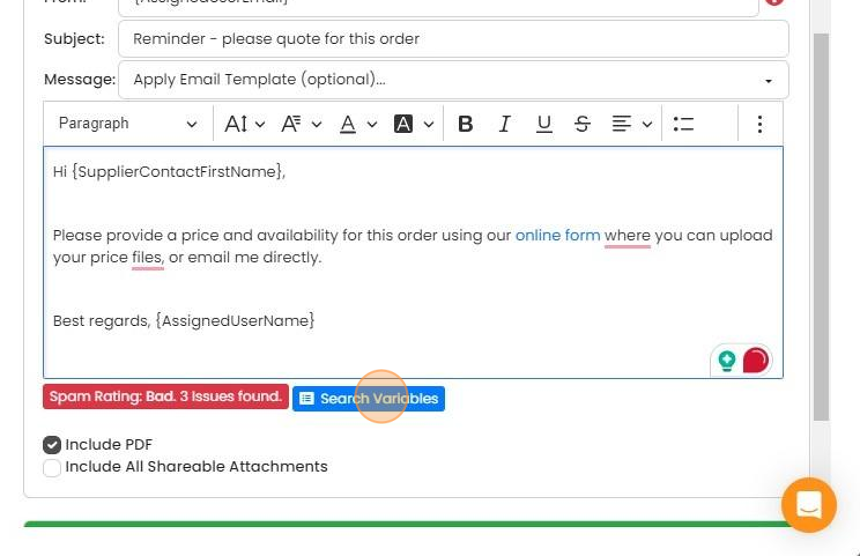
    Email editor for a quote reminder message, with the Search Variables button below the message body highlighted
  32. Make sure that the supplier's online page is included

    Email message editor with
  33. Add the hyperlink {ReviewLink} and tick to complete
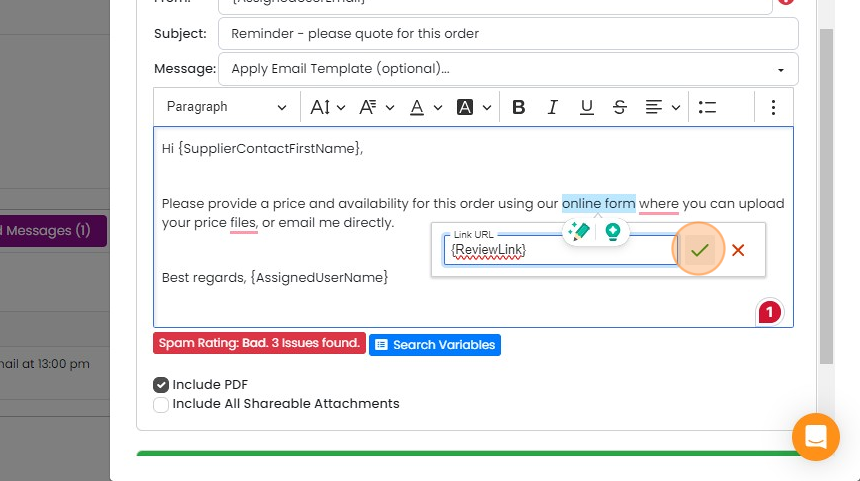
    Email message editor with Link URL set to {ReviewLink} on
  34. Click here

    Automated message email editor with Include PDF checked and the Save & Preview button highlighted below the message body
  35. Check the email renders correctly and then click "×"
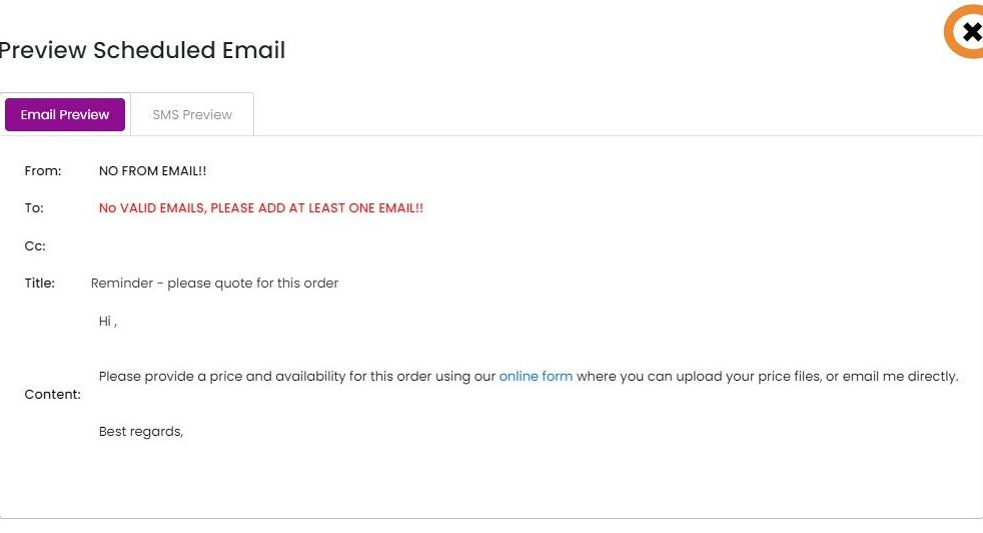
    Preview Scheduled Email window on the Email Preview tab showing the RFQ reminder email, with the × close button top right
  36. Click "×"

    Choose the pre-build templates
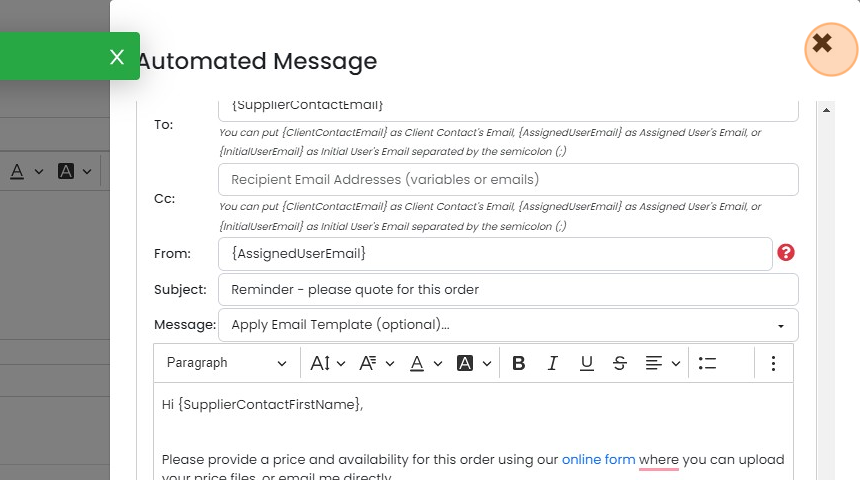
    Automated Message panel with supplier reminder email filled in, close × button highlighted in the top-right corner
  37. Click "Choose Templates"

    Edit form with the Choose Templates button highlighted next to Save Changes, above the Items and Attachments tabs
  38. Click here

    RFQ attachments list with the edit icon highlighted next to the (Body) RFQ document, beside a PDF preview of the request
  39. Make sure a document template is selected
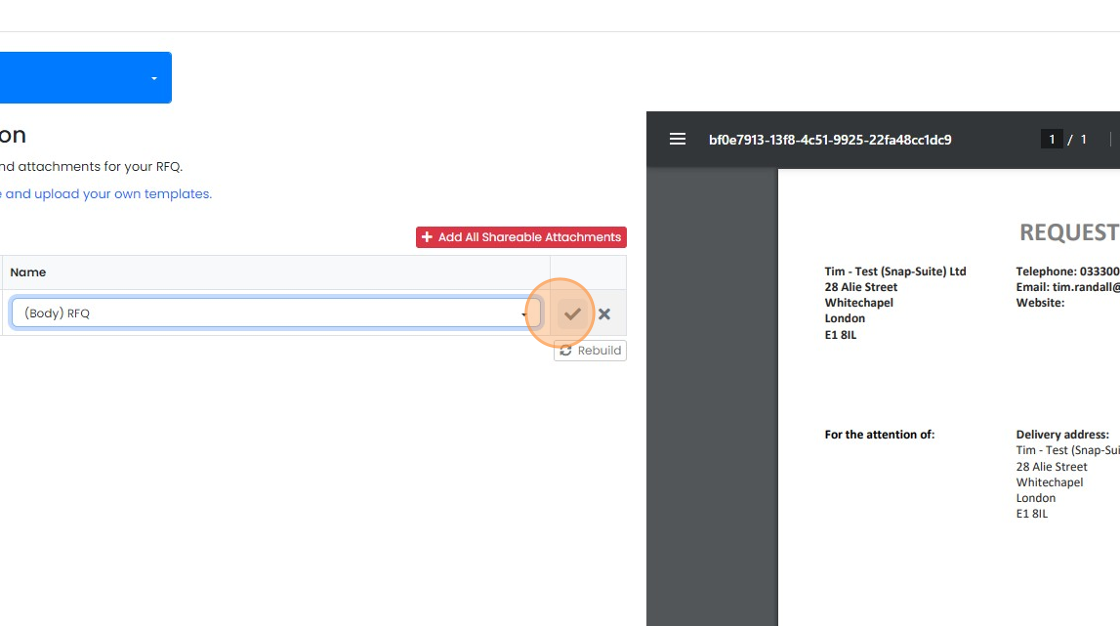
    RFQ attachments panel with
  40. Set the email template to use on this pre-build
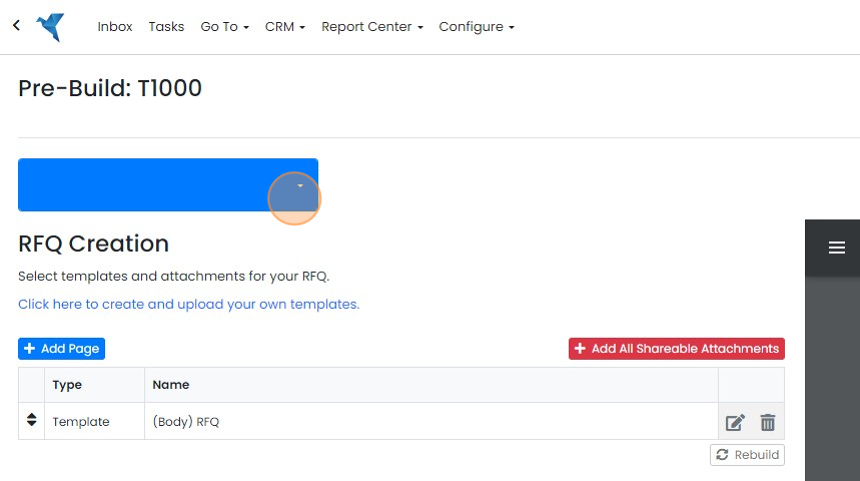
    Pre-Build RFQ Creation page with the dropdown arrow on the blue email template selector highlighted at the top
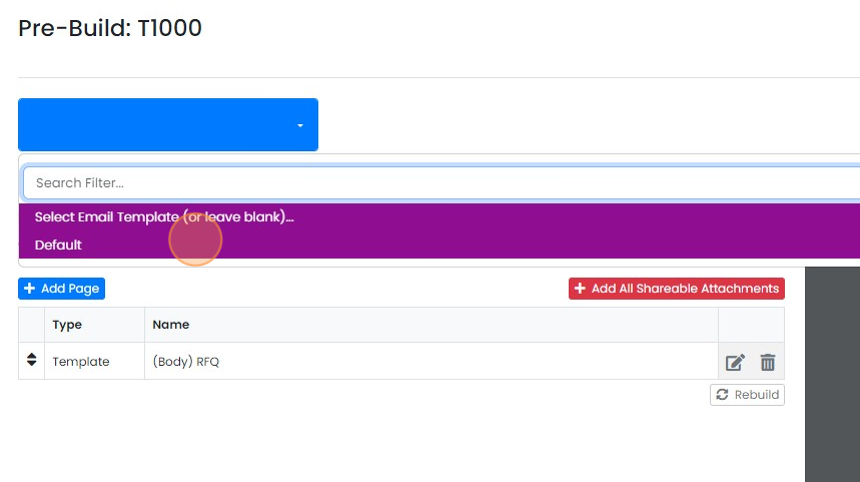
  41. For example

    Pre-Build: T1000 screen with the email template dropdown open and the Default option highlighted below the Search Filter
  42. Click on the back button

    Back button circled in orange at the top right of the page, above a green Download button and below the toolbar icons
  43. You are now set up to create an RFQ

RFQs allow you to request prices from suppliers in a set process, ensuring that everyone in your business knows what is happening. Another benefit of this module is that it can automatically follow up on a quotation request to a supplier-setting this up is also covered in this article.
​

Set up RFQ statuses

Frequently asked questions

Next step

Create and send RFQsMomentum planTo ask suppliers for prices, open the quotation, click Create at the top right, then RFQ. Check the suppliers for each item, click Create RFQs and pick a pre-build. Open the RFQ, click Preview, then Send. The supplier enters prices through the link in the email, and you apply them to the quotation from the line's menu.

Was this helpful?

See Zigaflow on your own workflow

Book a demo and we will walk through quoting, jobs and purchasing the way your team runs them.

Or see how Zigaflow would fit your business, free