Deliver work

Creating an automated message escalating a supplier's lack of response

In ZigaflowEssentials, Go and Momentum plans

The short answer

Open a purchase order pre-build, go to Automated Messages, and create a new blank automated message. Set the business days to wait and the trigger status, then address the email to the assigned user and/or a manager. Add a title, text and the {ReviewLink} variable, preview it, and copy it to other pre-builds if needed.

Steps

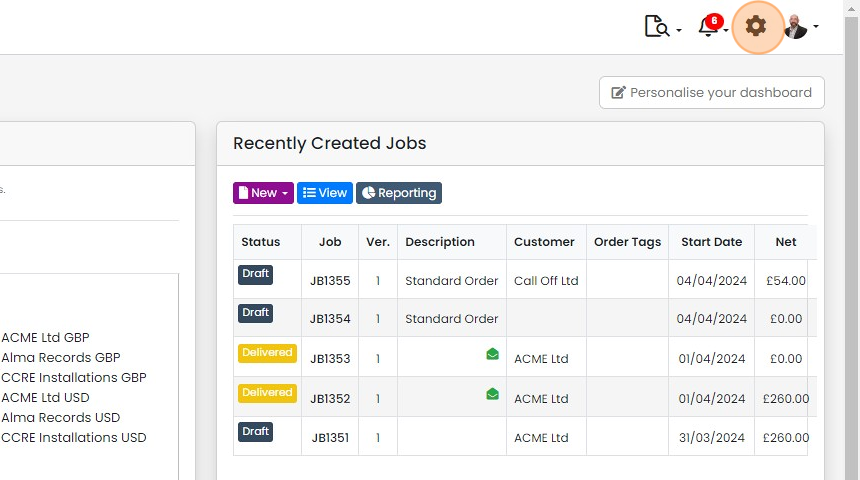
  1. Click here

    Zigaflow dashboard with the settings gear icon highlighted in the top-right toolbar, beside notifications and profile menu
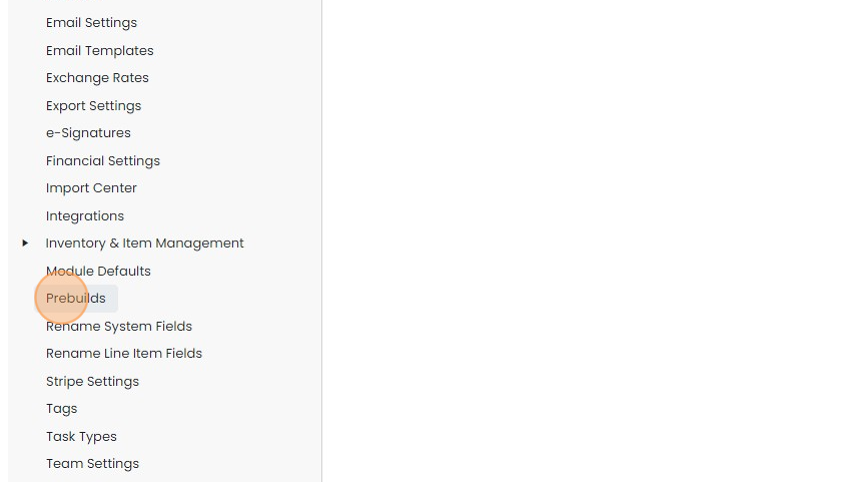
  2. Click "Prebuilds"

    Settings menu list with the Prebuilds option highlighted between Module Defaults and Rename System Fields
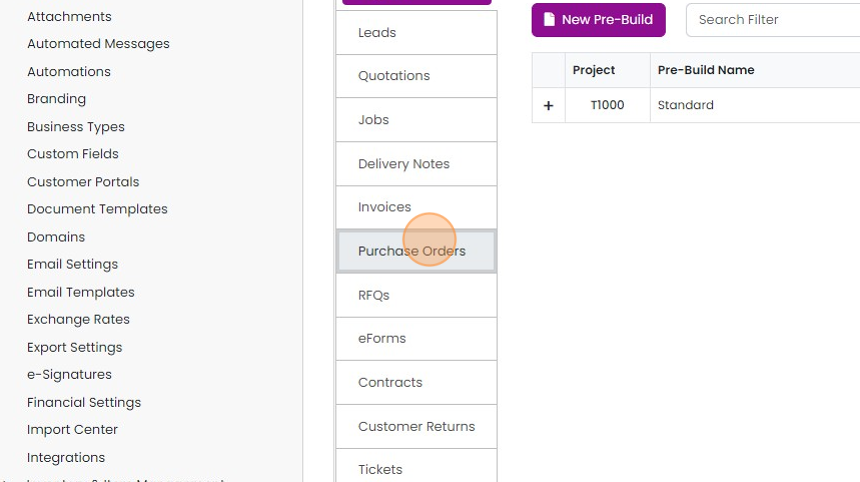
  3. Click "Purchase Orders"

    Settings page with the Purchase Orders tab highlighted in the module list, next to the Pre-Build table and New Pre-Build button
  4. Edit a pre-build

    Automated messages list with the edit icon highlighted on the third row, beside the copy and delete icons
  5. Click "Automated Messages"

    Create the automated message
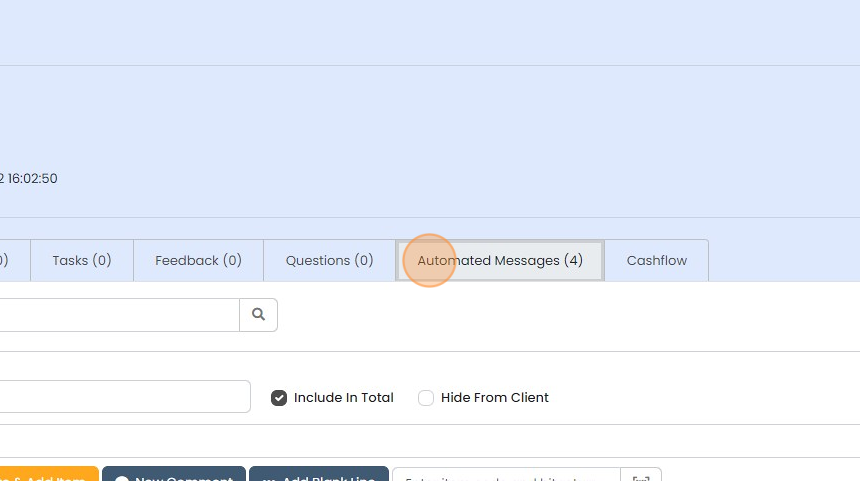
    Record tab row with the Automated Messages (4) tab highlighted, between the Questions and Cashflow tabs
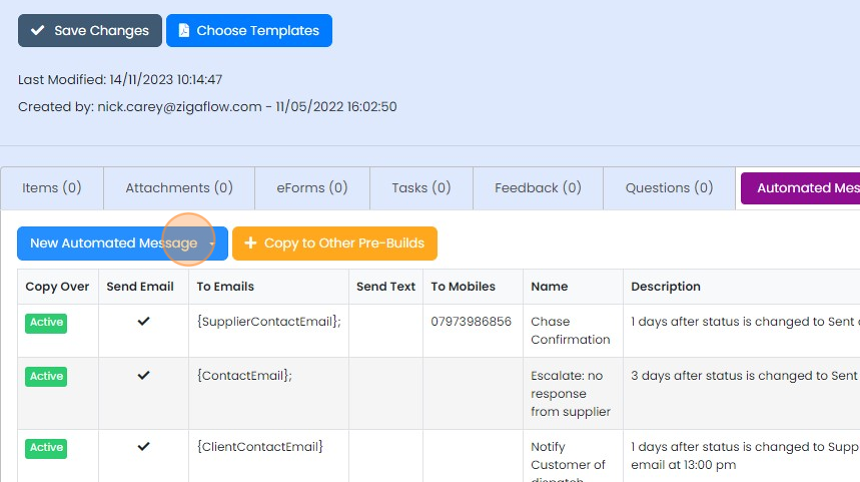
  6. Click "New Automated Message"

    Automated Messages tab of a pre-build with the New Automated Message button highlighted above a list of existing messages
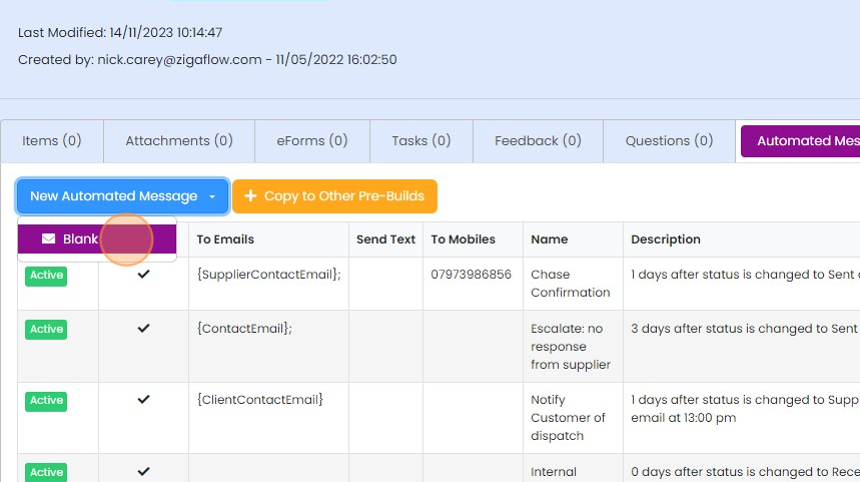
  7. Click "Blank"

    Automated Messages tab with the New Automated Message dropdown open and the Blank option highlighted
  8. Enter a name for the message - this is only used internally

    Automated Message dialog with the Name field highlighted, showing
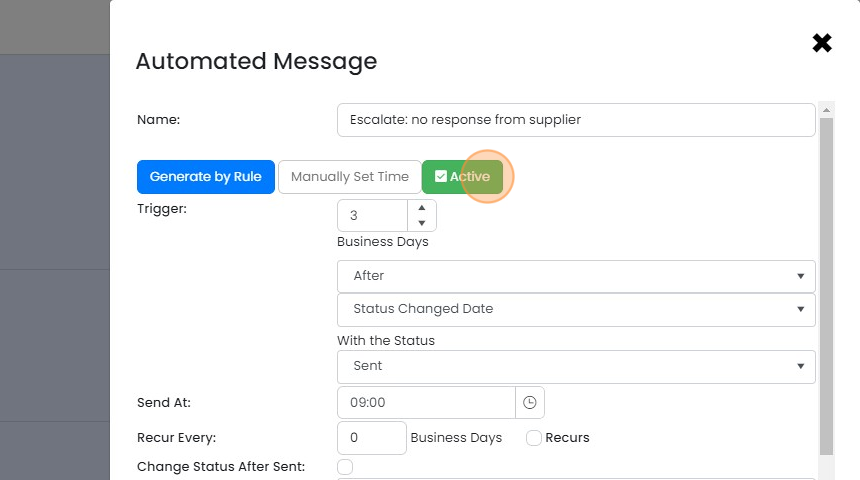
  9. Make sure "Active" is ticked

    Automated Message window with the green Active checkbox highlighted beside the Generate by Rule and Manually Set Time buttons
  10. Enter the number of business days to wait before sending this escalation message
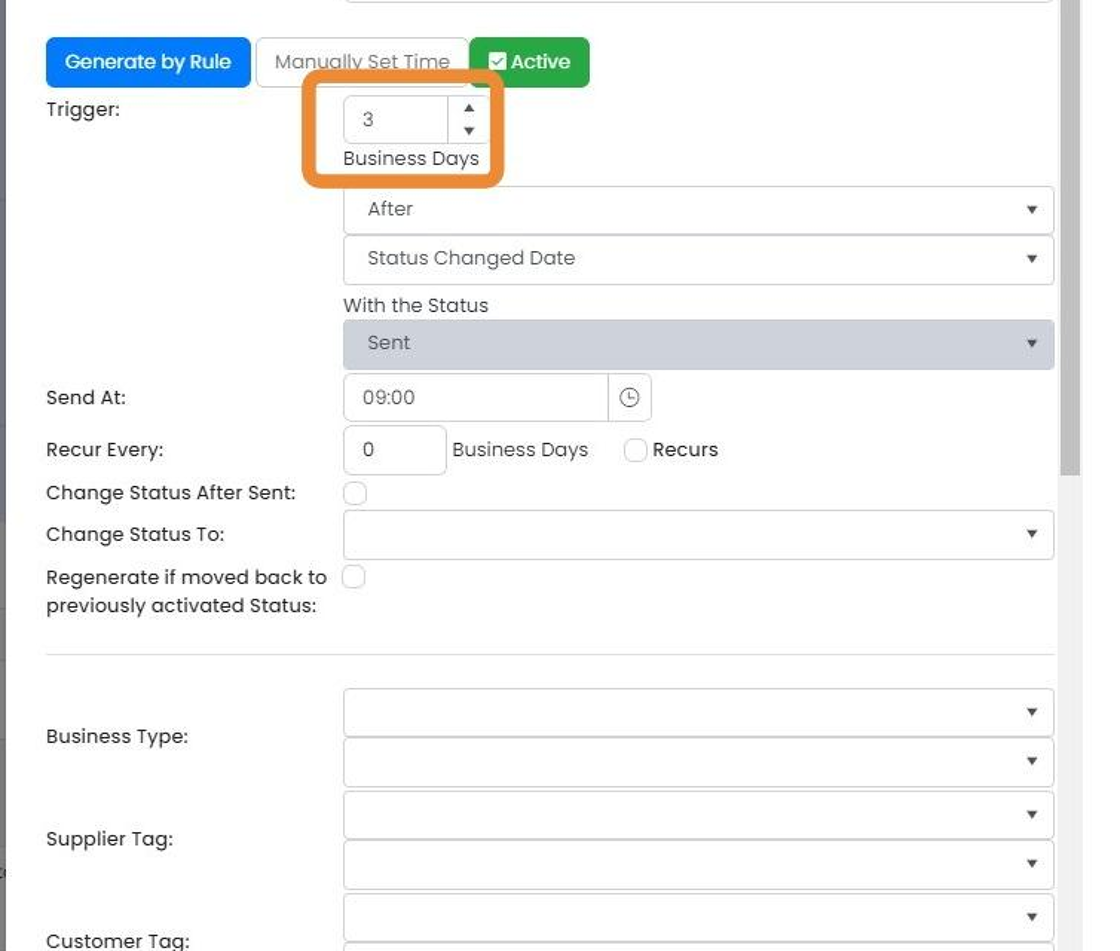
    Automated message rule settings with the Trigger field set to 3 Business Days highlighted, after Status Changed Date of Sent
  11. Select the status to trigger it in, for example "Sent"
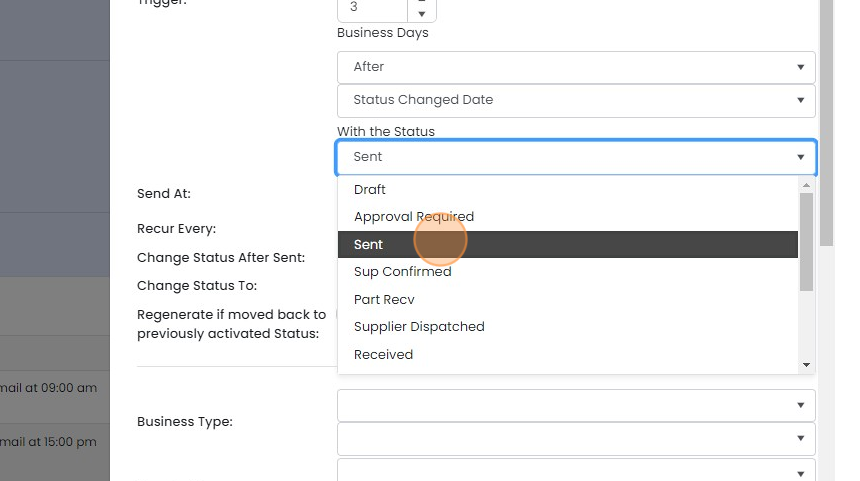
    With the Status dropdown open in the automated message trigger settings, with Sent highlighted among purchase order statuses
  12. Set the time to send

    Write the escalation email
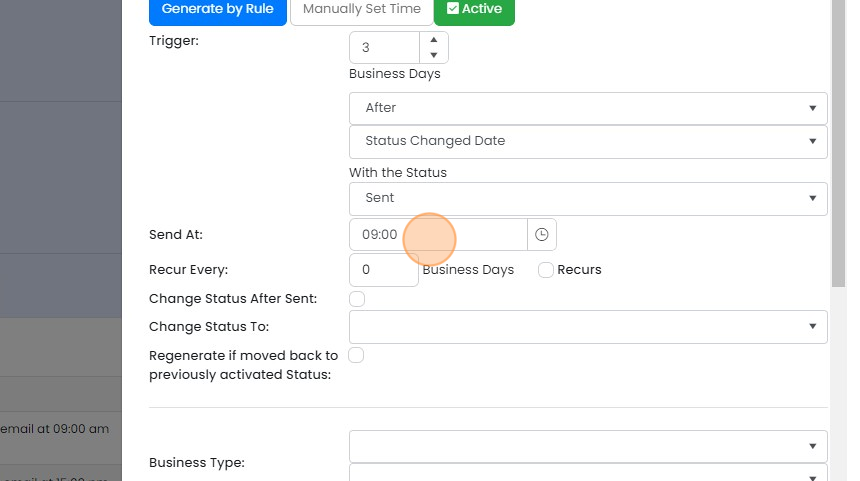
    Automated message rule panel with the Send At time field highlighted, set to 09:00, below the Sent status trigger settings
  13. Enter the assigned user's email and/or a manager's
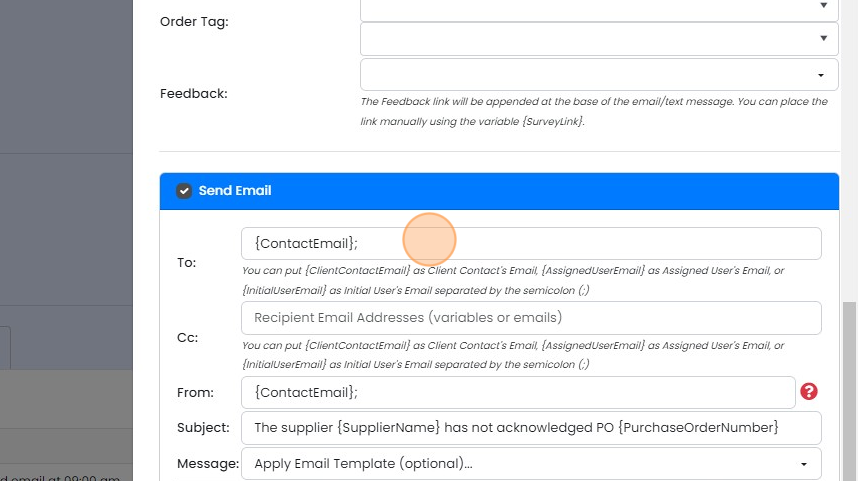
    Send Email panel with the To field highlighted, showing the {ContactEmail}; variable above Cc, From and Subject fields
  14. This can be from the assigned user {ContactEmail}
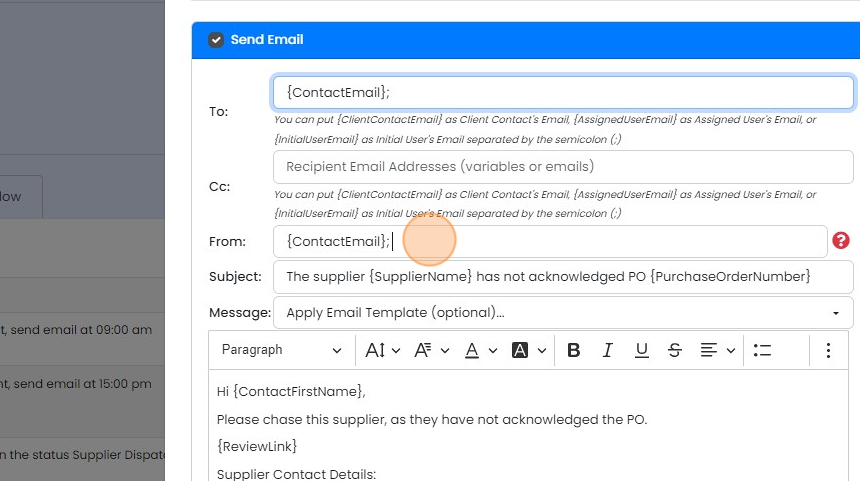
    Send Email panel with the From field highlighted, set to {ContactEmail} for a PO chase message to the supplier
  15. Enter a title. Good practice is to put some helpful details in this, such as {SupplierName} and...

    Enter a title. Good practice is to put some helpful details in this, such as {SupplierName} and {PurchaseOrderNumber}
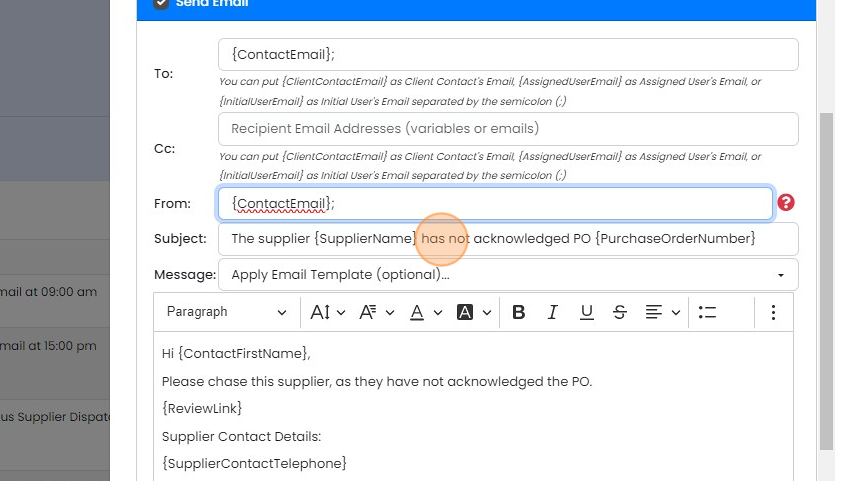
    Send Email panel with the Subject field highlighted, containing {SupplierName} and {PurchaseOrderNumber} variables
  16. Add the text and ideally include some helpful details, such as "SupplierContactTelephone}"
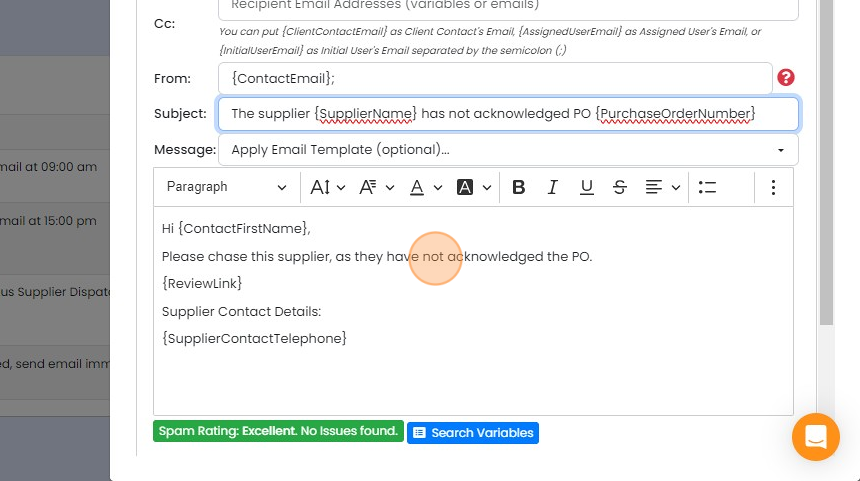
    Email message editor with body text asking to chase the supplier, including {ReviewLink} and {SupplierContactTelephone} variables
  17. Make sure the variable {ReviewLink} is included as this will link to the PO so the recipient can edit/view...

    Make sure the variable {ReviewLink} is included as this will link to the PO so the recipient can edit/view it immediately. You can place this as a hyperlink under type as well

    Preview and copy the message
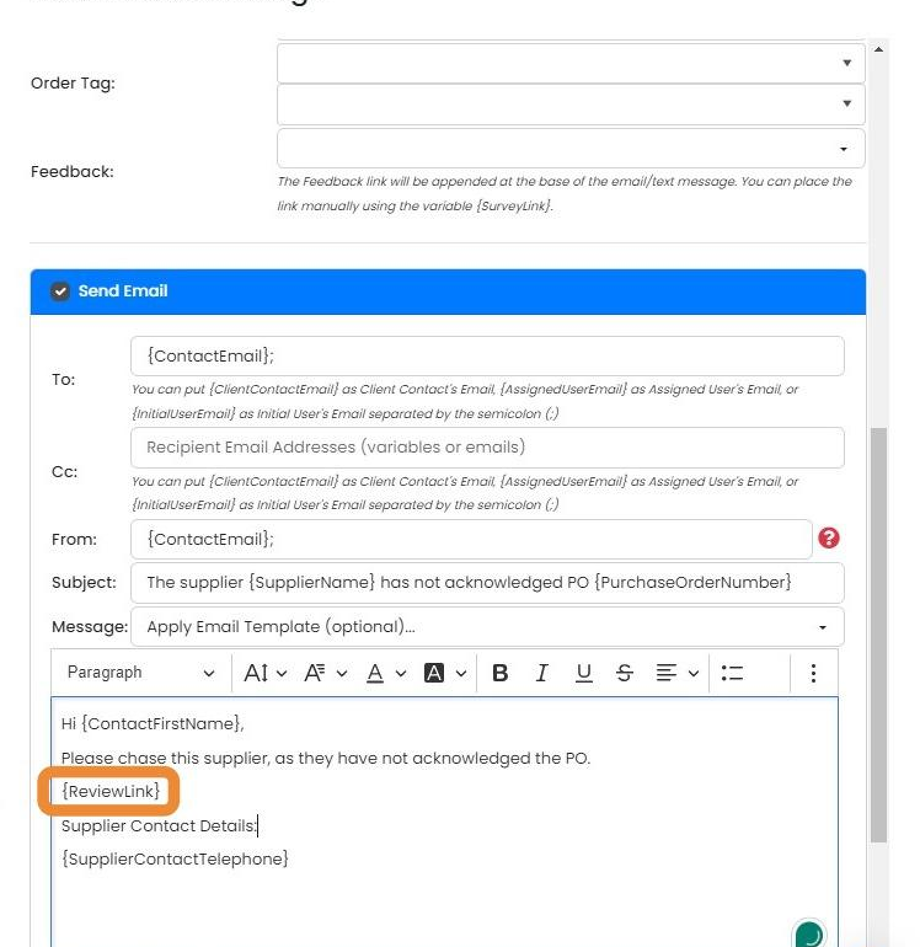
    Send Email section of an automated message with the {ReviewLink} variable highlighted in the message body
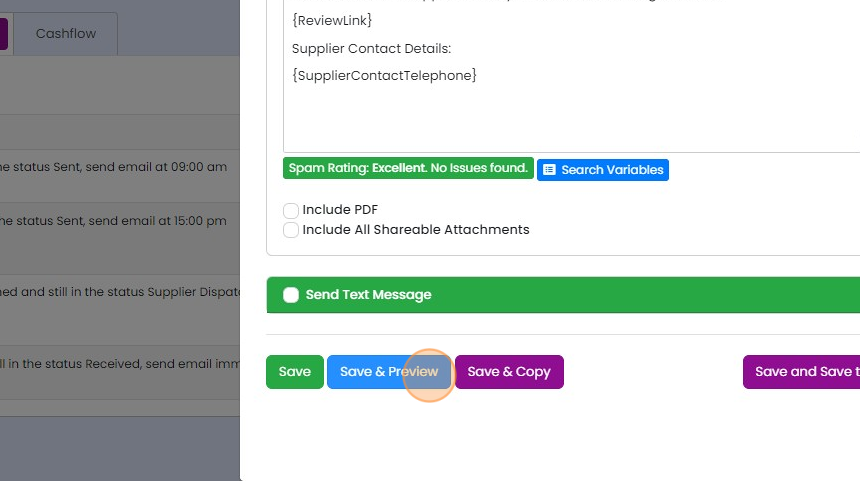
  18. Check that it works by clicking here

    Automated message editor with email template, Send Text Message section, and the Save & Preview button highlighted
  19. If a variable is not recognized, it will appear in its {} brackets. Click "x" to close the preview

    Preview Scheduled Email window showing a PO acknowledgment chaser email, with the close X button highlighted top right
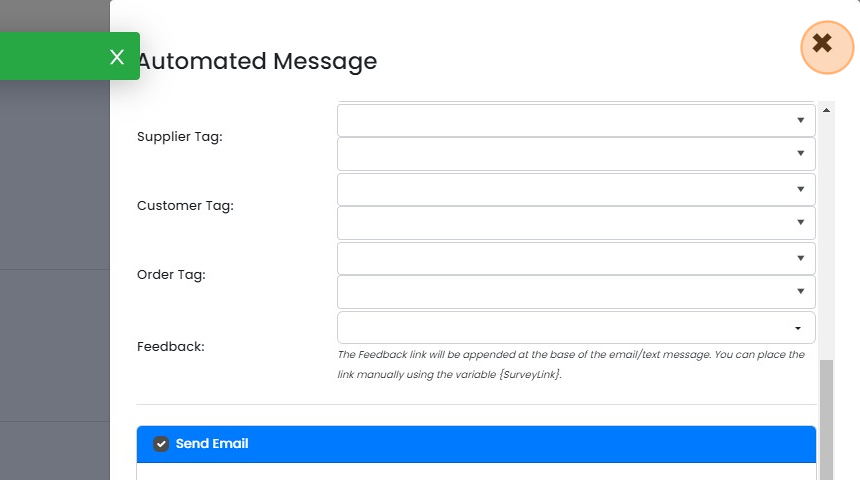
  20. Click "×"

    Automated Message panel with tag, feedback and Send Email fields, close × button highlighted at top right
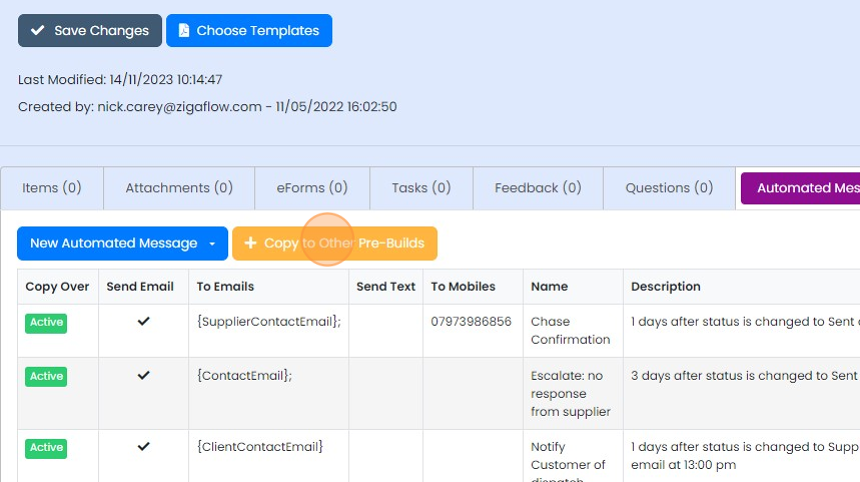
  21. To push it to other pre-builds, click "Copy to Other Pre-Builds"

    Automated Messages tab of a pre-build with the

​

Open the purchase order pre-build

Frequently asked questions

Next step

Creating an automated message to chase a supplierEssentials, Go and Momentum plansOpen a purchase order pre-build in Zigaflow, go to Automated Messages, and create a new blank automated message. Set the days after the trigger, such as a status change to "Sent", choose whether it recurs until the supplier responds, and write the email to the supplier contact with a review link.

Was this helpful?

See Zigaflow on your own workflow

Book a demo and we will walk through quoting, jobs and purchasing the way your team runs them.

Or see how Zigaflow would fit your business, free