Tracking the expected dates of individual PO items
The short answer
Turn on the Expected Date column on the purchase order through Screen Options, then click the edit icon to set an expected date for each item. To see those dates on the linked job or sales order, add the PO Details column there through Screen Options.
Steps
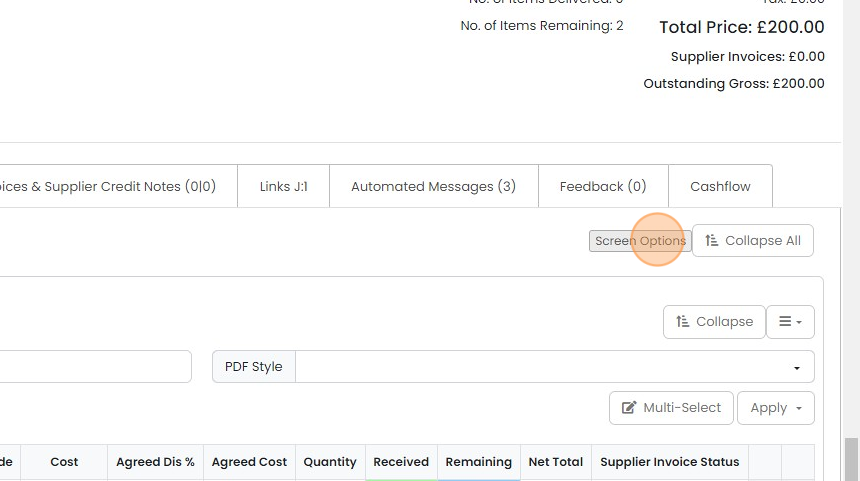
This uses the "Expected Date" column on the PO. If you can't see it, click on "Screen Options"
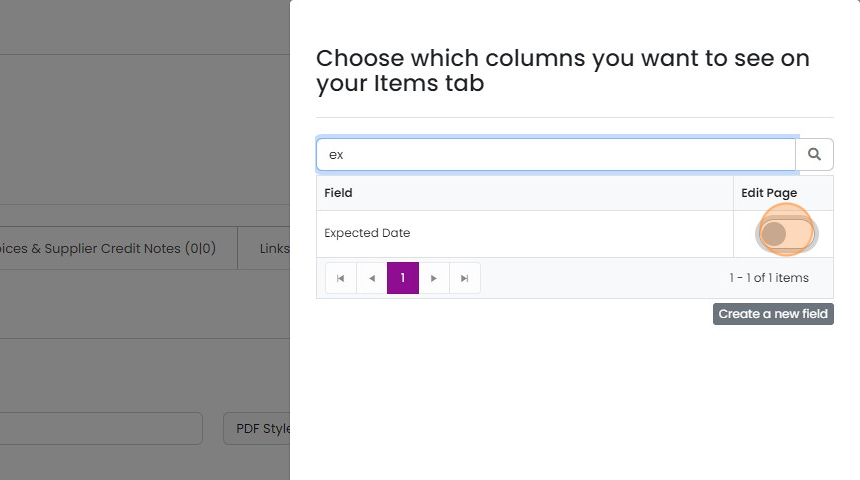
Click on the toggle to make it visible
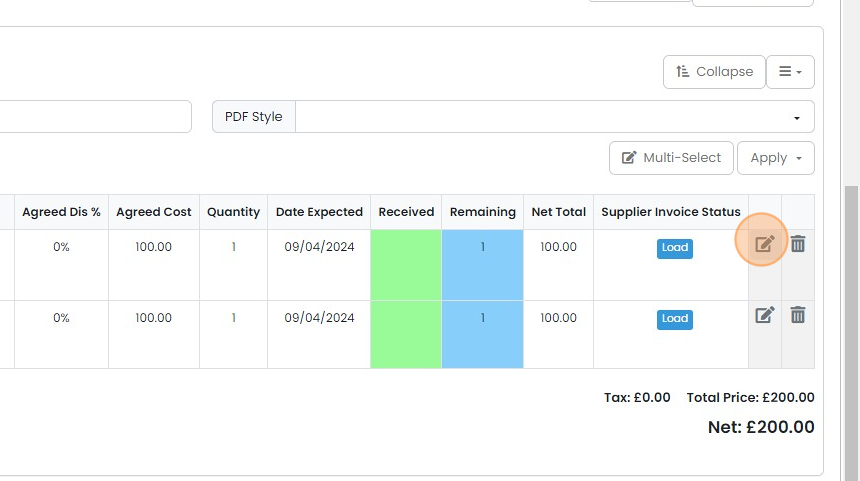
Click the edit icon
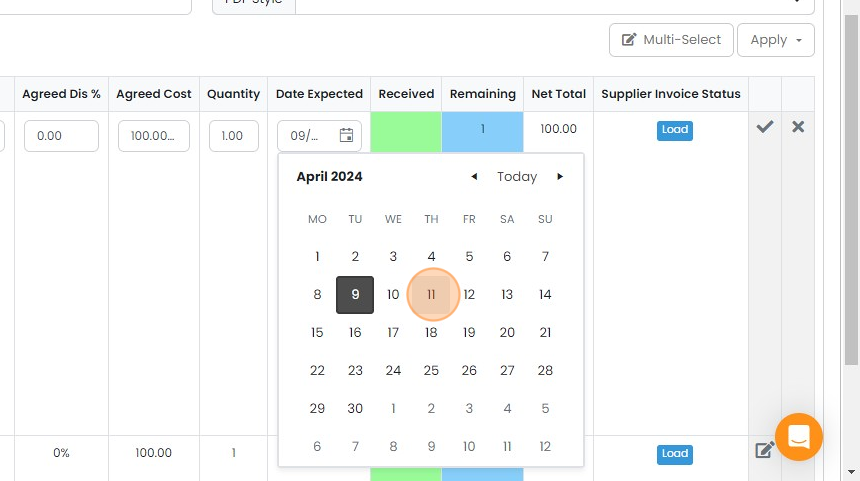
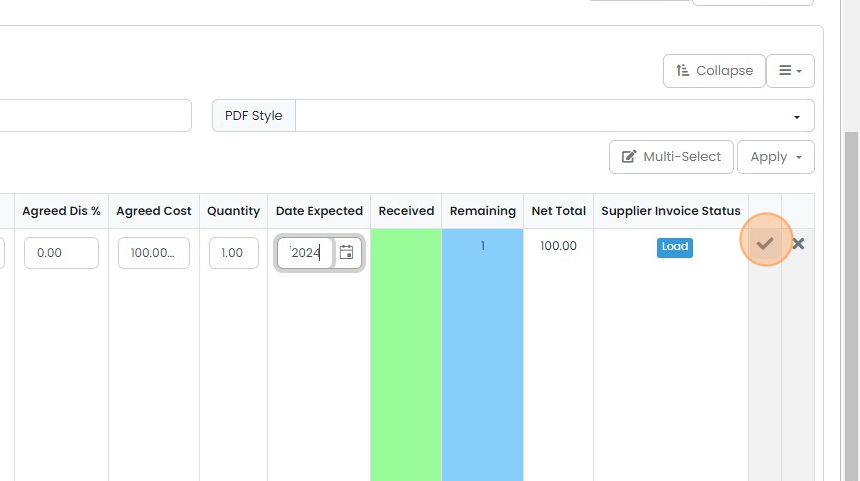
You can now edit each item's expected date
You can now edit each item's expected date. When you change the expected date for the whole PO, you have the option of setting them all at once.
Tick to confirm
View dates on the job or sales order
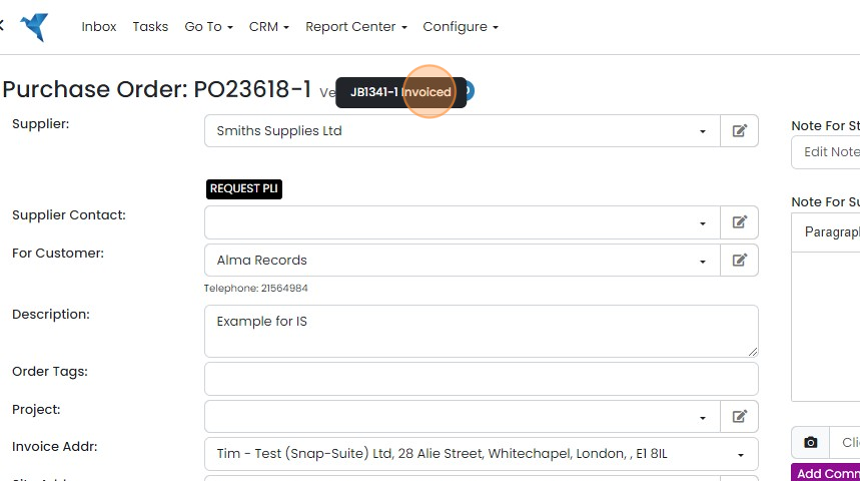
To view the dates on the linked Job/Sales Order, open that document (for example, using the icon at the...
To view the dates on the linked Job/Sales Order, open that document (for example, using the icon at the top of the PO)
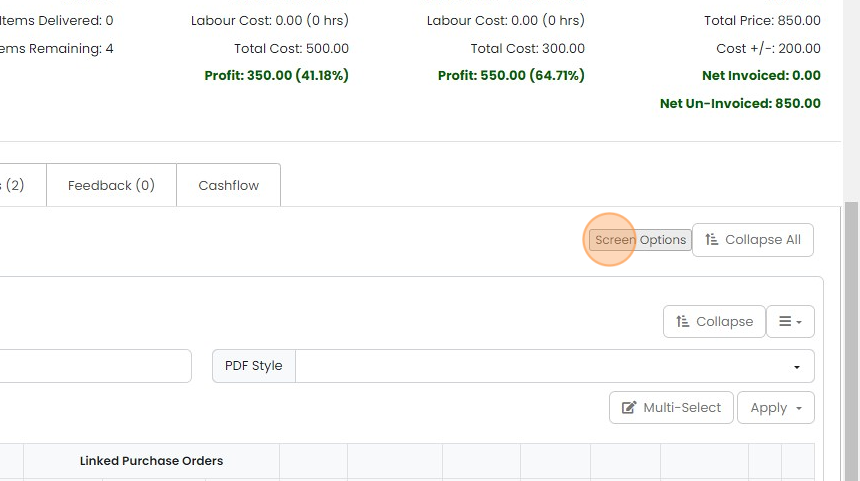
On the Job/Sales Order, click on "Screen Options" to add the fields to the grid
On the Job/Sales Order, click on "Screen Options" to add the fields to the grid. Note that these will not be shown if there are no PO(s) currently linked to the Job/Sales Order
Show the "PO Details" column
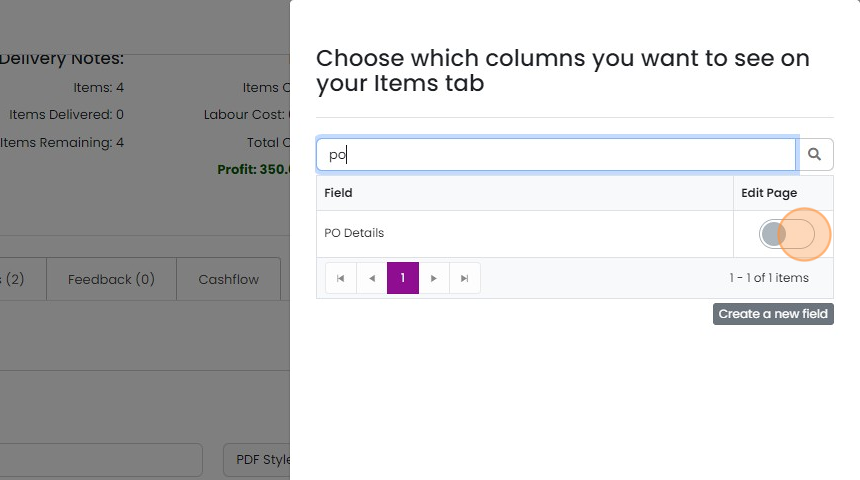
Click away from the pull-out to close it

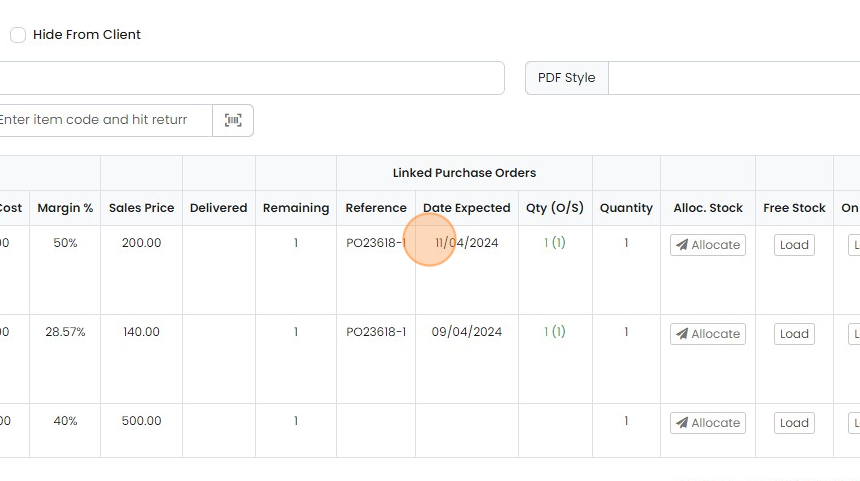
The "Expected Date" is now pulled through from the linked PO(s)
Learn more: purchase orders in Zigaflow


You can track the expected date of each item on a PO, and also see this on the linked Job/Sales Order.
Set expected dates on the PO
Frequently asked questions
Next step
Essentials, Go and Momentum plansWas this helpful?