Get set up

Create an automation to create a job / sales order automatically when a quotation is accep

In Zigaflow

The short answer

In Zigaflow, click the cog icon, then Automations, then Quotation, then New Automation. Name the rule, set the trigger to Status Changed, add a delay, set the condition to Accepted, then add a Create Job action with a status such as Draft. Save and close.

Steps

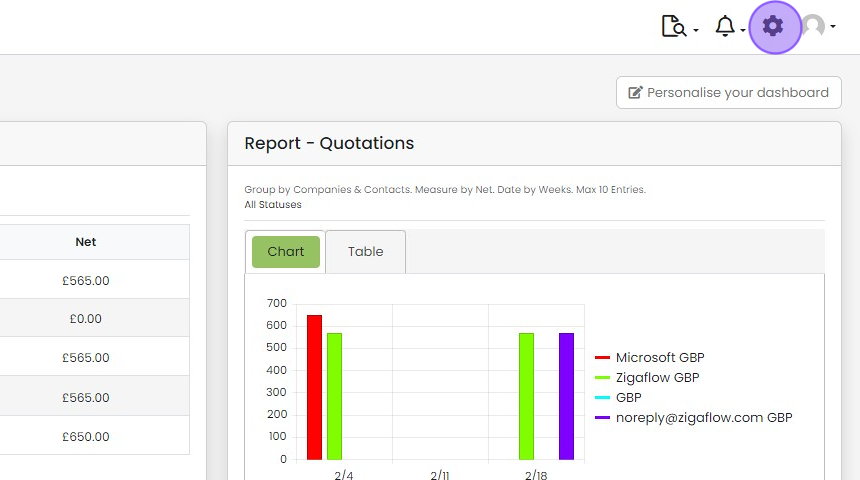
  1. Click the cog icon

    Zigaflow dashboard with the settings cog icon highlighted in the top toolbar, beside the notifications bell
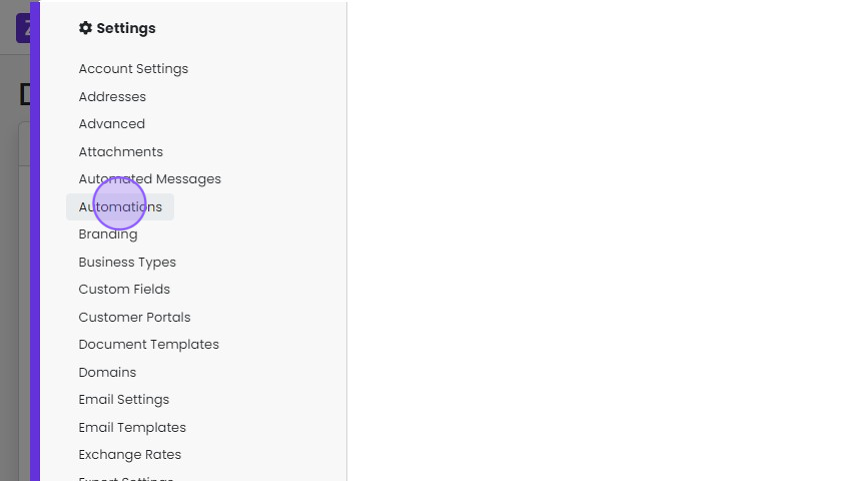
  2. Click "Automations"

    Settings menu listing options from Account Settings to Exchange Rates, with Automations highlighted by a purple click marker
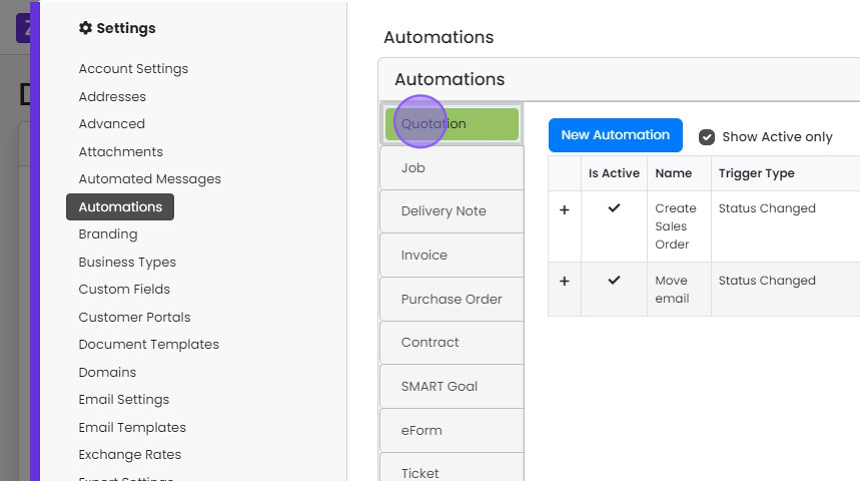
  3. Click "Quotation"

    Automations settings page with the Quotation tab highlighted in the record type list beside the New Automation button
  4. Click "New Automation"

    Automations screen with the Quotation tab selected and the New Automation button highlighted above the automations list
  5. Give your automation rule a name

    Set the trigger and delay
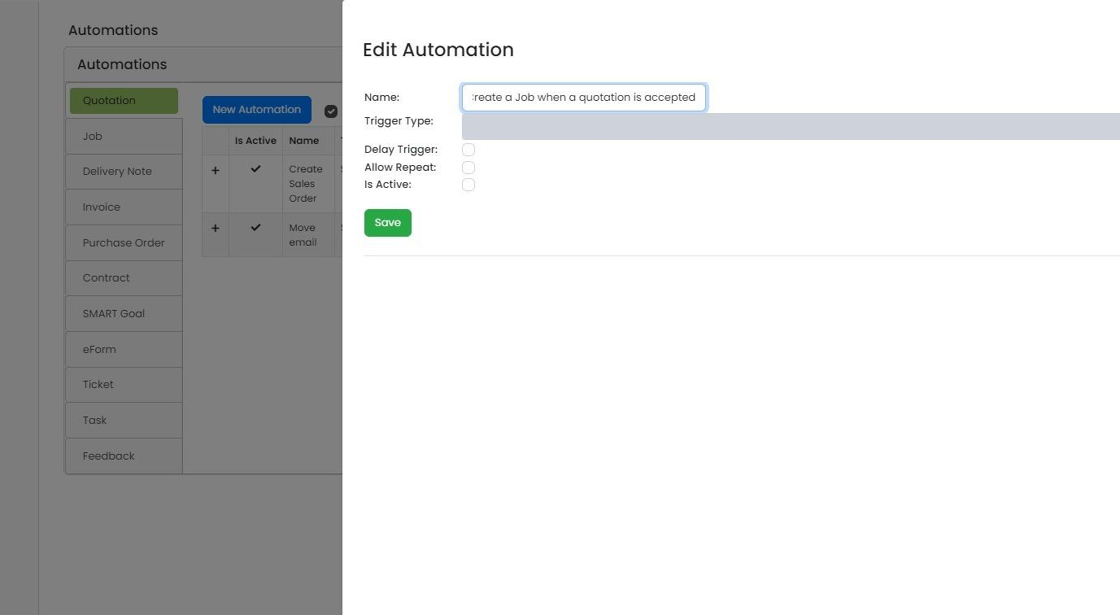
    Edit Automation panel with the Name field highlighted, filled in as
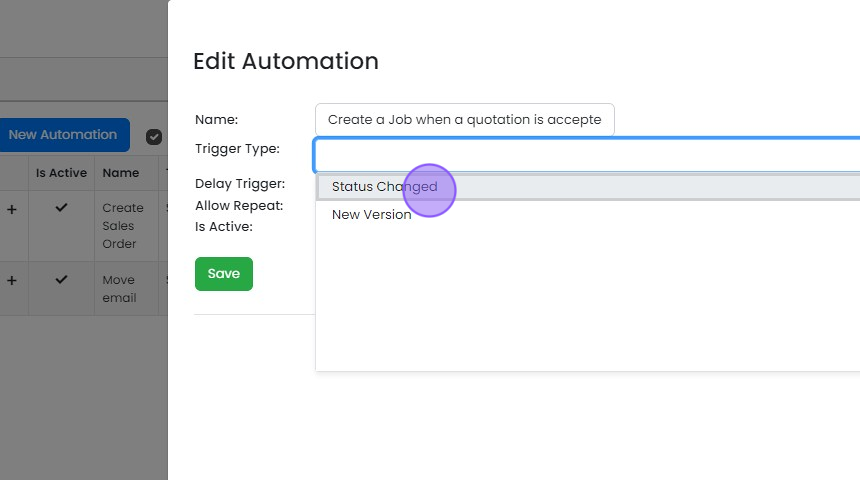
  6. Click on "Status Changed"

    Edit Automation panel with the Trigger Type dropdown open and the Status Changed option highlighted above New Version
  7. Click the "Delay Trigger" field

    Edit Automation panel with Trigger Type set to Status Changed and the Delay Trigger checkbox highlighted
  8. Add a delay time

    NOTE: Adding a delay time to automations just creates a short pause before an automation is executed. This is good practice to prevent automations being triggered accidentally
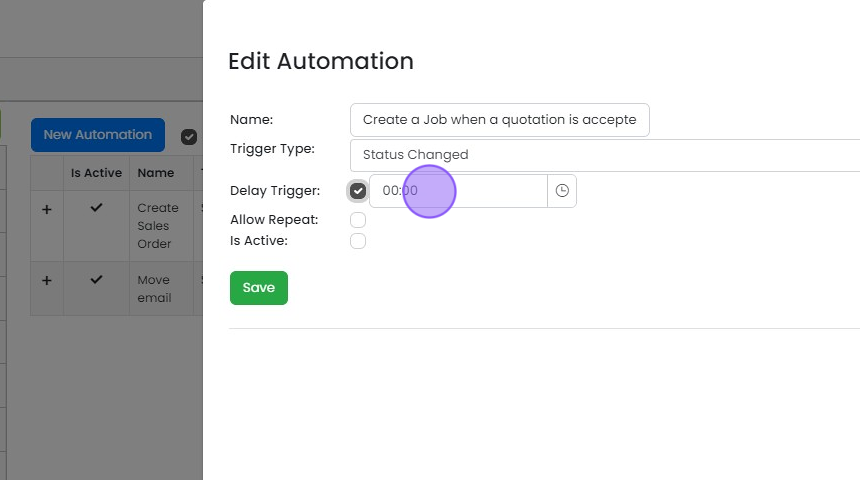
    Edit Automation panel with Delay Trigger checked and the time field set to 00:00 highlighted, below Trigger Type Status Changed
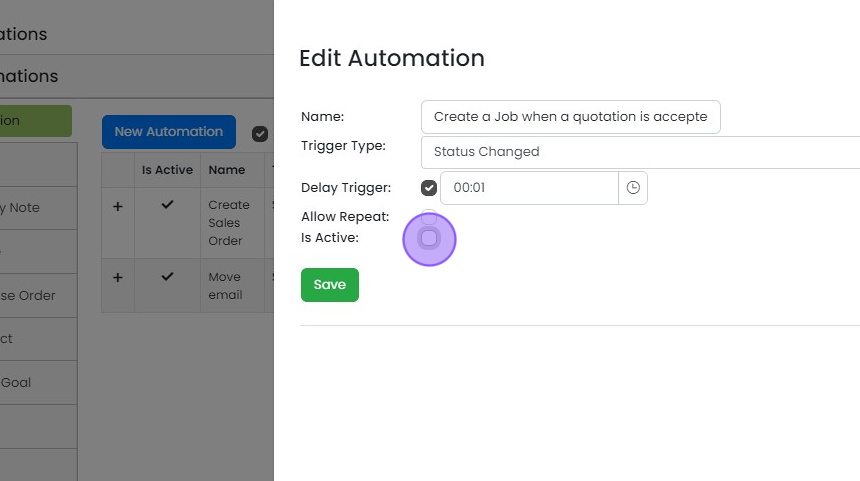
  9. Click the "Is Active" field

    Edit Automation panel with the Is Active checkbox highlighted, below Delay Trigger set to 00:01 and above the Save button
  10. Click "Save"

    Set the accepted condition
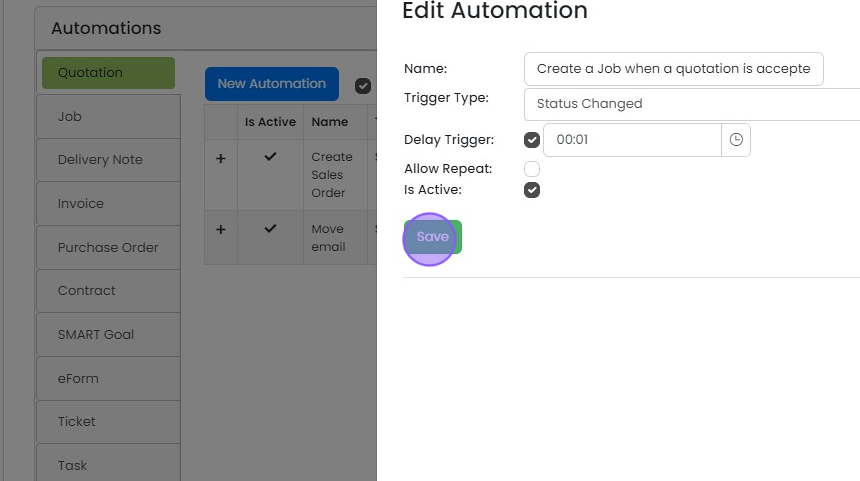
    Edit Automation panel with Status Changed trigger, Delay Trigger and Is Active ticked, and the Save button highlighted
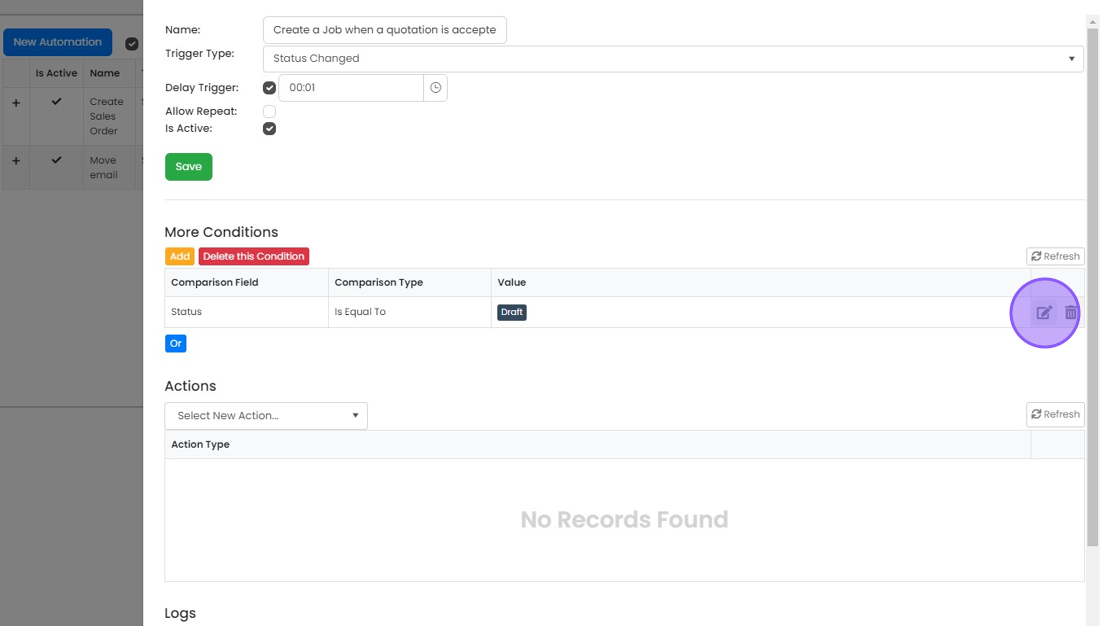
  11. Click here to edit the condition

    Automation More Conditions table with the edit icon highlighted on the Status Is Equal To Draft condition row
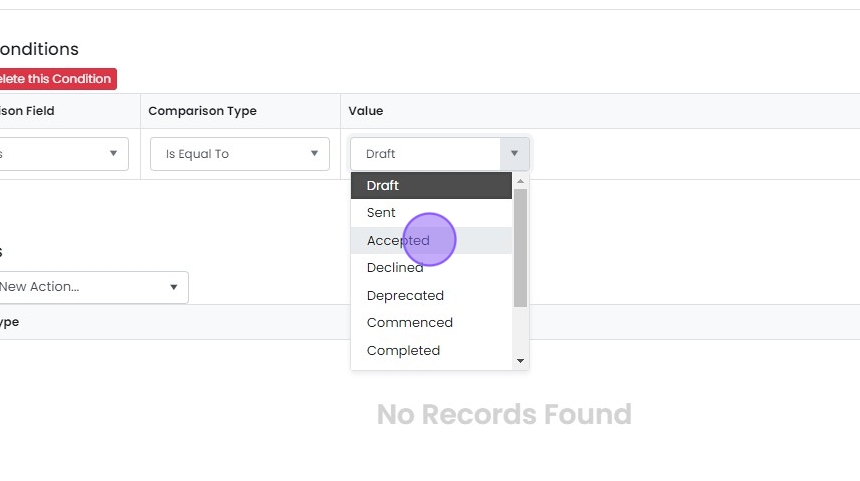
  12. Click "Accepted"

    Conditions section with the Value dropdown open and
  13. Click the tick icon

    Add the create job action

    Tick icon highlighted to save an automation condition row with the Value dropdown set to Accepted
  14. Click here

    Workflow Actions section with the Select New Action dropdown arrow highlighted, below a Status Is Equal To Accepted condition
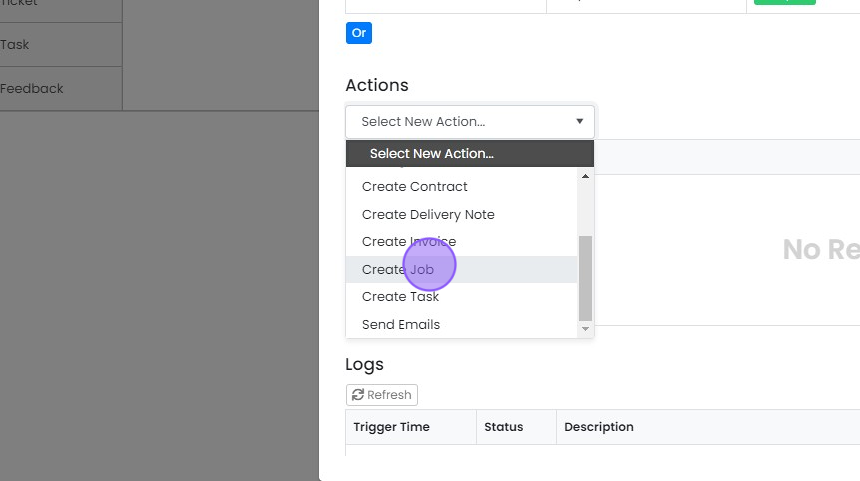
  15. Click "Create Job"

    Actions section of an automation with the Select New Action dropdown open and Create Job highlighted among the options
  16. Select the status for your newly created job, in this case, click "Draft"
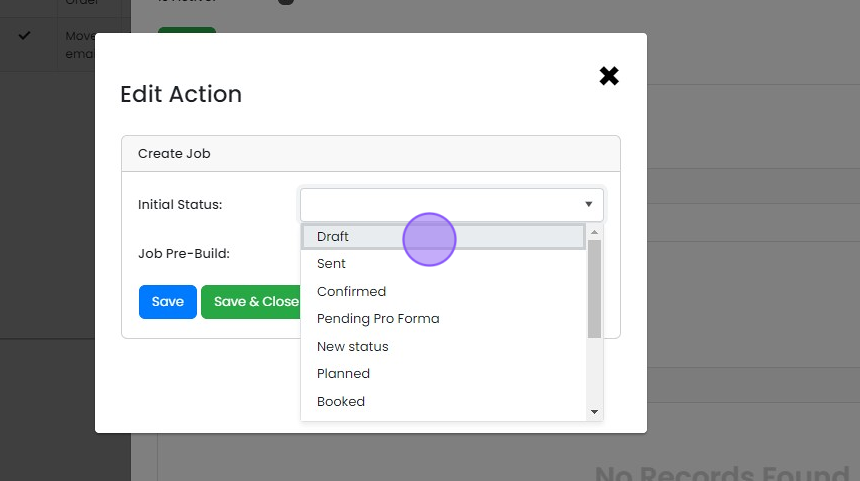
    Edit Action dialog for Create Job with the Initial Status dropdown open and the Draft option highlighted
  17. OPTIONAL: Choose a Job pre-build to use for this automation
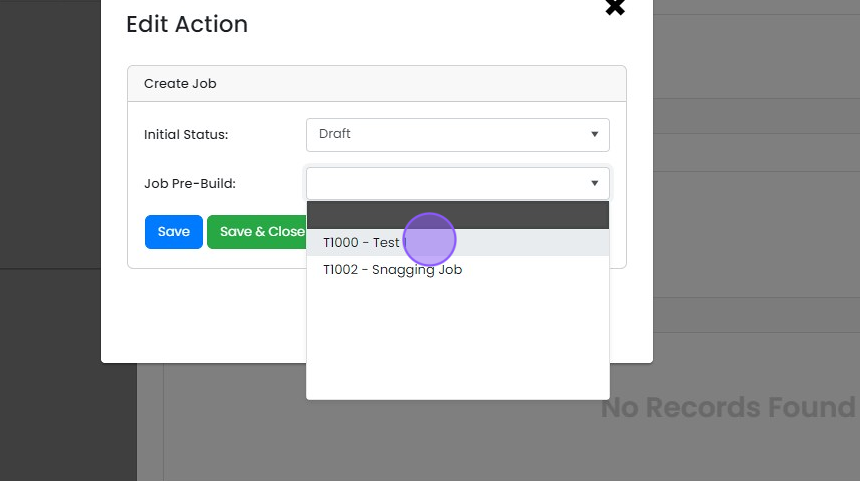
    Edit Action dialog, Create Job section, with Job Pre-Build dropdown open and T1000 - Test pre-build option highlighted
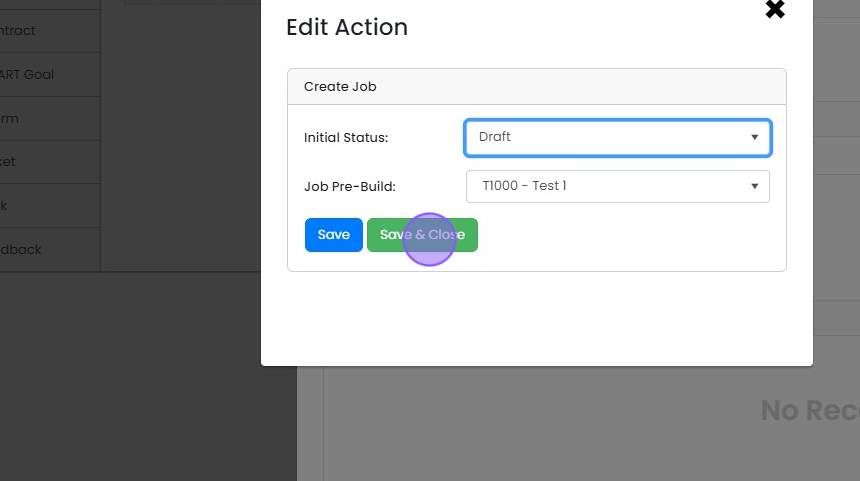
  18. Click "Save & Close"

    Edit Action dialog for Create Job with Initial Status set to Draft and a Job Pre-Build selected, Save & Close highlighted
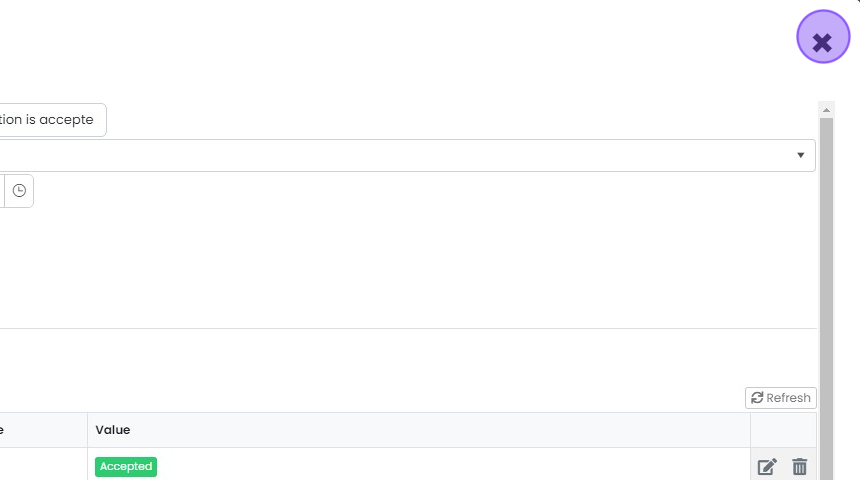
  19. Click "X" to close the panel

    Automation setup panel with an Accepted trigger condition, highlighting the purple X close button in the top-right corner

Create the automation rule

Frequently asked questions

Next step

Automations explainedAn automation in Zigaflow runs actions for you when a quotation, job or order is changed or created. Open the Cog, click Automations, and pick a module. Set a trigger, an optional delay, conditions and actions, then save. The automation log shows which automations have run.

Was this helpful?

See Zigaflow on your own workflow

Book a demo and we will walk through quoting, jobs and purchasing the way your team runs them.

Or see how Zigaflow would fit your business, free