Get set up

Create an item custom field

In Zigaflow

The short answer

To create an item custom field in Zigaflow, go to Custom Fields, click Items, then click Create Custom Field. Select a type such as text, date or dropdown, give it a label and click Create. The field then exists for all items, and you can fill in its value on each item.

Steps

  1. Click here

    Zigaflow dashboard top bar with the gear settings icon highlighted next to notifications and the user profile menu
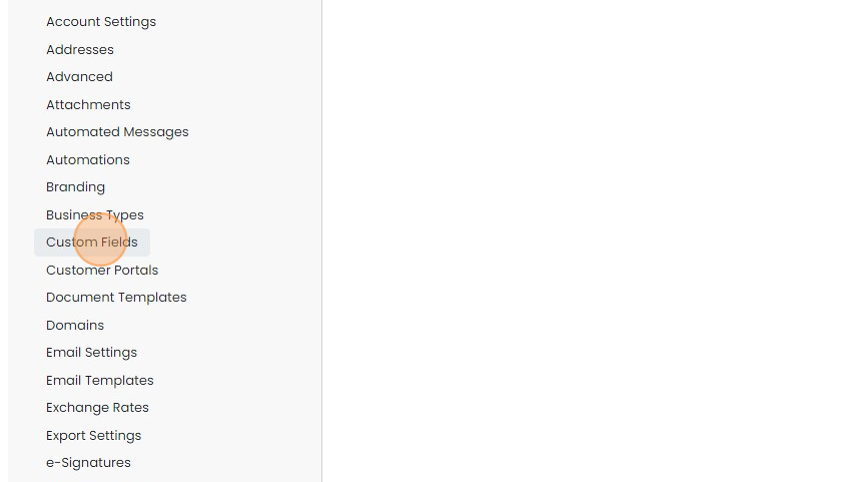
  2. Click "Custom Fields"

    Settings menu list with Custom Fields highlighted between Business Types and Customer Portals
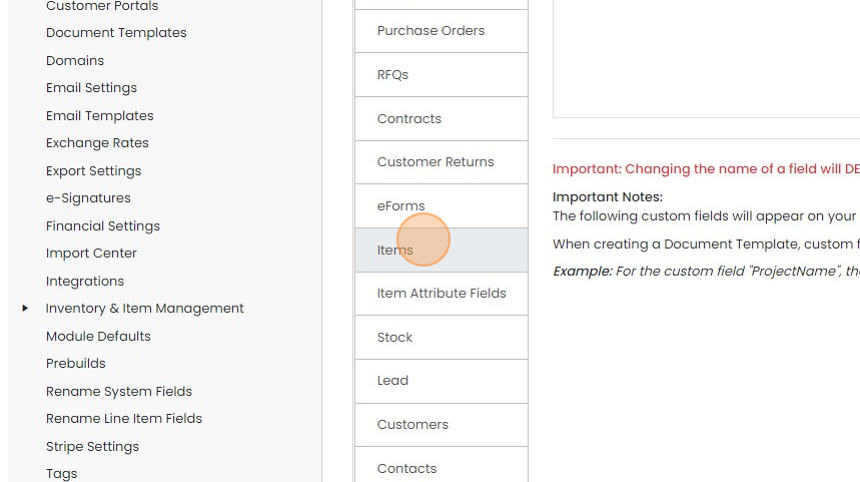
  3. Click "Items"

    Custom fields settings with the Items tab highlighted in the module list, between eForms and Item Attribute Fields
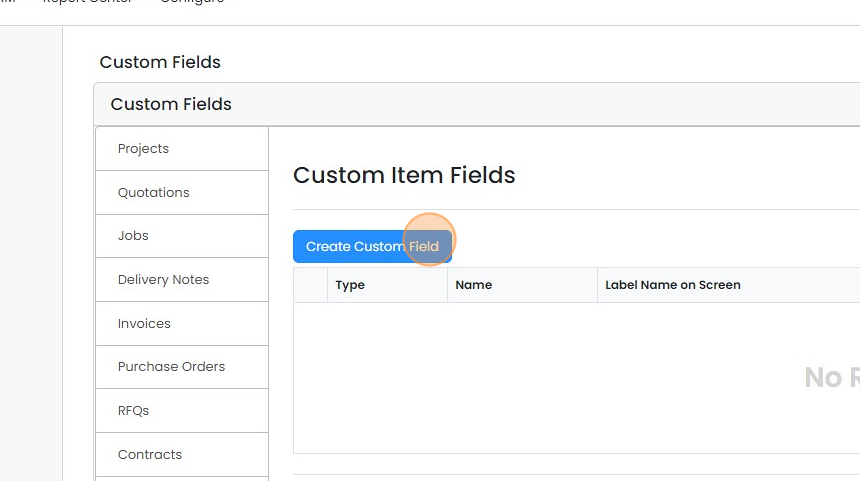
  4. Click "Create Custom Field"

    Custom Item Fields page in Custom Fields settings with the Create Custom Field button highlighted above an empty table
  5. Select the type - this can be text, date, dropdown, and more
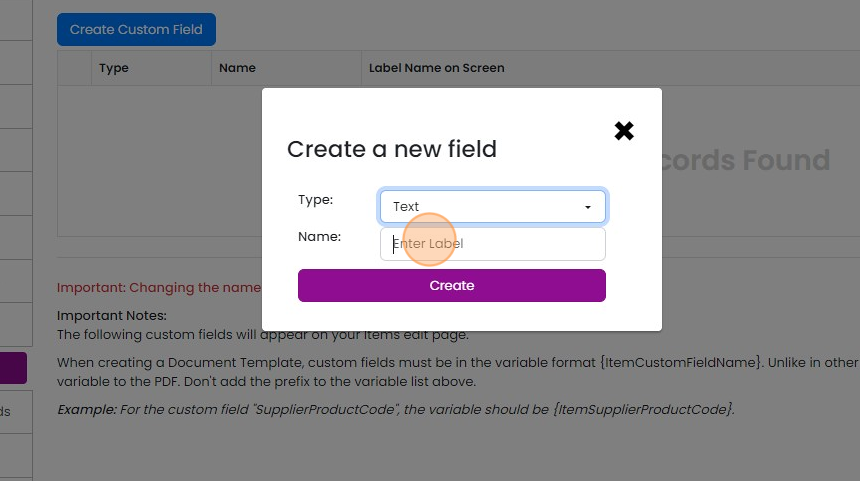
    Create a new field dialog with the Type dropdown set to Text, highlighted above the Name field and Create button
  6. Give it a label and click "Create"

    Give it a label and click "Create". Note that the system will use the variable name with "Item" as the prefix and replace any spaces with underscores "_", for example: {ItemSupplier_Code}. This is used in the document templates.

    Add a value to an item
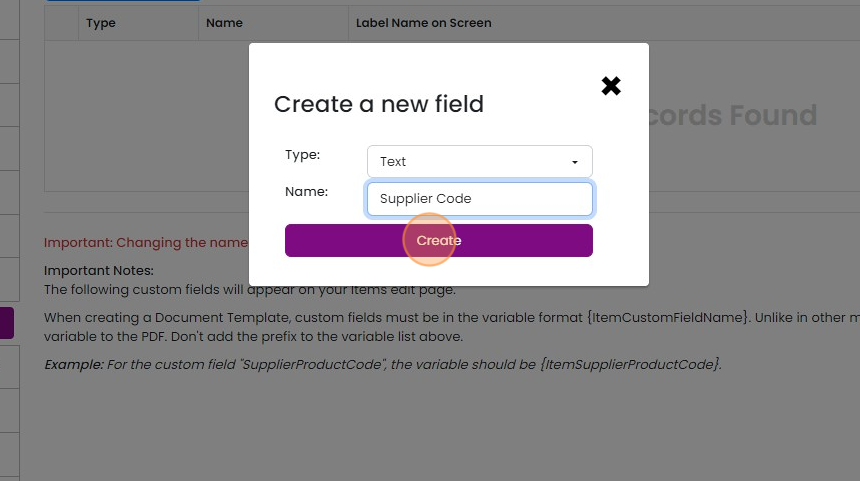
    Create a new field dialog with Type set to Text and Name
  7. To populate the field on an item, click "Go To"

    Custom Fields settings page showing Custom Item Fields, with the Go To menu in the top navigation bar highlighted
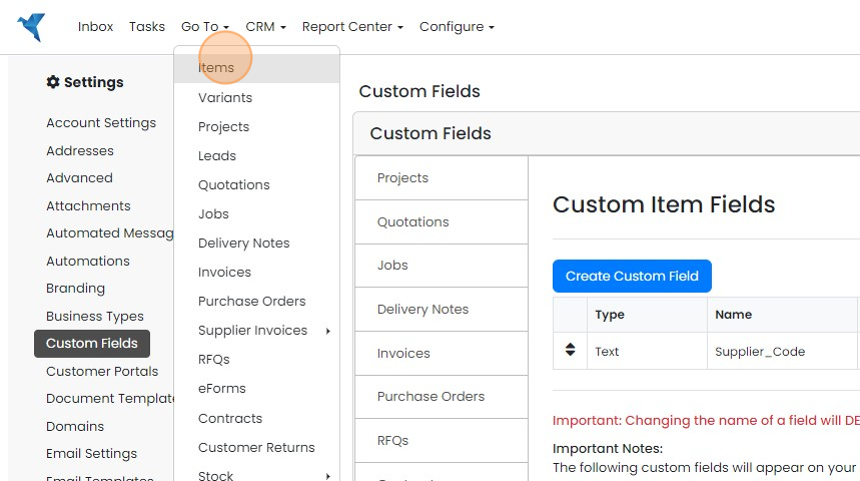
  8. Click "Items"

    Go To menu open over the Custom Fields settings page, with Items highlighted at the top of the dropdown list
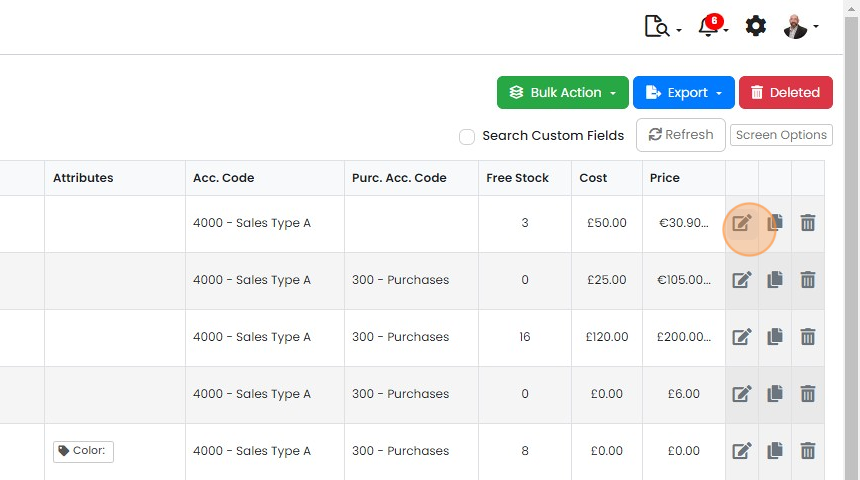
  9. Edit an item

    Items list with Acc. Code, Free Stock, Cost and Price columns, with the edit (pencil) icon highlighted on the first row
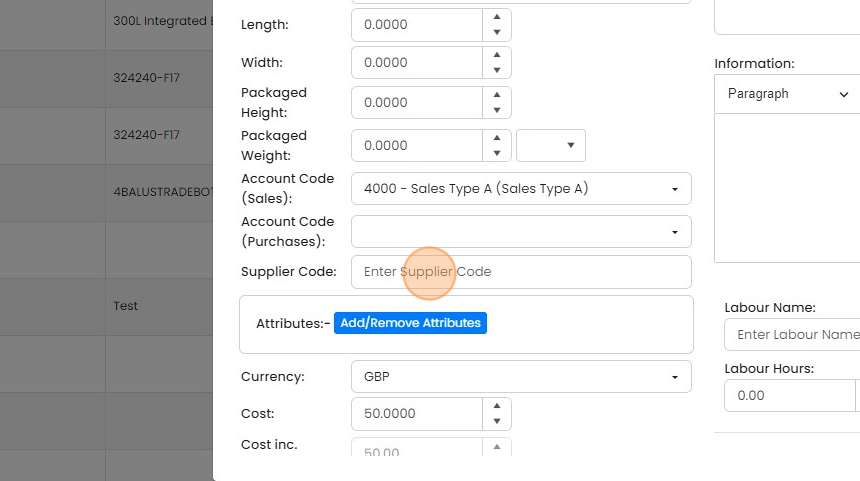
  10. Enter the value in the field

    Item details form with the Supplier Code field highlighted, below Account Code fields and above Add/Remove Attributes
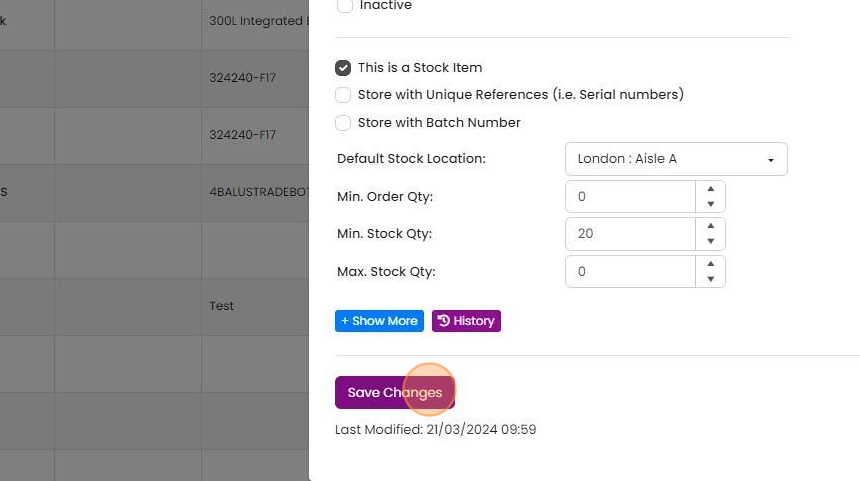
  11. Click "Save Changes"

    Item edit panel with stock settings and Min. Stock Qty set to 20, highlighting the Save Changes button at the bottom
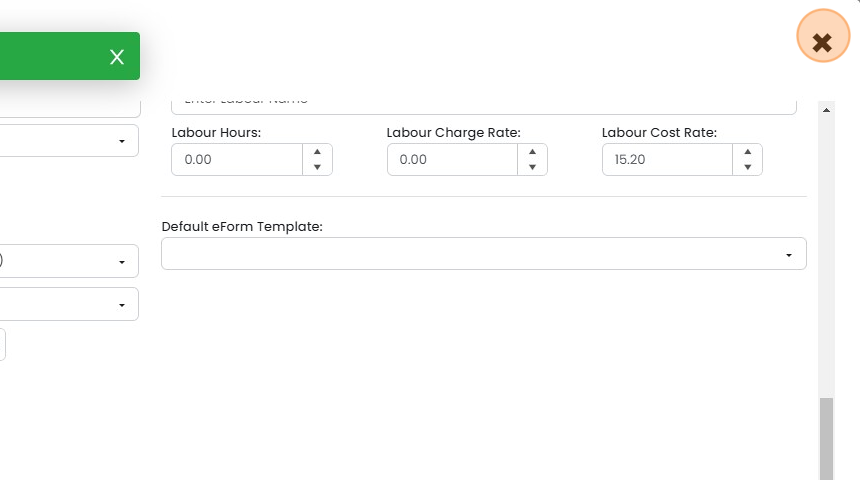
  12. Click "×"

    View the field in a module

    Item form with Labour Hours, Charge Rate and Cost Rate fields, close × button highlighted in the top-right corner
  13. To see how it appears in a module, for example in "Quotations", click "Go To"

    Items list with a Details Updated confirmation, highlighting the Go To menu in the top navigation bar
  14. Click the module

    Go To menu open over the Items page, with Quotations highlighted in the module list between Leads and Jobs
  15. Open a record (for example, a quotation)
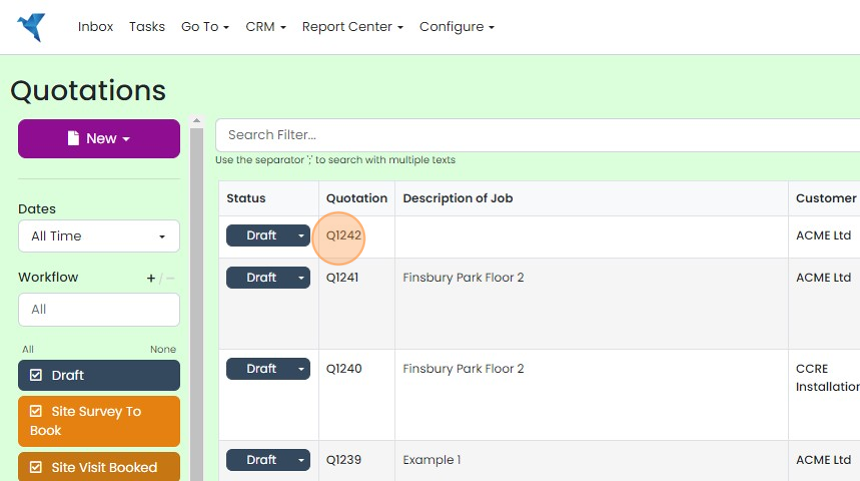
    Quotations list with the quotation number Q1242 highlighted in the first Draft row, ready to open the record
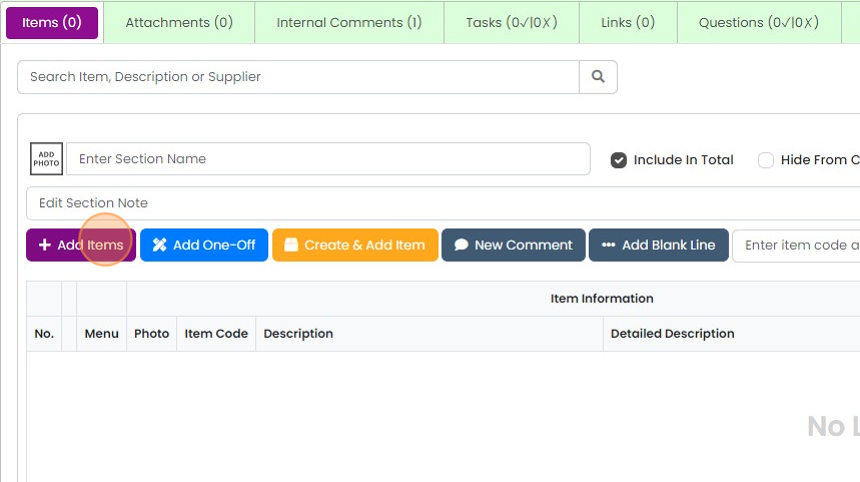
  16. Click "Add Items"

    Items tab of a record with an empty section, highlighting the purple Add Items button in the toolbar above the item table
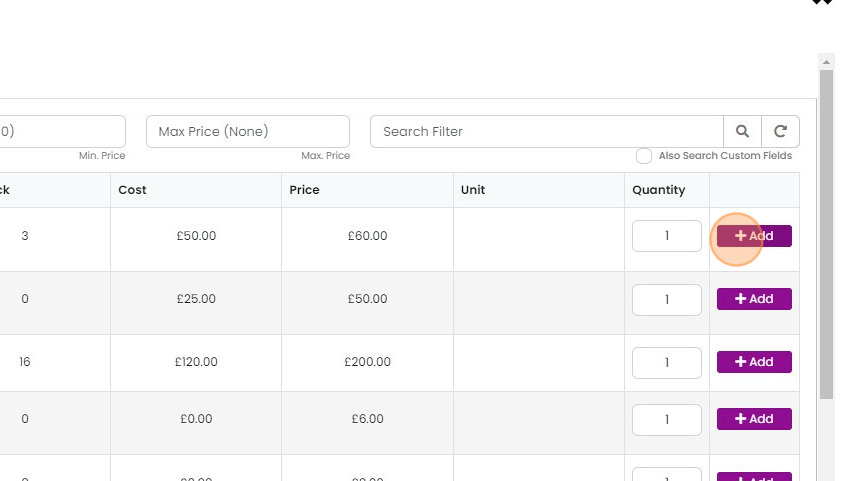
  17. Add the item

    Item picker list with Cost, Price and Quantity columns, highlighting the Add button on the first item row
  18. Where a value exists for a custom field, the field and value are shown

    Where a value exists for a custom field, the field and value are shown. Where there is no value, the field is not shown
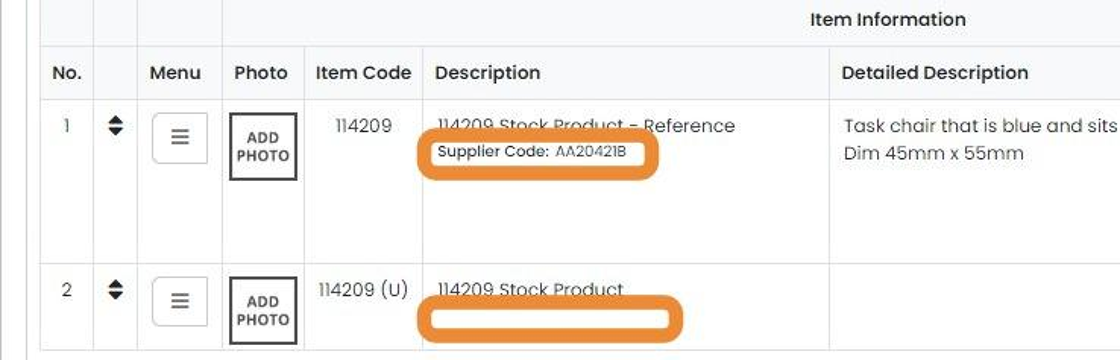
    Item Information table with Supplier Code shown under line 1's description and no field shown under line 2, both highlighted
  19. The field is always shown when the item is edited

    Add the field to a PDF
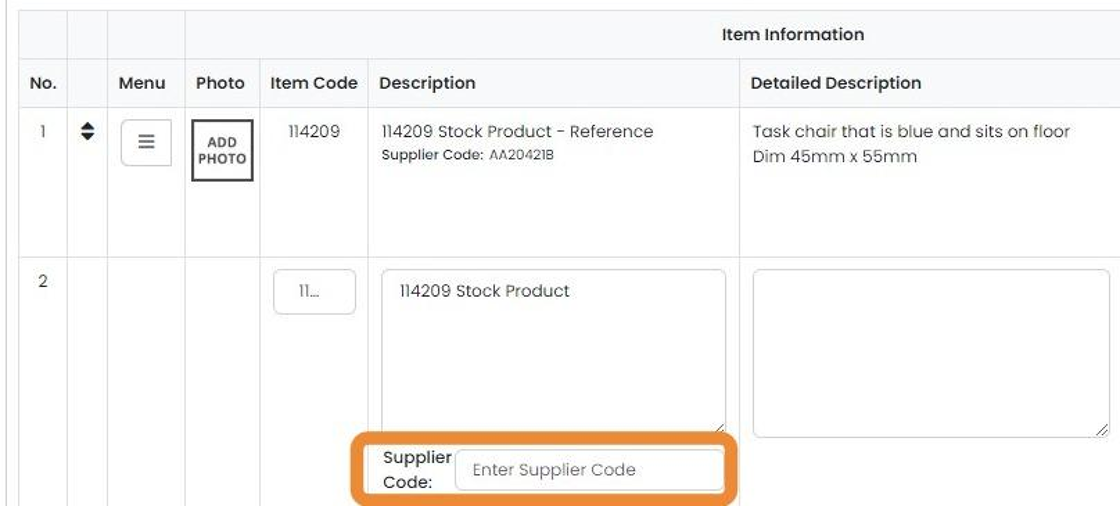
    Item lines table with the Supplier Code field highlighted below the Description box on an item being edited
  20. To add a custom item to a PDF document, click here

    Quote summary screen with the gear Settings icon highlighted in the top-right toolbar, next to the notifications bell
  21. Click "Document Templates"

    Settings menu list with Document Templates highlighted and selected, between Customer Portals and Domains
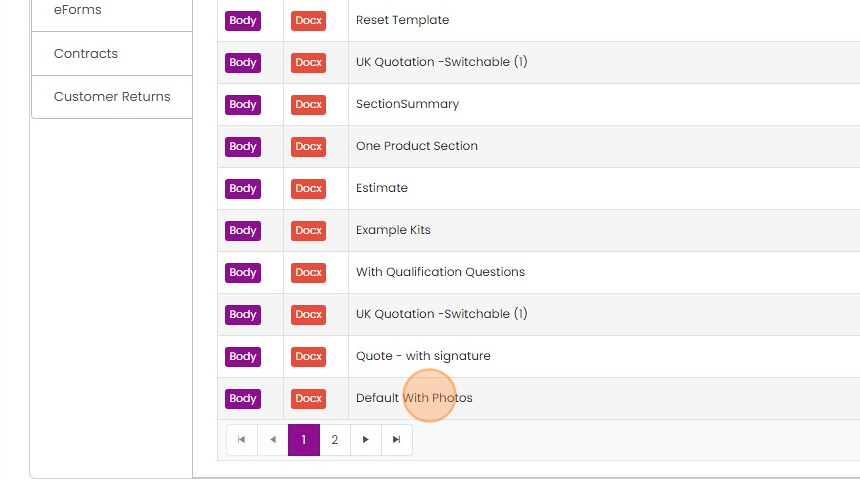
  22. Edit a document template

    Template list with Body and Docx tags, with a click highlighted on the Default With Photos template to edit it
  23. Add the variable. IMPORTANT - for item custom fields, they are always preceded by Item, so in this case it...

    Add the variable. IMPORTANT - for item custom fields, they are always preceded by Item, so in this case it is {ItemSupplierCode}

    Document template item table with the {ItemDescription} cell highlighted as the place to add the item custom field variable
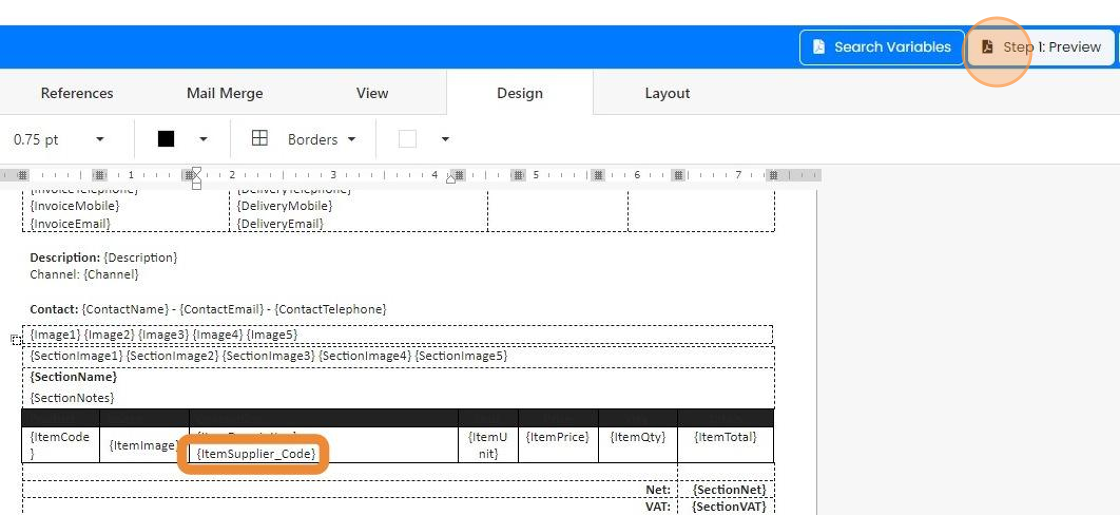
  24. Click "Step 1: Preview"

    Template designer showing {ItemSupplier_Code} added to the item table, with the Step 1: Preview button highlighted at top right
  25. If the variable is showing correctly, click "Step 2: Save"

    If the variable is showing correctly, click "Step 2: Save". If it is showing still showing with the curly brackets, i.e. {ItemSupplier_Code}, the system does not recognize it.

    Learn more: document templates in Zigaflow
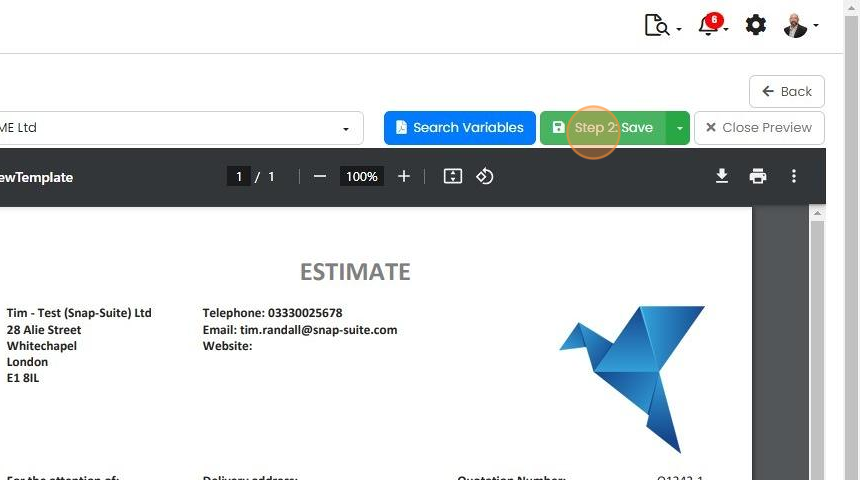
    Template preview showing an Estimate PDF, with the green

These are fields you can create that exist for all items. These are ideal for fields such as Supplier codes, or Commodity codes, and can be text, dates, numbers, dropdowns, hyperlinks and more.

If a custom field should be for some items but not others, consider using Attributes instead.

Create the custom field

Frequently asked questions

Next step

Editing document templates onlineTo edit a document template online in Zigaflow, click Document Templates, then click Edit on the template you want and make changes in the online editor. This suits changing text or other simple changes. You can add variables, preview the result, and save by overwriting the current version or creating a new one.

Was this helpful?

See Zigaflow on your own workflow

Book a demo and we will walk through quoting, jobs and purchasing the way your team runs them.

Or see how Zigaflow would fit your business, free