Get set up

Import customers from a spreadsheet with selected columns

In Zigaflow

The short answer

To import customers from a spreadsheet that does not use the Zigaflow template layout, click the cog icon, open Import Center, choose Flexi, then Clients. Upload your file, choose the column holding the client name, map the other columns to Zigaflow fields, click Next, and save the mapping if you want to reuse it.

Steps

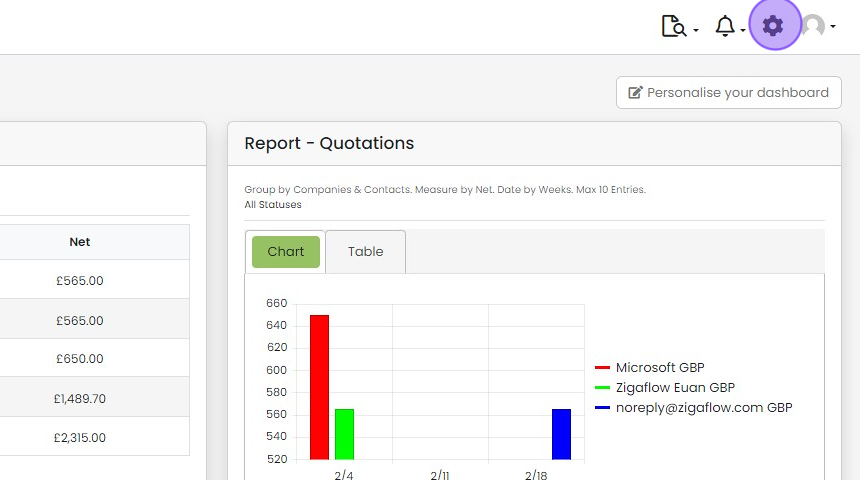
  1. Click on the cog icon

    Zigaflow dashboard with the settings cog icon highlighted in the top-right toolbar, beside the notifications bell
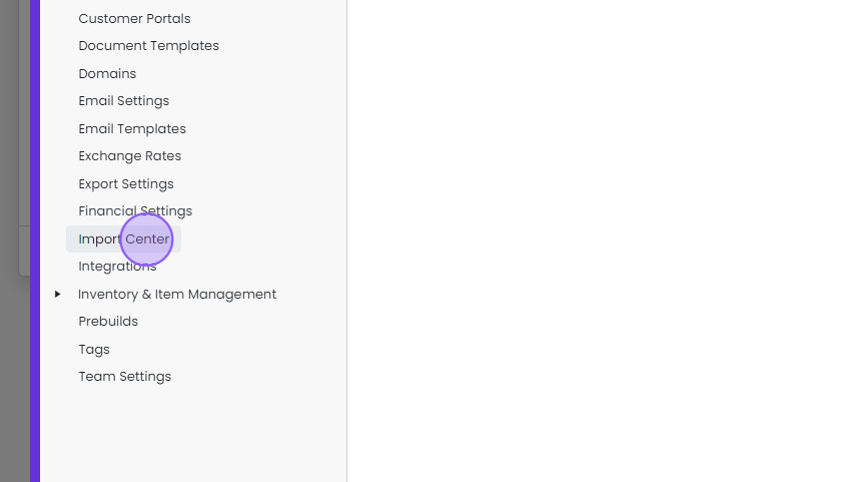
  2. Click "Import Center"

    Settings menu list with Import Center highlighted by a click marker, between Financial Settings and Integrations
  3. Click "Flexi"

    Import Center in Settings with the Flexi tab highlighted at the top of the import list, above Items, Variants and Stock
  4. Click "Clients"

    Import Center Flexi section with the Clients tab highlighted in the sub-menu beside the Flexi Import Items upload step
  5. Click here or drag & drop your file

    Map your columns
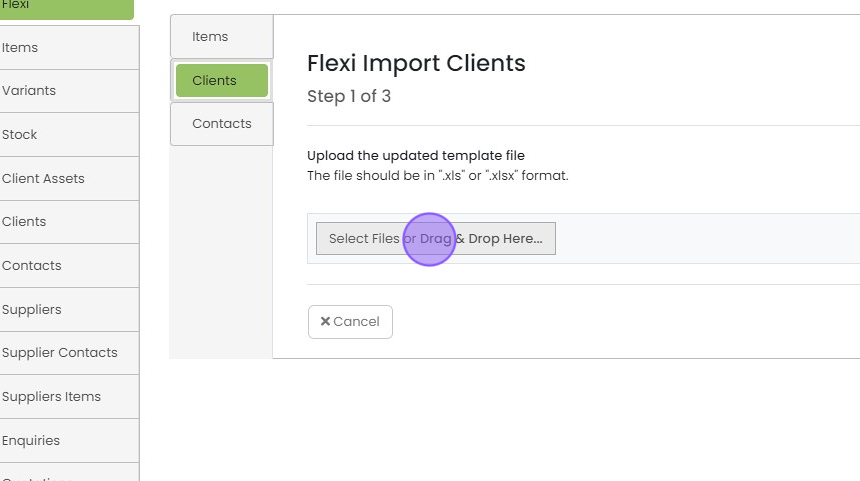
    Flexi Import Clients Step 1 of 3 with the Select Files or Drag & Drop Here button highlighted for uploading an .xls or .xlsx file
  6. Choose the column heading from your spreadsheet which contains the Client Name
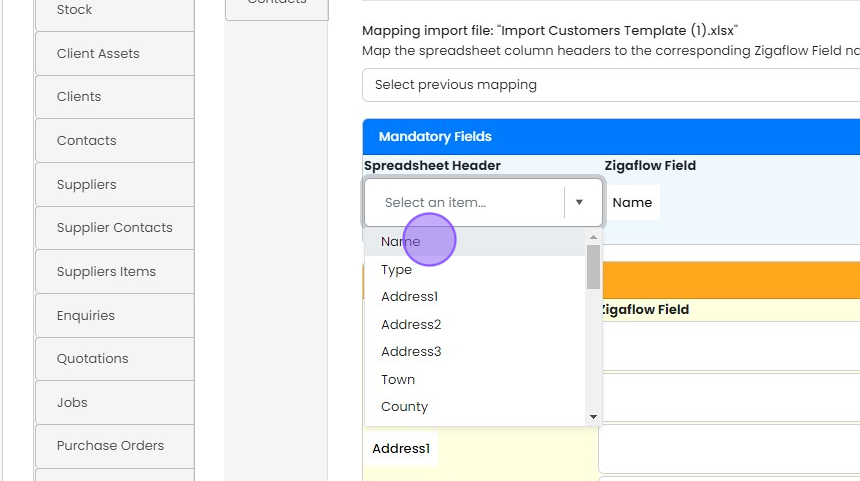
    Import mapping screen with the Spreadsheet Header dropdown open under Mandatory Fields, Name highlighted for Zigaflow Field Name
  7. In the lower panel, the left hand column contains the headings from the columns in your file

    Using the dropdowns on the right, choose the fields in Zigaflow to map your data to
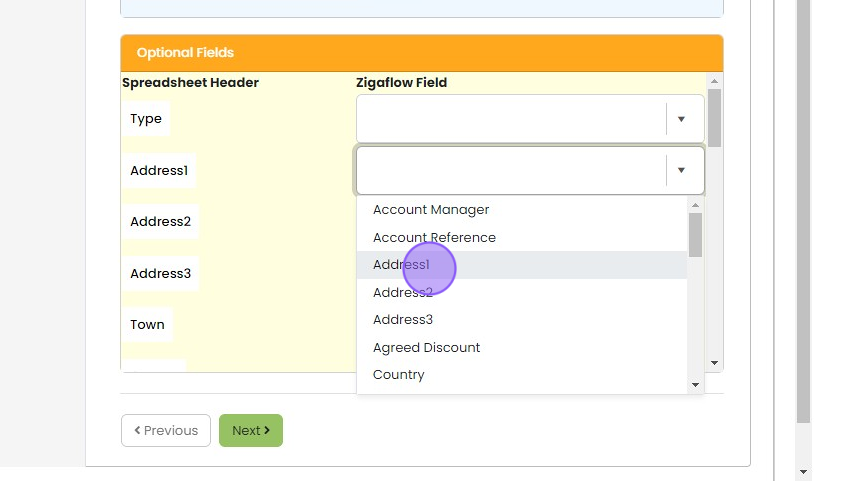
    Optional Fields mapping panel with the Zigaflow Field dropdown for Address1 open and the Address1 option highlighted
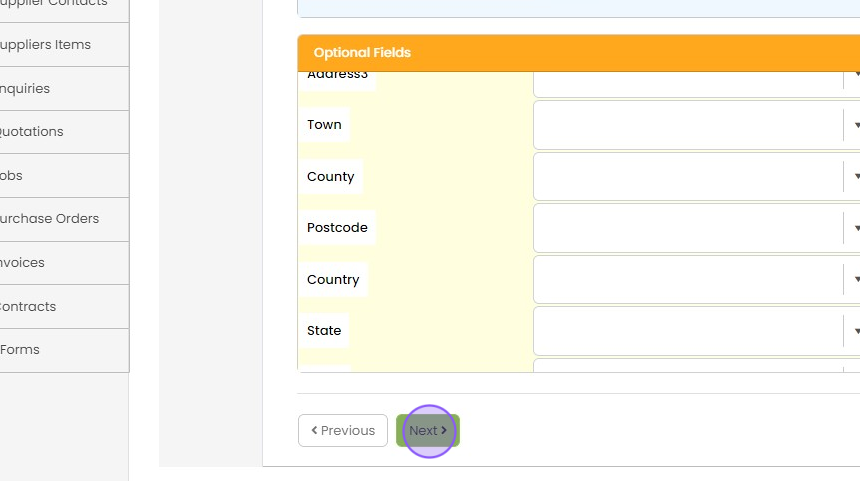
  8. Click "Next"

    Save your mapping

    Import mapping screen with Optional Fields for Town, County, Postcode and Country, with the Next button highlighted
  9. OPTIONAL

    If you want to import more data in the same format enter a name for this mapping to save it for future use
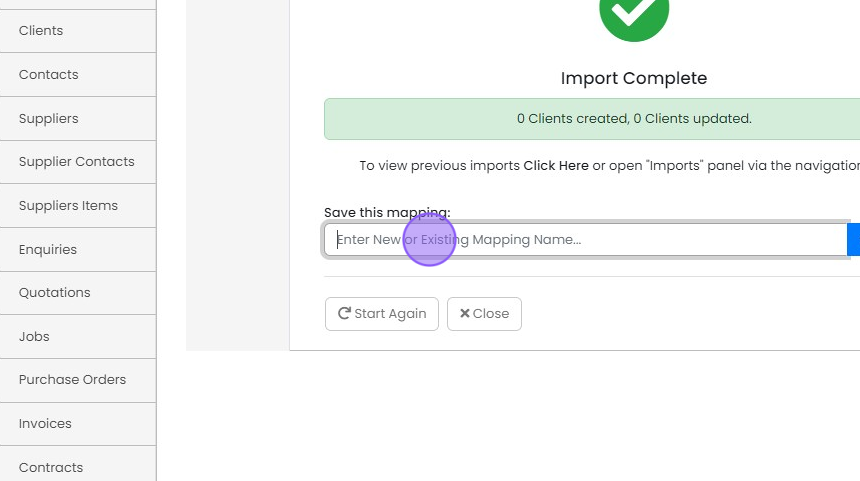
    Import Complete screen with the Save this mapping field highlighted for entering a new or existing mapping name
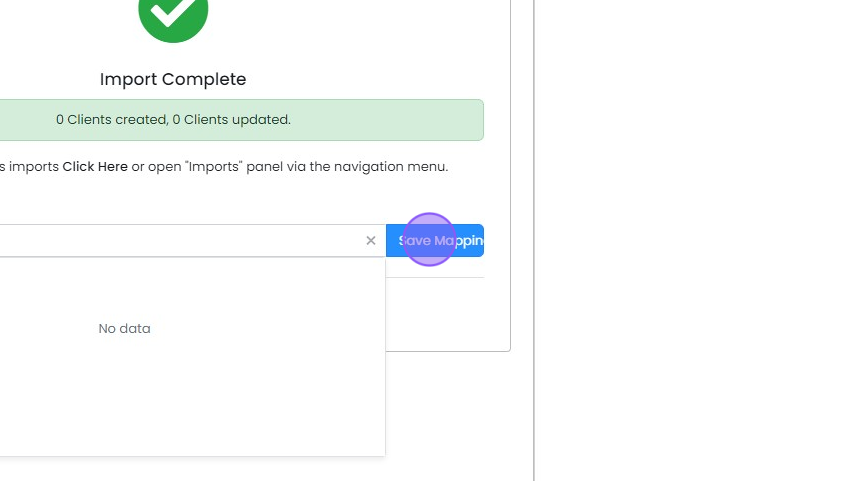
  10. Click "Save Mapping"

    Import Complete screen showing 0 Clients created, 0 Clients updated, with the Save Mapping button highlighted
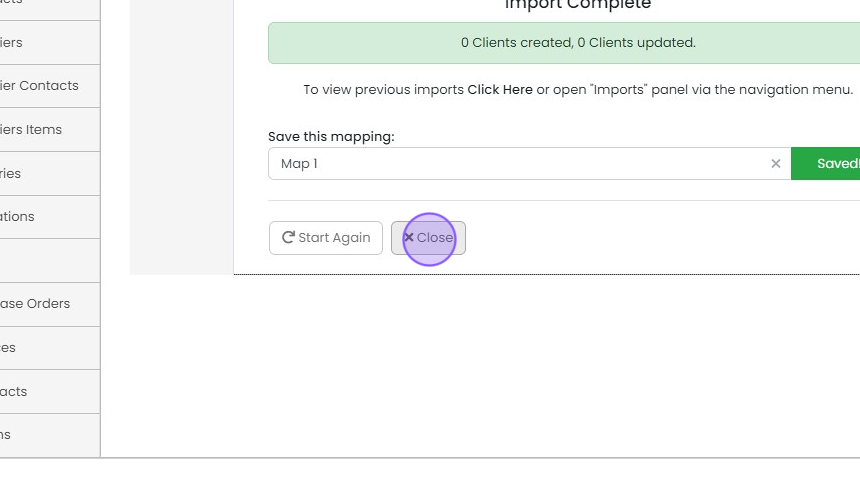
  11. Click "Close"

    Reuse a saved mapping

    Import Complete screen showing clients created and updated count, with the Close button highlighted next to Start Again
  12. If you saved your mapping, next time "click here"

    Flexi Import Clients step 2 of 3 with the Select previous mapping dropdown highlighted above the Mandatory Fields section
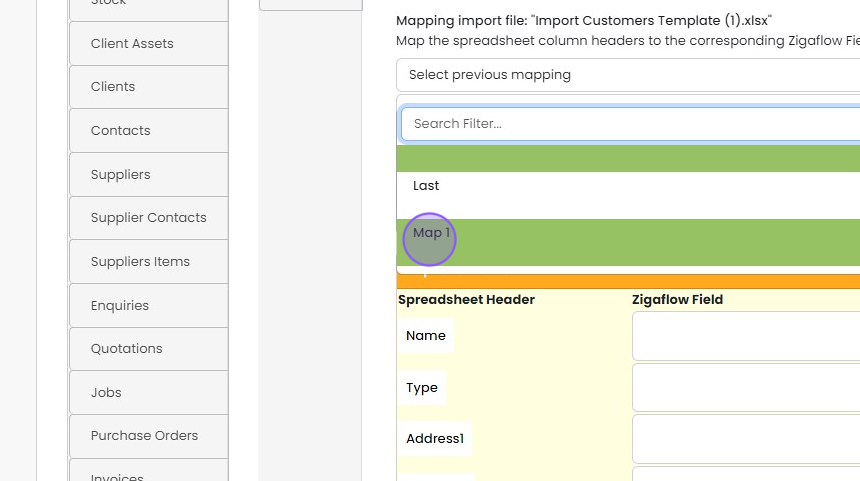
  13. Choose your saved mapping

    Import mapping screen with the Select previous mapping dropdown open and the saved Map 1 option highlighted
  14. This will then remap your next file for you
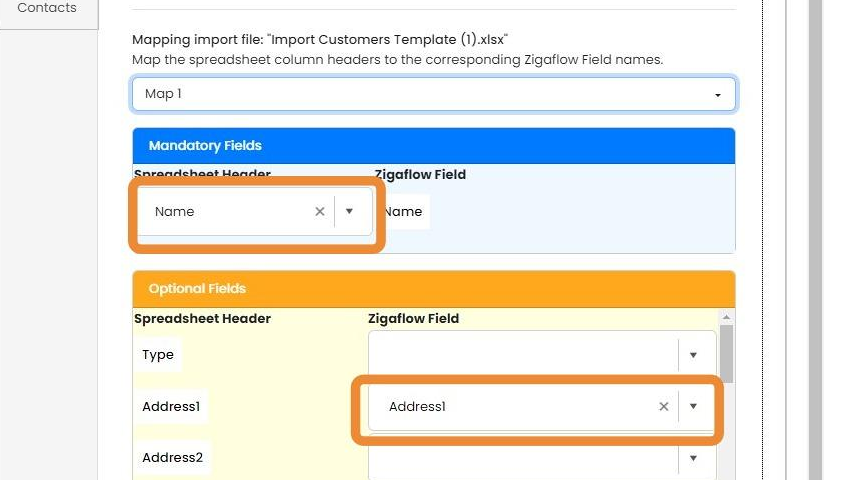
    Import mapping screen with saved Map 1 applied, highlighting the Name header and Address1 Zigaflow Field auto-mapped

Note:

When using flexi import to import your customers you need to ensure that your file meets the following criteria:

  • One row per client
  • No merged cells

Open flexi import

Frequently asked questions

Next step

Importing contactsTo import contacts into Zigaflow, click the Cog, then Import Center, then Contacts, and drag and drop your import file. Match the columns you want to Zigaflow fields, click Next, and the import reports how many contacts were updated and how many were added. You can save the mapping to reuse it.

Was this helpful?

See Zigaflow on your own workflow

Book a demo and we will walk through quoting, jobs and purchasing the way your team runs them.

Or see how Zigaflow would fit your business, free