Win work

Creating an automated message to follow up a quotation

In ZigaflowEvery plan

The short answer

Open a quotation pre-build in Zigaflow, go to Prebuilds, then Quotations, edit a pre-build, and click Automated Messages, then New Automated Message. Set the days to wait, the trigger status or date, and the send time, write the email, then use Save & Preview to check it.

Steps

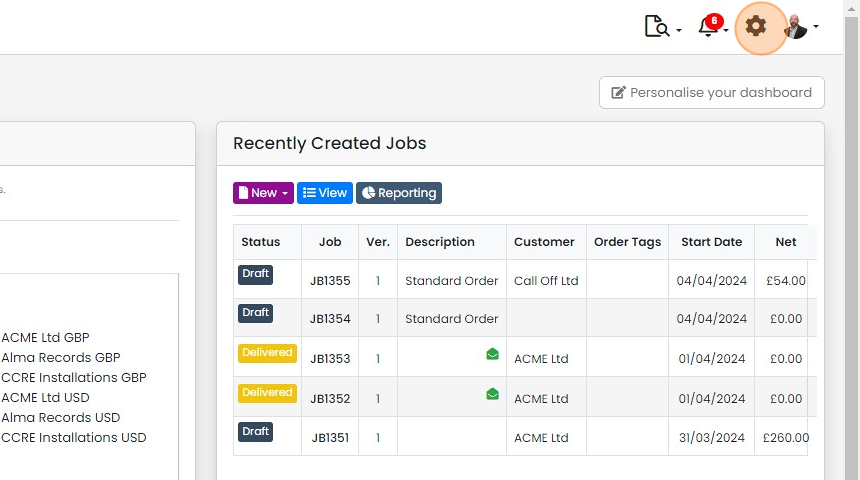
  1. Click here

    Dashboard top toolbar with the gear-shaped settings icon highlighted, next to notifications and profile menu
  2. Click "Prebuilds"

    Settings menu list with the
  3. Click "Quotations"

    Settings Pre-Builds page with the Quotations tab highlighted in the left list below Projects and Leads
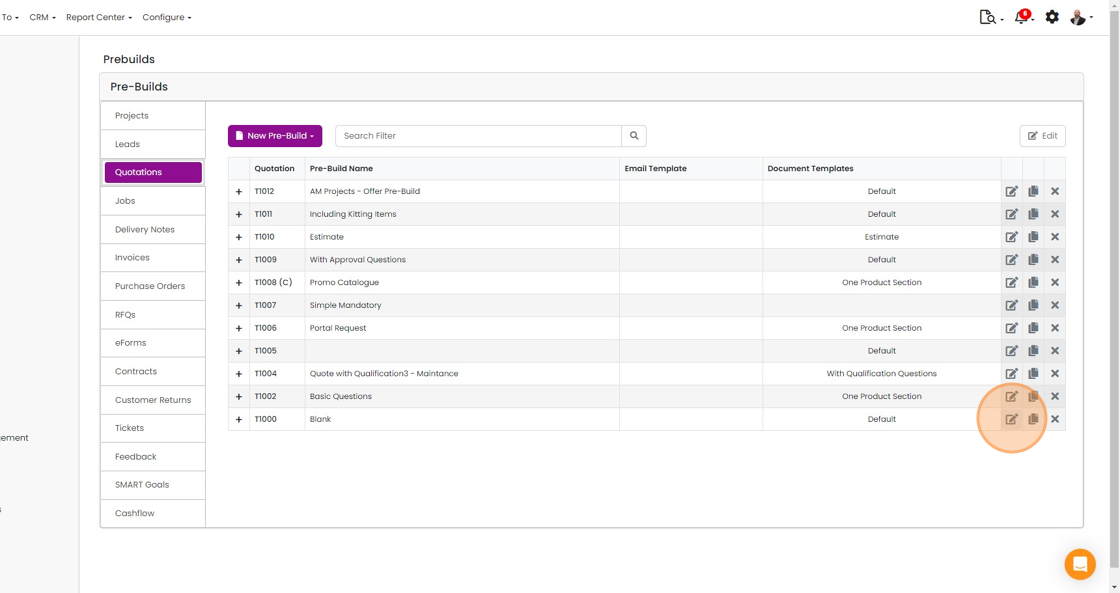
  4. Edit a pre-build

    Pre-Builds screen with Quotations selected, highlighting the edit icon for the T1000 Blank pre-build in the list
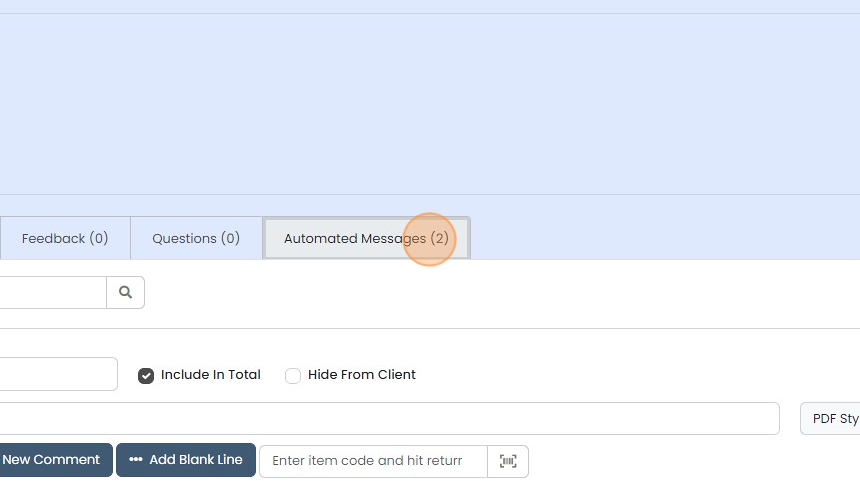
  5. Click "Automated Messages"

    Quote screen tab bar with the Automated Messages (2) tab highlighted next to the Feedback and Questions tabs
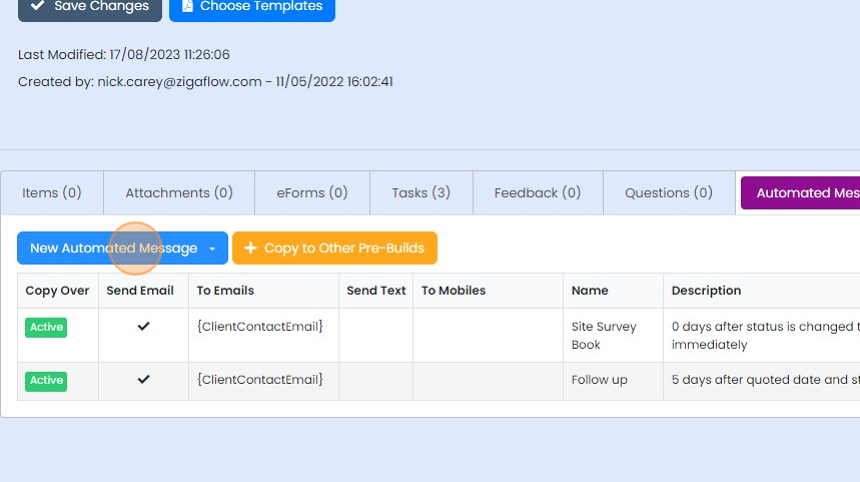
  6. Click "New Automated Message"

    Automated Messages tab of a pre-build with the New Automated Message button highlighted above the list of existing messages
  7. Click "Blank"

    Set when the message is sent

    Automated Messages tab with the New Automated Message dropdown open, highlighting the Blank option above Follow up
  8. Give the message a name, and toggle the "Active" button to inactive so it is not copied to a new quotation...

    Give the message a name, and toggle the "Active" button to inactive so it is not copied to a new quotation or "Active" so that it is
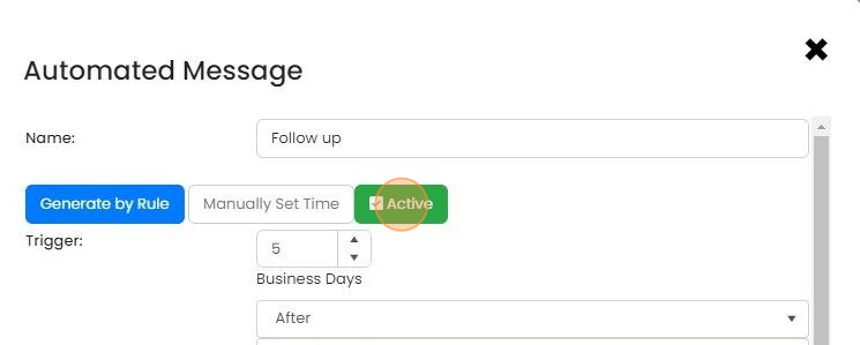
    Automated Message dialog with the green Active toggle highlighted beside Generate by Rule and Manually Set Time buttons
  9. Set the number of days to wait before triggering the message
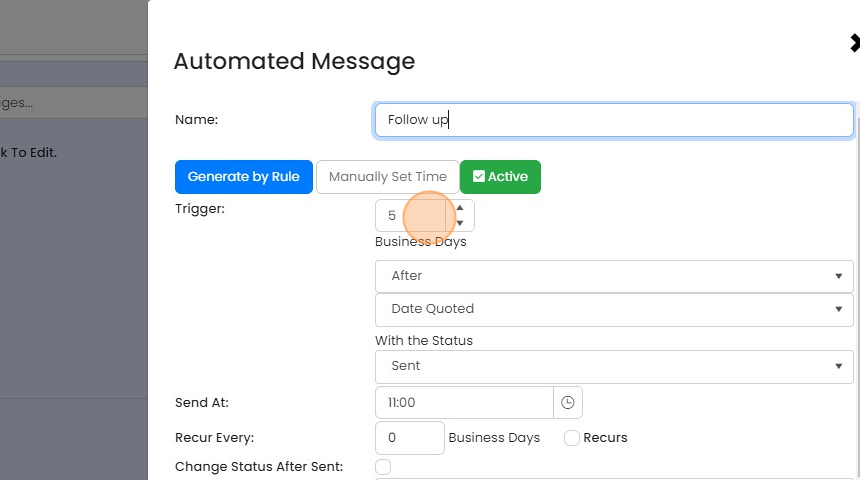
    Automated Message panel with the Trigger field set to 5 Business Days highlighted, after Date Quoted with status Sent
  10. Set the status to trigger it, or select a date using the dropdown above

    Automated message settings with the With the Status dropdown open and Sent highlighted among the quote statuses
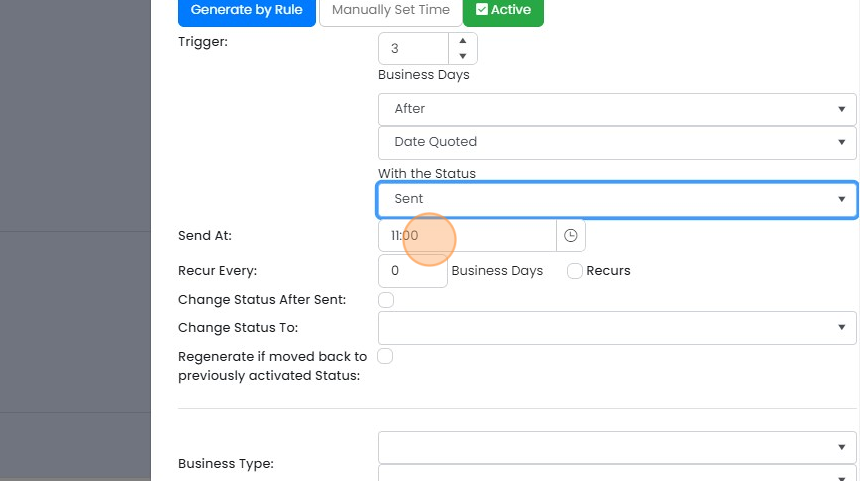
  11. Set the time to send

    Automated message rule settings with the Send At time field highlighted, set to 11:00, below the trigger options
  12. It is possible to filter messages so they are sent/not sent depending on the business type, customer tags...

    It is possible to filter messages so they are sent/not sent depending on the business type, customer tags or quotation tags

    Write the message
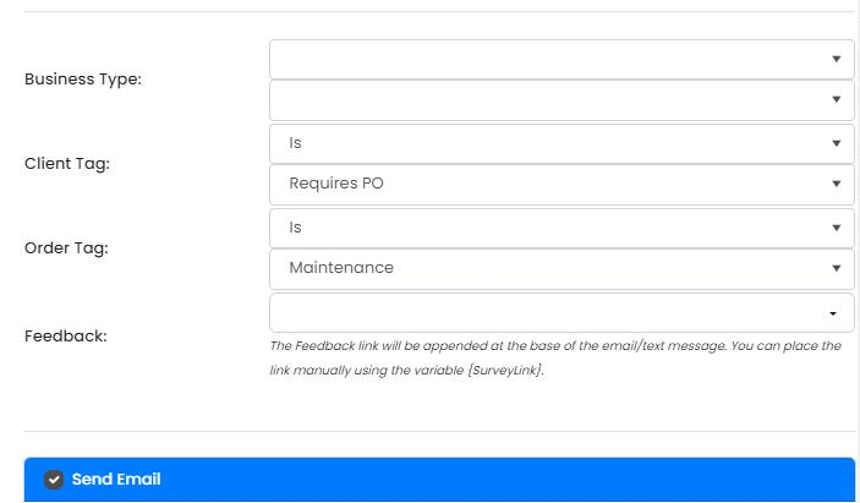
    Automated message filters with Business Type blank, Client Tag Is Requires PO, and Order Tag Is Maintenance above Send Email
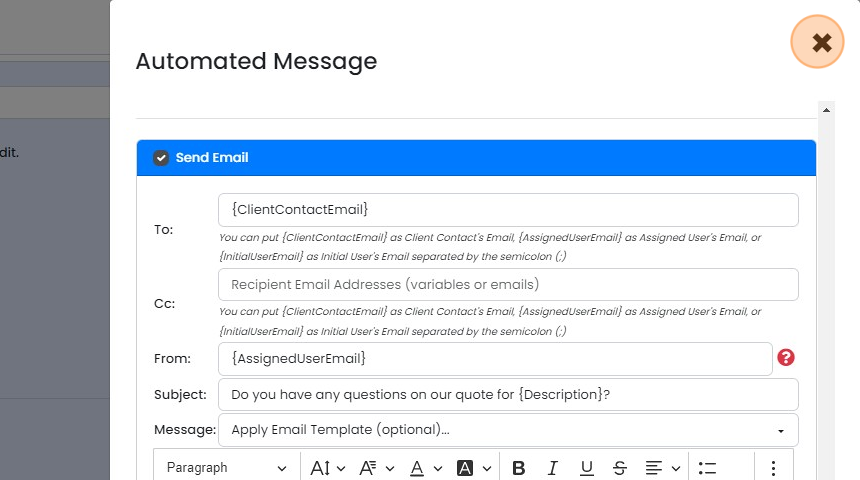
  13. Use {ClientContactEmail} for the client contact's email
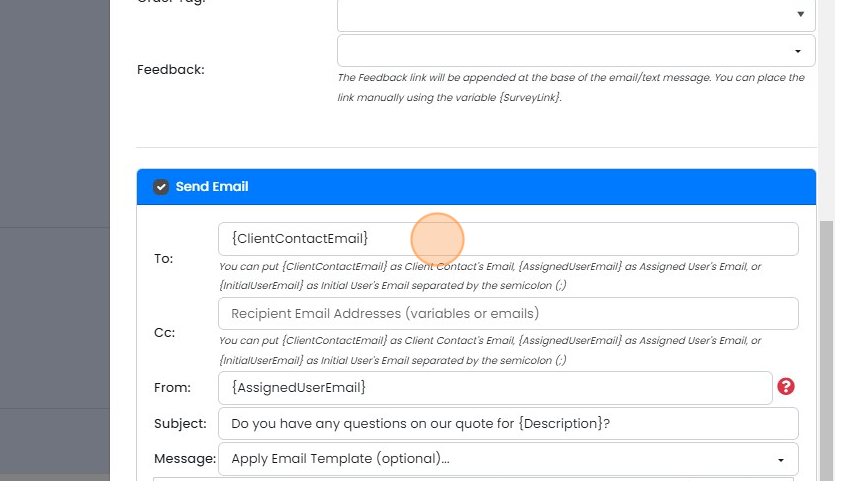
    Send Email section with the To field highlighted, containing the {ClientContactEmail} variable for the client contact
  14. Use {AssignedUserEmail} as the sender email address

    Use {AssignedUserEmail} as the sender email address. You can also use a group email, similar to sales@mycompany.com

    Send Email action panel with the From field set to {AssignedUserEmail} highlighted, below the To and Cc fields
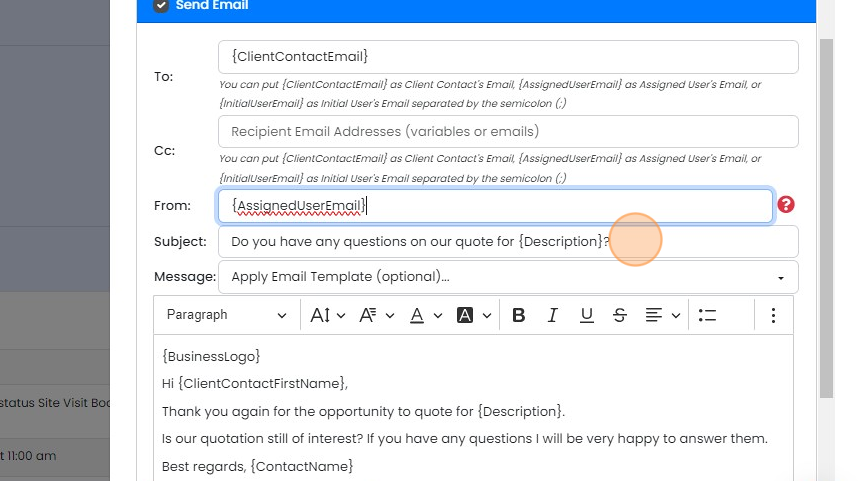
  15. Give the message a title

    Send Email panel with the Subject field highlighted, reading
  16. Fill out the text. The more you personalize the text, the less likely it is to end up in the recipient's...

    Fill out the text. The more you personalize the text, the less likely it is to end up in the recipient's spam filter.
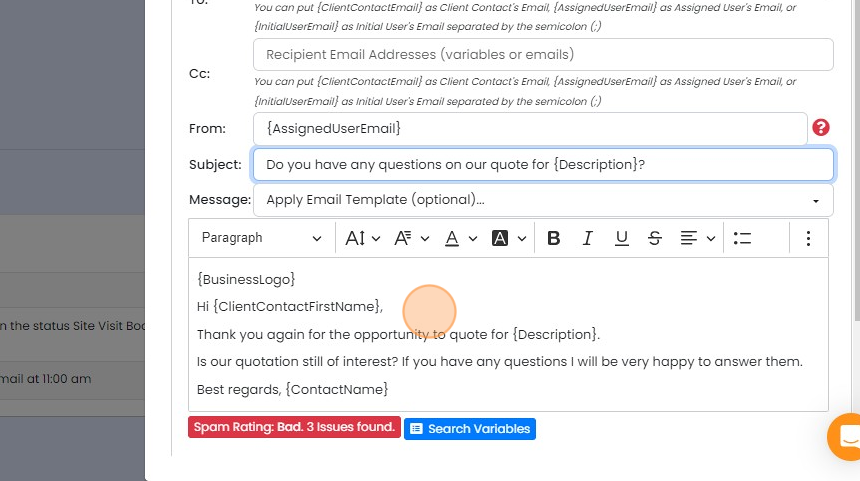
    Email message editor with variables like {ClientContactFirstName} in the body and a red Spam Rating: Bad, 3 issues found badge
  17. To find more variables, click "Search Variables"

    Email message editor with a quote follow-up template, highlighting the Search Variables button below the message text
  18. Click on a variable to copy it ready to paste into the text
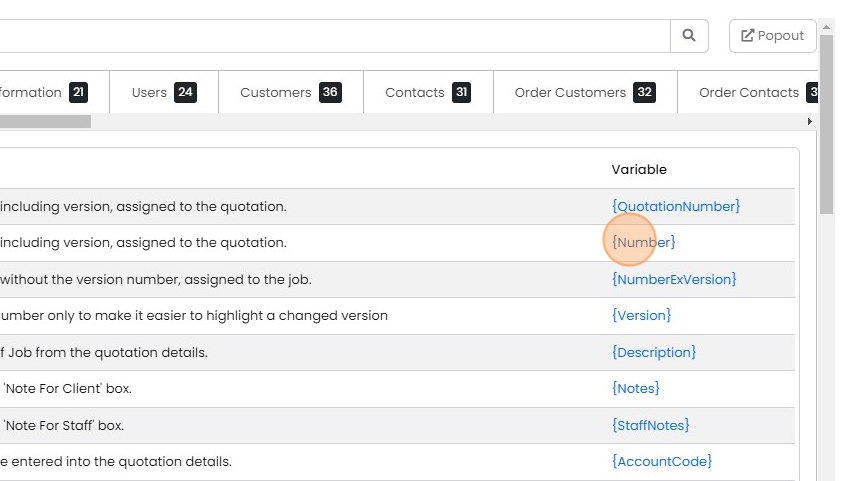
    Variables list with Users, Customers and Contacts tabs, with the {Number} variable highlighted to click and copy it
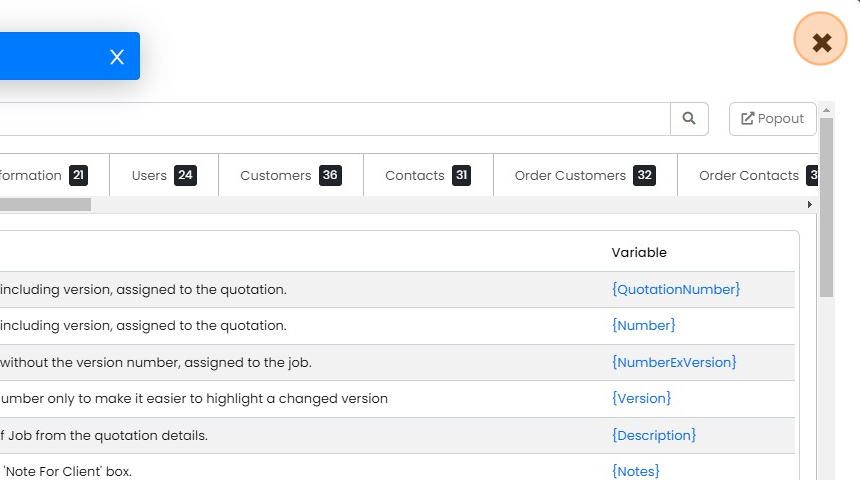
  19. Click "×"

    Preview the message

    Variables panel listing quotation merge fields like {QuotationNumber}, with the close × button highlighted at top right
  20. Check the message works by clicking on "Save & Preview"
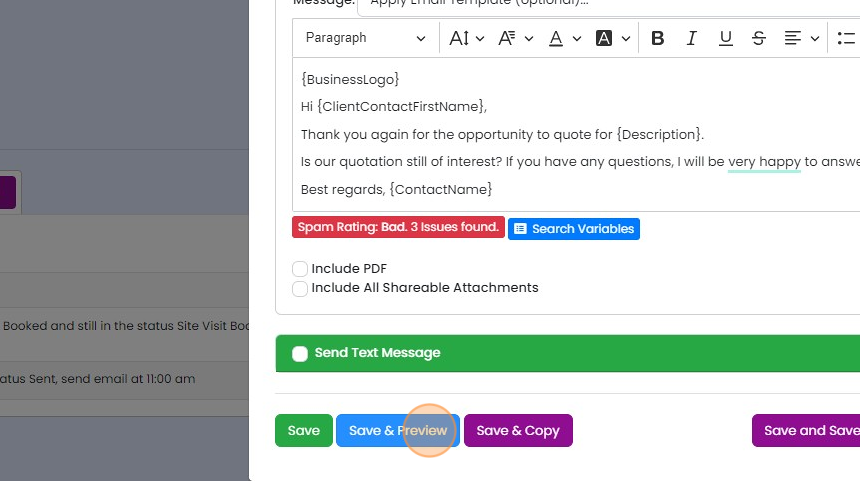
    Automated message editor with a quote follow-up email template, with the Save & Preview button highlighted below it
  21. If any of the variables are not recognized, they will appear between the {} brackets
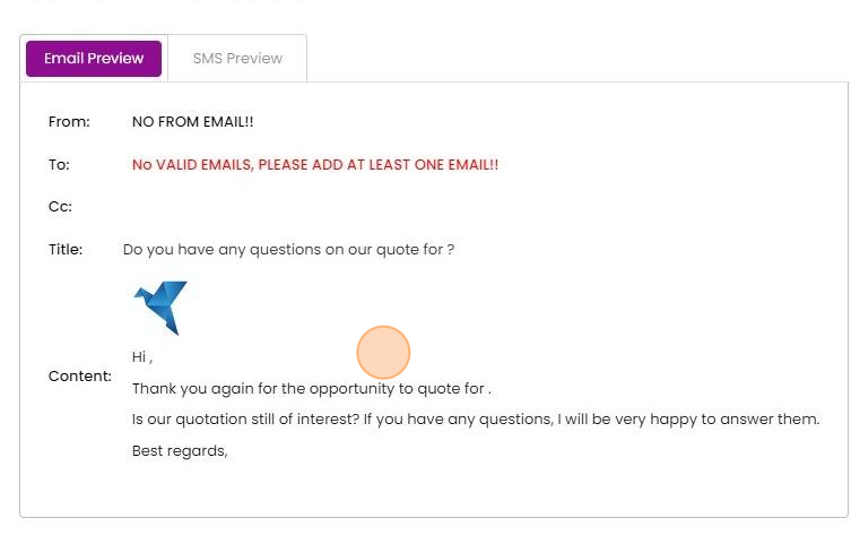
    Email Preview tab showing follow-up quote message with empty variables and red warnings for missing From and To emails
  22. Click "×"

    Email preview pop-up over the Automated Message panel, with the close
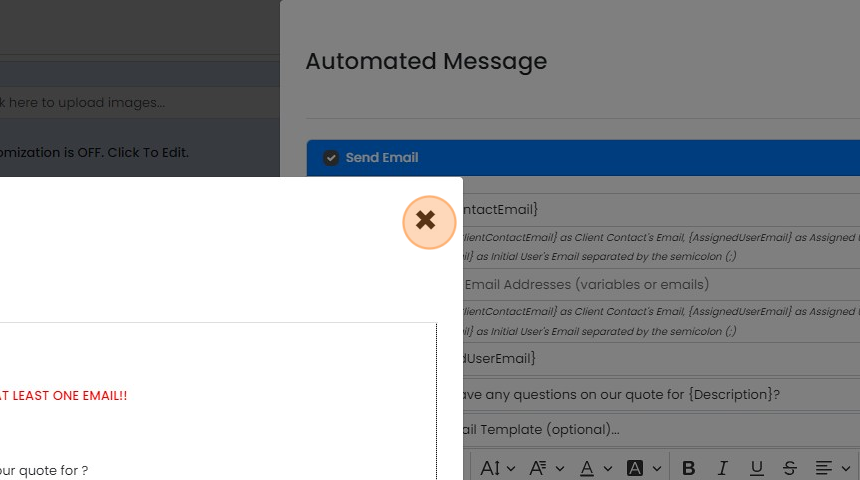
  23. Click "×"

    Copy to other pre-builds

    Automated Message window with Send Email fields filled in and the close × button highlighted in the top-right corner
  24. Once you have set up the message on one pre-build, you can copy it to the others by clicking on "Copy to...

    Once you have set up the message on one pre-build, you can copy it to the others by clicking on "Copy to Other Pre-Builds"
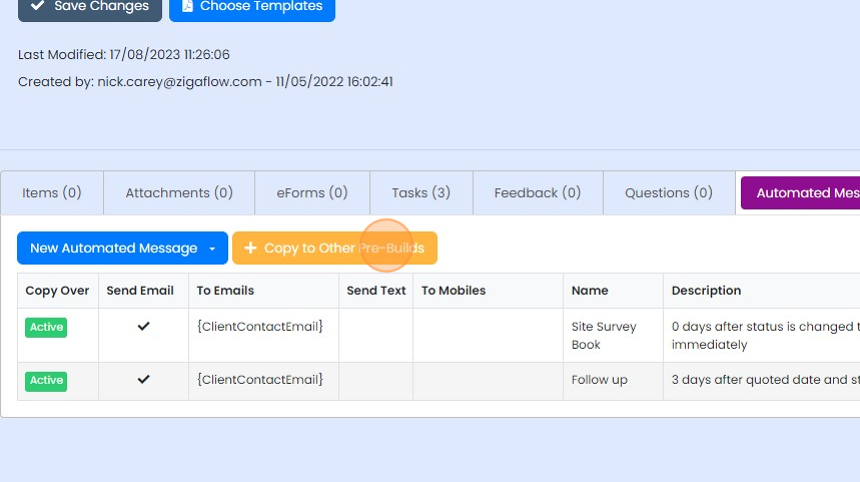
    Automated Messages tab of a pre-build listing two active messages, with the Copy to Other Pre-Builds button highlighted
  25. Select the targets

    Panel to replace Automated Messages in Pre-Builds, with the checkbox highlighted on the T1011 Including Kitting Items row
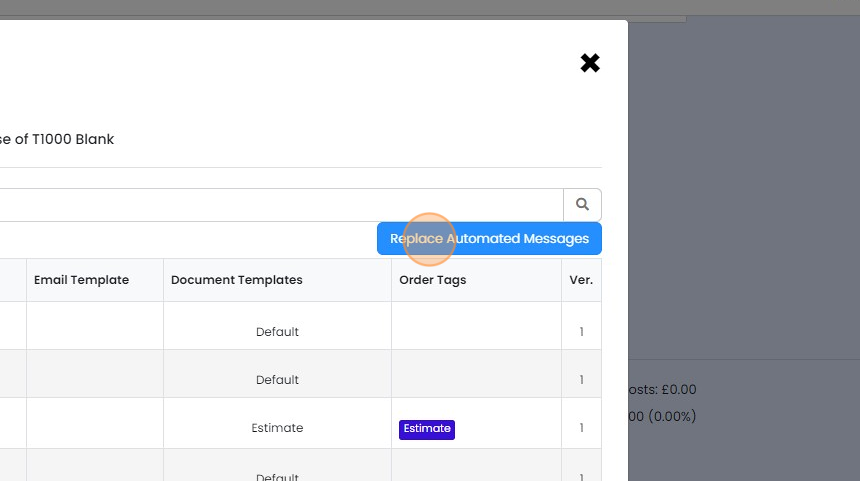
  26. Click "Replace Automated Messages"

    Modal listing T1000 Blank usage with Email Template, Document Templates and Order Tags columns, Replace Automated Messages button highlighted
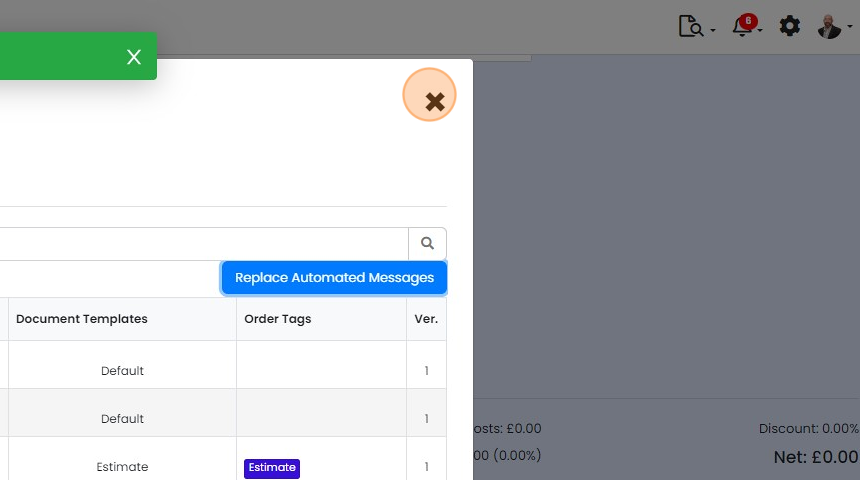
  27. Click "×"

    Panel listing Document Templates and Order Tags with Replace Automated Messages button, close × icon highlighted at top right

Zigaflow makes it easy to set up chaser emails and SMS messages to customers. This article explains how to set up an automated email triggered 5 days after the quotation is sent. The message will no longer be sent when the quotation moves to a different status.

Open the quotation pre-build

Frequently asked questions

Next step

Create an automated message customer approval chaserEvery planTo create an automated message that chases customers for approvals, click the cog, then Prebuilds, then eForms, and edit an eForm. Open Automated Messages, click New Automated Message, and choose Blank. Name the message, set the business days to wait, the trigger status and the time, then add the email text, sender and recipient.

Was this helpful?

See Zigaflow on your own workflow

Book a demo and we will walk through quoting, jobs and purchasing the way your team runs them.

Or see how Zigaflow would fit your business, free